Configuration
To access the Search Interface and customize it, take the following steps:
- Click the Indices tab on the top.
- On the left pane, under the Search Experience section, click Search Interface.
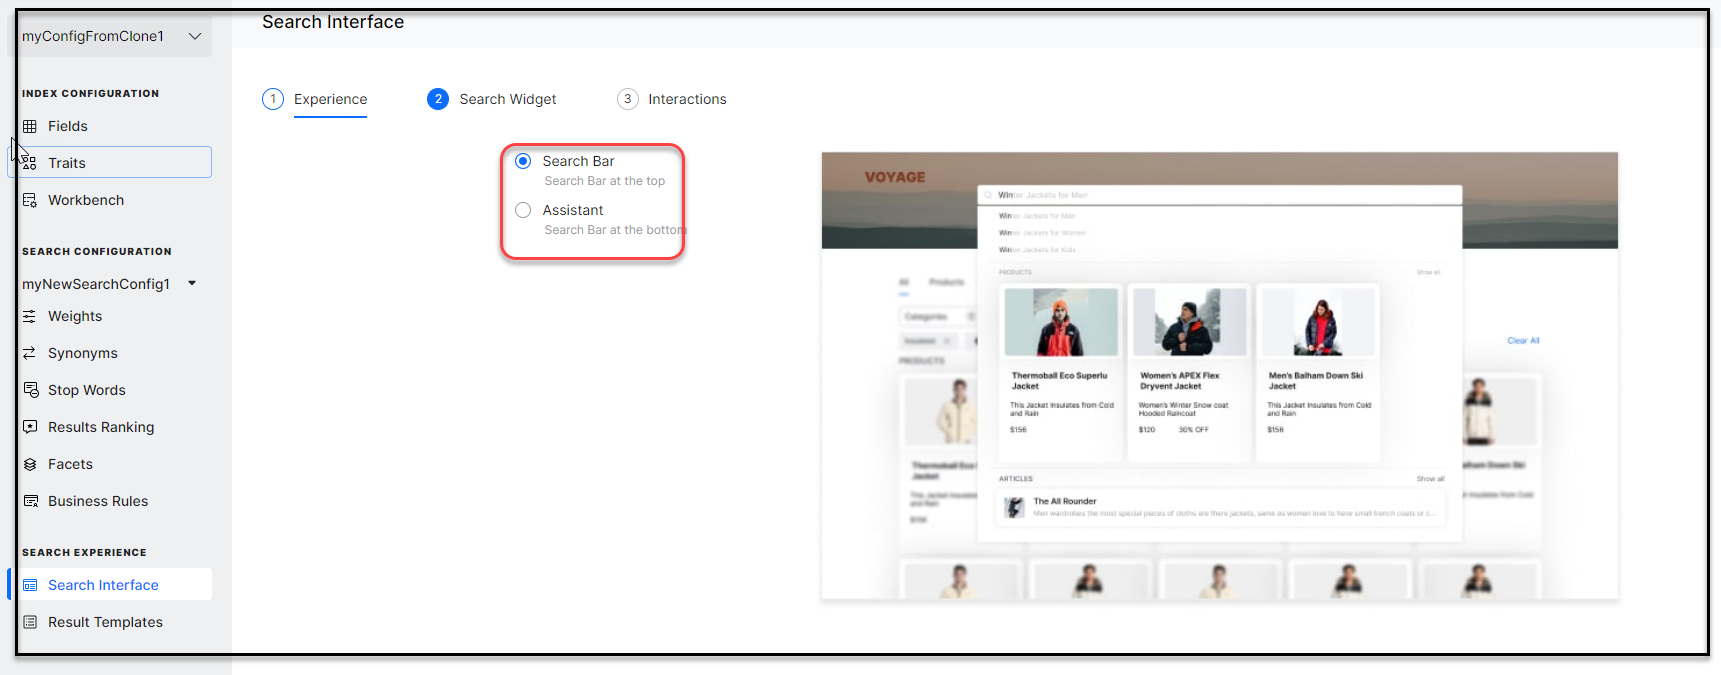
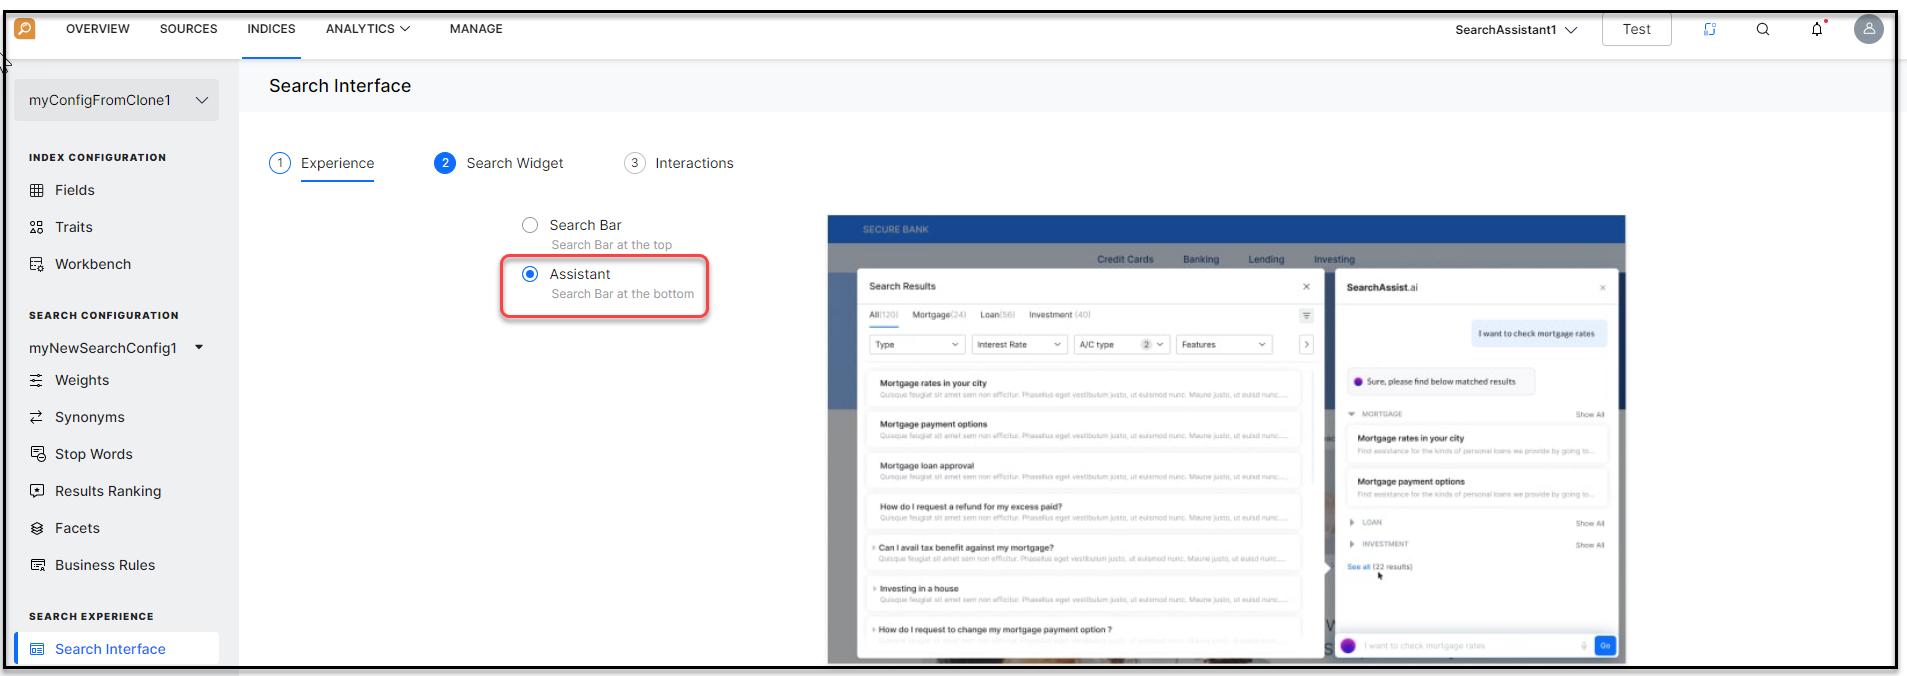
- On the Search Interface page, by default, the Experience section is displayed.
- Select an option:
- Search Bar – Search bar at the top
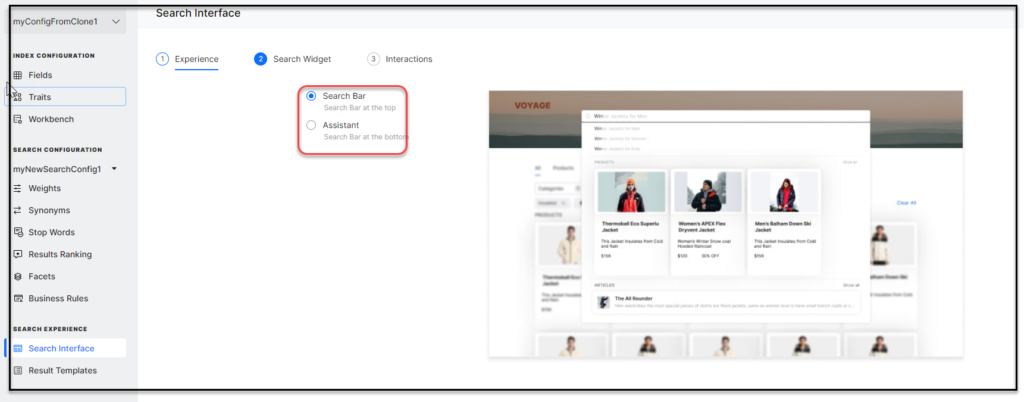
- Assistant – Search bar at the bottom

- Search Bar – Search bar at the top
- Click Next.
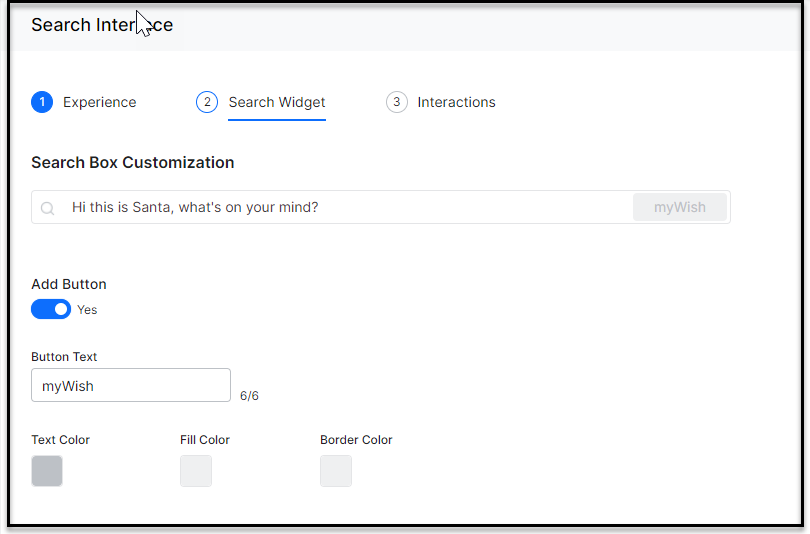
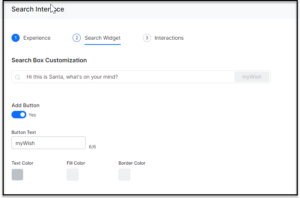
- On the Search Widget section:
- In the Search Box Customization section, you can make changes to the search box.
-
- Click in the search text box to update the placeholder text and the text color.
- Click in the search box to update the border color and the fill color
- Hover the mouse over the Search icon in the search box customization field, then see Edit icon.
- Click on the Edit the search icon icon to Upload Icon of your choice to replace the default icon. You can upload an image measuring 26×26 pixels under 5kb size.
- Click Button to Add button. You can change
- Show or hide button
- Placement of the button – outside or inside the search bar
- Text displayed on the button (total of 5 characters)
- Text color, button fill color, and button border color.
-
- In the Search Box Customization section, you can make changes to the search box.
- Click Next.
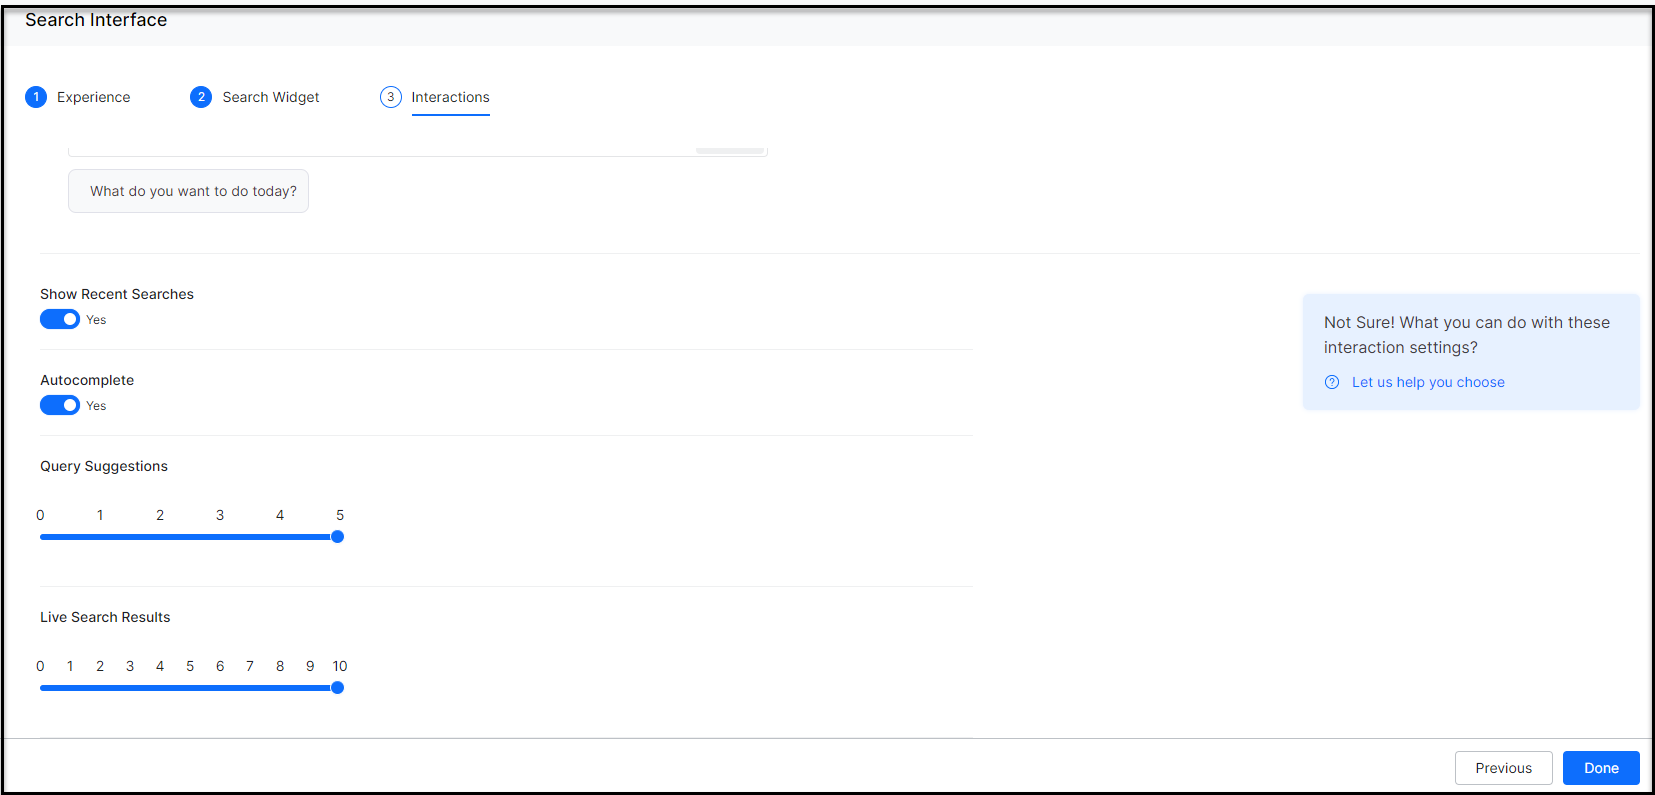
- On the Interactions section:

- Enter a message to be displayed as the greeting message, in the Customize Greeting Message box.
- Turn the Show Recent Searches toggle on or off as required.
- Turn on or off the Auto-complete toggle. This option auto-completes the search text as the user is typing.
- Under Query Suggestions, set the slider between to decide the number of query suggestions to be displayed.
- Under Live Search Results, set the slider to decide the number of live search results to be displayed.
- Click Done.