Introduction to Connectors
SearchAssist app uses connectors to search and point to content from diverse repositories or sources. The repositories include but are not limited to Microsoft SharePoint, Atlassian’s Confluence, and IBM Domino et. al.
Connectors are specific to the required repository to enable crawling the specific third-party content management applications as well as others like customer relationship management(CRM) systems, web database applications, and cloud-based applications.
For a given connected source type only one connector is allowed to be connected, but you can connect the SearchAssist app to multiple connectors albeit only one for each third-party repository.
To facilitate indexing and search of the content ingested via the connectors follow these necessary steps:
- SearchAsssist creates field Names pertaining to the connector prefixing the field name with the connector name.
- Add the connector fields to be searched in the Weights section and assign weights as per business requirements, so that the relevant content can surface in the results.
- Map the added field names in the results template so that they are included in the results layout view.
- Add the connector source name in the facets configuration so that it is reflected in the results describing the source of the result.
Ingesting Content and Synchronization
SearchAssist first establishes a connection and then fetches the data required along with applicable permissions. The connector saves the data for further indexing by SearchAssist.
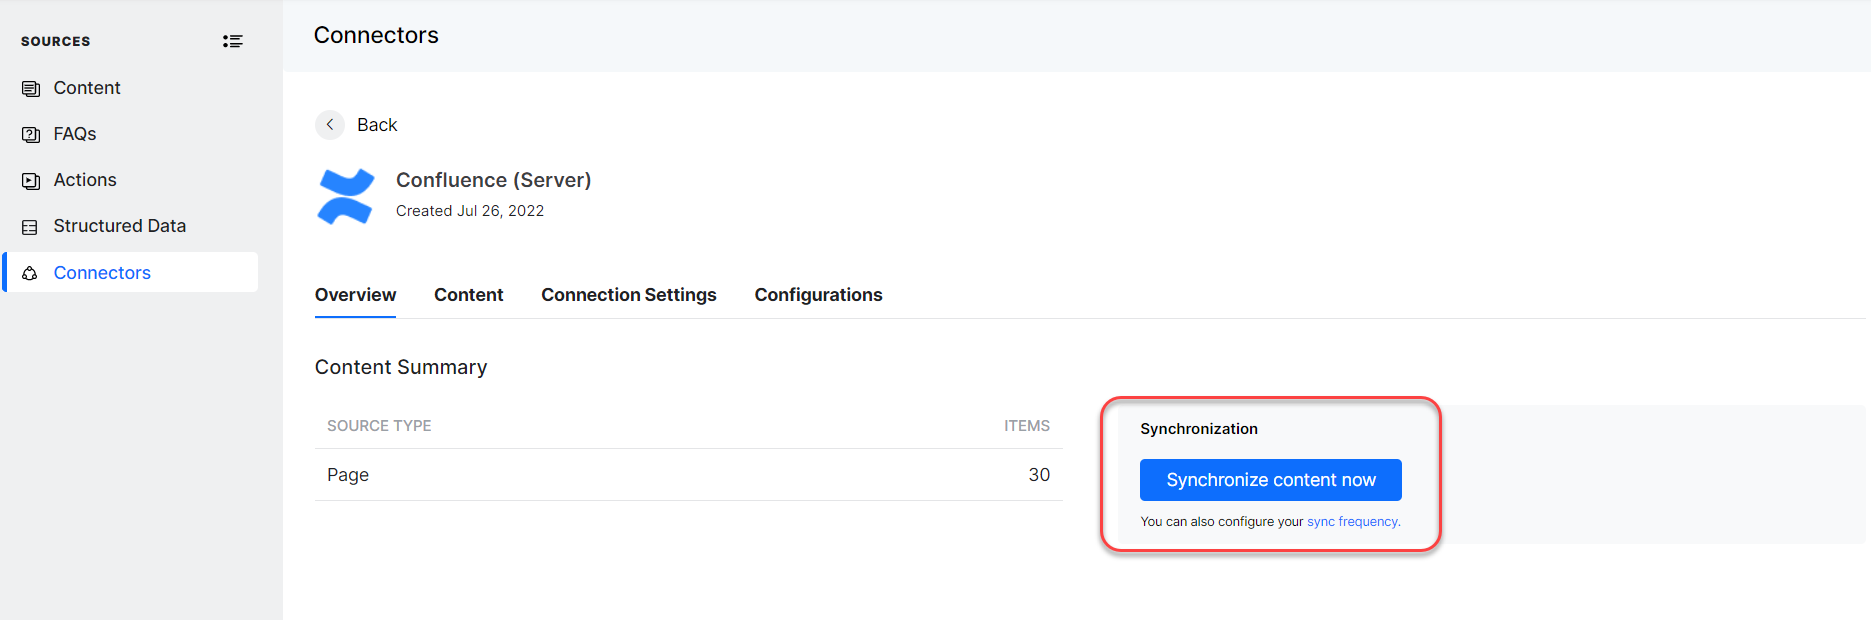
Once the connection is established with a given connector source type you can synchronize to ingest the content from the source into SearchAssist.
Content synchronization is a batch process. The sync operation is not a near real-time activity, unless synchronized afresh the newly added content on the source side won’t be reflected on the SearchAssist side.
However, the repository admin gets an instant notification whenever the content is updated. The administrator has an option either to
- capture the change (delta) manually i.e., on-demand, or
- at pre-scheduled intervals.
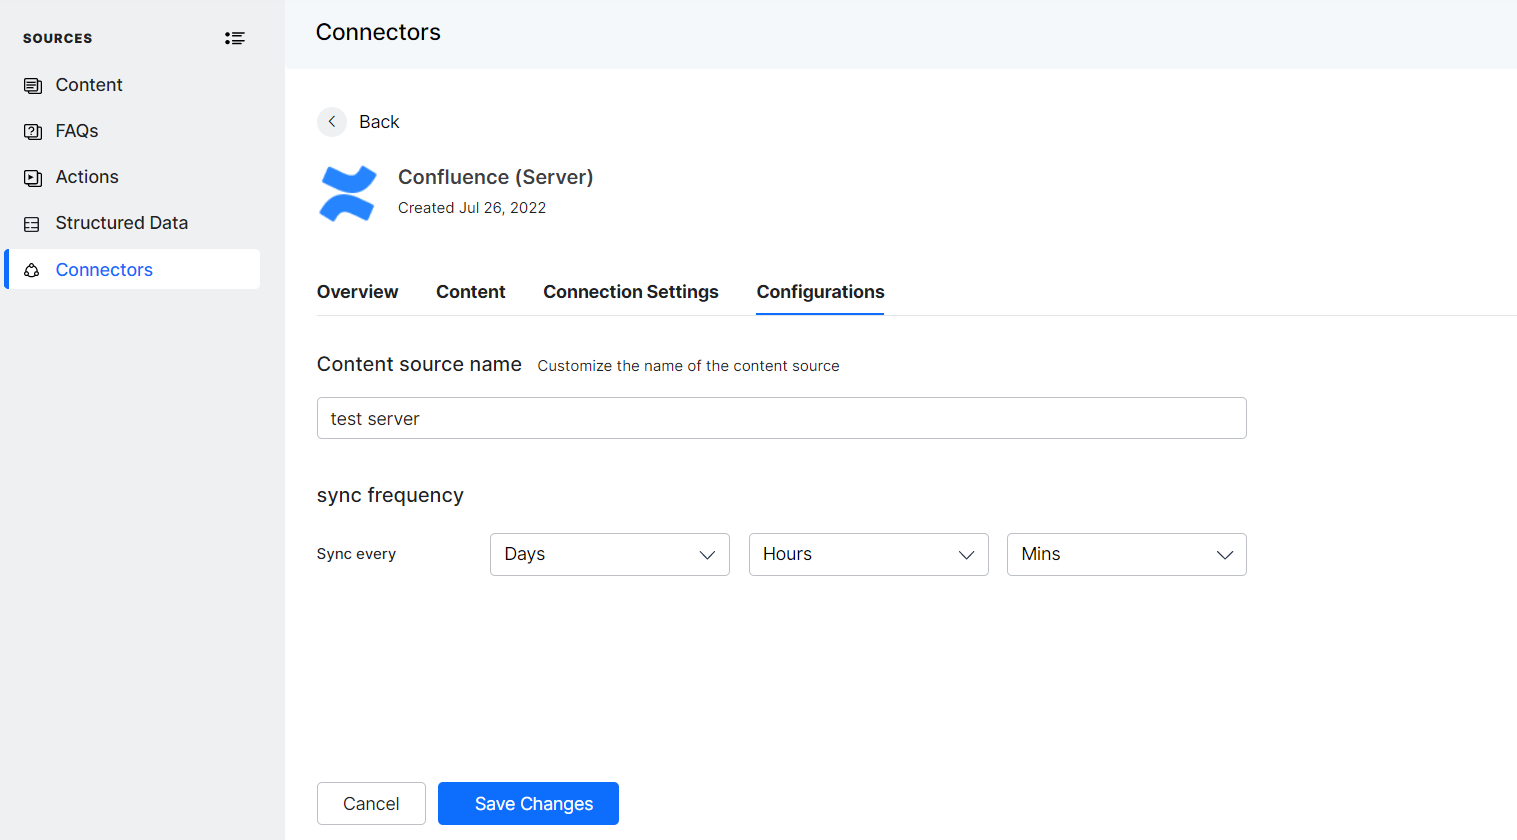
You can customize the frequency of content synchronization with the target repository as required.
If the content on the source side is deleted it will not be visible in the search results post the latest synchronization.
Access Privileges
The access privileges of the content files like view only, comment or edit are maintained as per the privileges assigned to the user in the third-party repository.

Interfacing with Confluence Cloud
Prerequisites
To create and activate a connector with the Confluence cloud ensure the following prerequisites are met:
- Create an admin account in Atlassian’s confluence: admin.atlassian.com
- Create a target domain
- Create pages in confluence and add text content to the pages.
Note: Currently only manually created pages are visible from the confluence and it does not search and point to other uploaded content types like PDF files, docs, and images.
Summary of Connector Integration
To complete the integration process, fetch the following values from the Confluence repository side i.e., the source side and capture them in the target side i.e., in the SearchAssist connector settings:
- Host URL
- Host domain
- Client ID
- Secret
From the SearchAssist app fetch the call back URL or target URL from the kore.ai configuration file and capture it in the confluence app authorization window.
Steps to Integrate
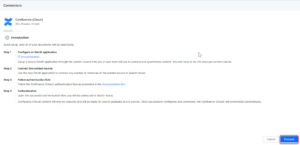
Configure on the Confluence Cloud side:
To complete the integration of the SearchAssist app with the Confluence Cloud take the following steps:
- Sign into your developer account in the Atlassian developer portal.
- Navigate to https://developer.atlassian.com/console/myapps/
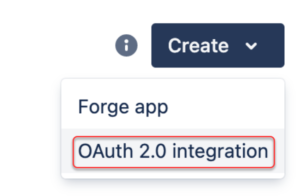
- Click Create and select OAuth 2.0 integration from the dropdown.
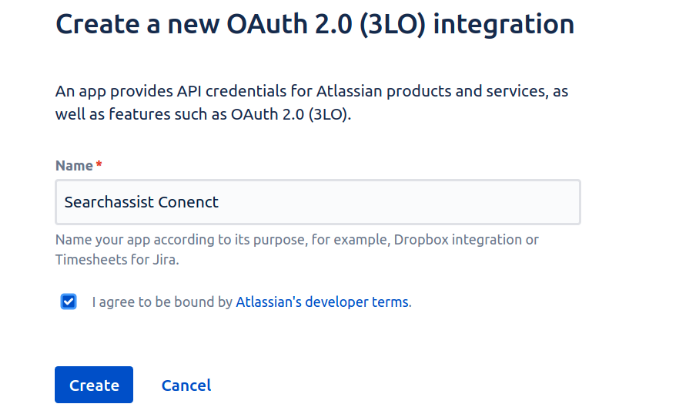
- To create an app that provides API credentials for Atlassian products and services follow these steps:
- Enter a relevant name for the app.
- Agree to the terms.
- Click Create.
Note: It’s best practice to name the app reflecting its purpose or context.

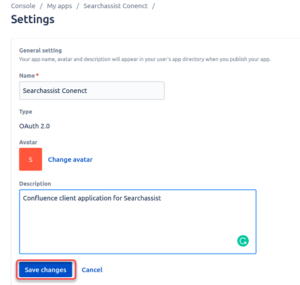
- To edit the general settings of the connector app created in the previous step follow these steps:
- Click Settings in the sidebar,
- Add a Description in the field given.
- Change the image of the avatar as required.
- Click Save changes.
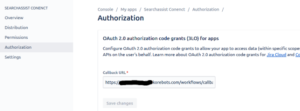
- To obtain authorization from Atlassian’s confluence follow these steps:
- Click Authorization in the sidebar.
- Click Configure.
- Add a Callback URL from Kore.ai’s SearchAssist configuration file.
- Click Save changes to complete the authorization process.For searchassist-pilot callback URL is https://staging-bots.idp.korebots.com/workflows/callback
- To edit permissions for the app follow these steps:
- Click Permissions in the sidebar.
- Under the User Identity API scope, add the following permissions.

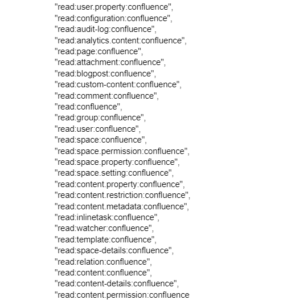
- Under the Confluence API scope, add the following permissions.
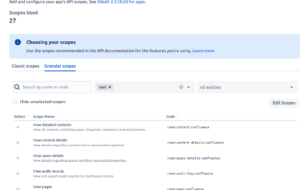
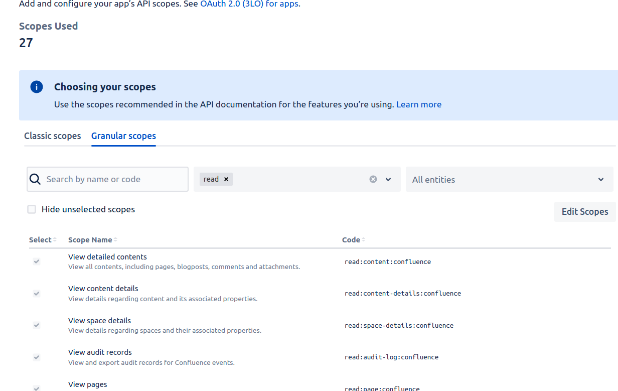
- Navigate to the Granular scopes and select a Read Operation filter.
- Click Edit scopes button, Select the following scopes and click save.
- To fetch the Client ID and Secret follow these steps:
- Click Settings in the sidebar.
- Retrieve the application’s Client ID and Secret.


Keep them accessible say in a notepad.
Configure on the SearchAssist Side
To complete the integration of the SearchAssist app with the Confluence Cloud take the following steps:
- From the SearchAssist business application to create a connector follow these steps:
-
- Click Sources tab.
- Select Connectors from the left pane.
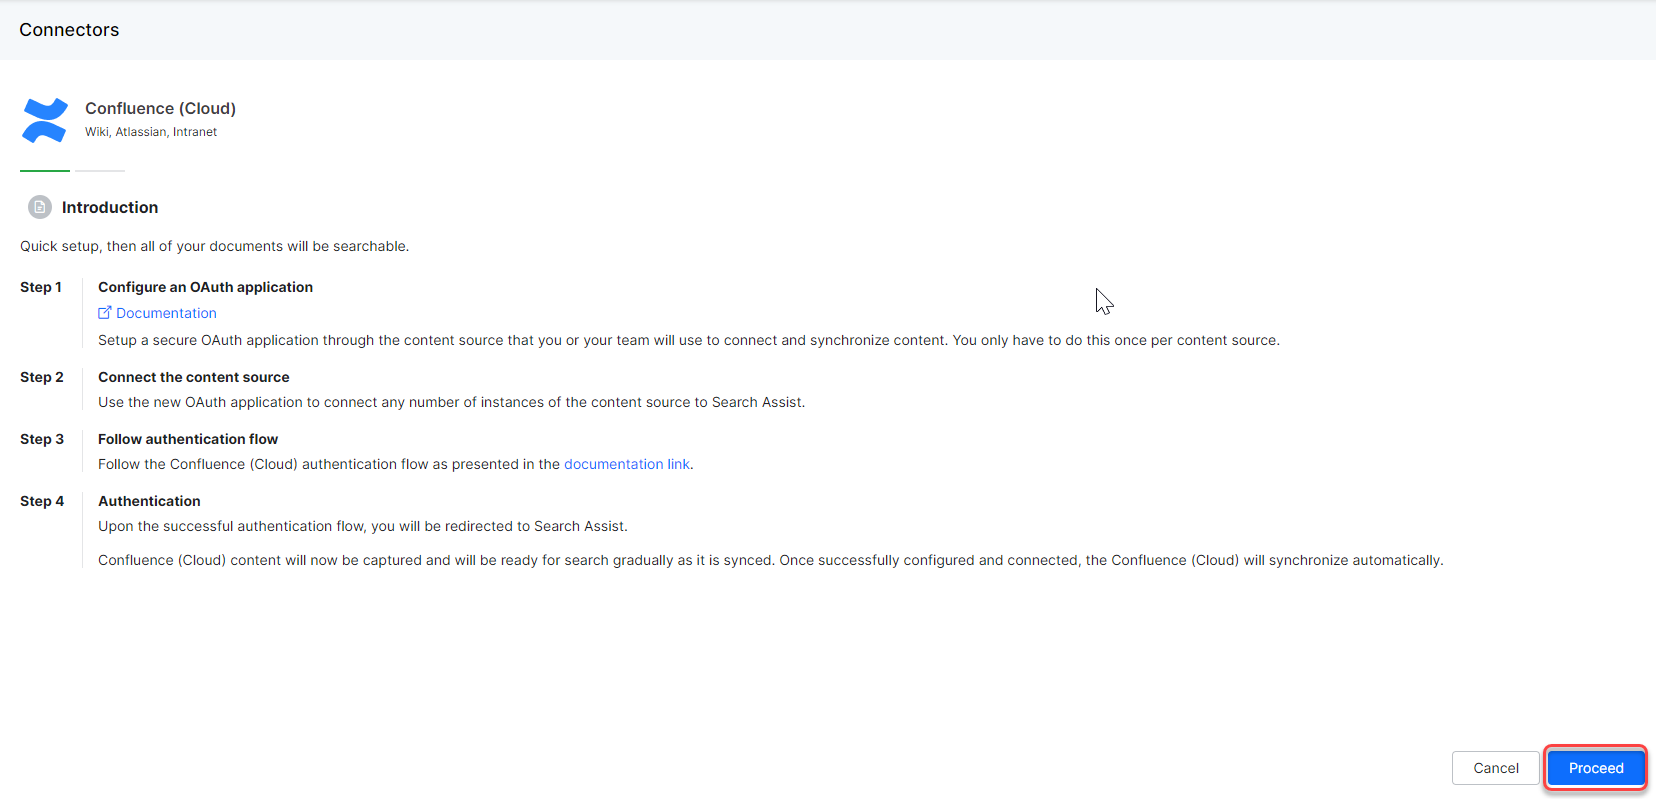
- Select Confluence cloud.
- Click Proceed.
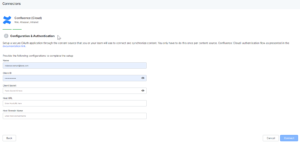
- Name the connector.
- Use the Client Id and Client Secret copied from the previous step. Paste them in the respective fields in the SearchAssist connector window.
- From the Confluence interface, capture the following values:
- The confluence server base URL (without trailing slash) in Host URL.
- Host Domain Name field.
For example Sample confluence cloud base URL: https://example.atlassian.net
-
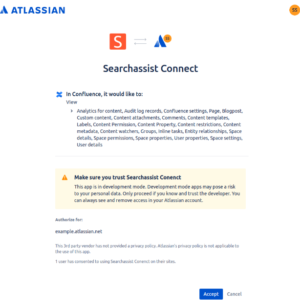
- Click Connect, now your Confluence application is connected to the SearchAssist.
- Click Accept to Authorize the connector