OVERVIEW
Virtual Assistants
Kore.ai Platform
Key Concepts
Natural Language Processing (NLP)
Accessing Platform
VIRTUAL ASSISTANTS
Virtual Assistant Builder
Virtual Assistant Types
Getting Started
Create a Simple Bot
SKILLS
Storyboard
Dialog Tasks
Introduction
Dialog Builder (New)
Dialog Builder (Legacy)
User Intent Node
Dialog Node
Entity Node
Supported Entity Types
Composite Entities
Supported Colors
Supported Company Names
Form Node
Logic Node
Message Nodes
Confirmation Nodes
Bot Action Node
Service Node
Custom Authentication
2-way SSL for Service nodes
Script Node
Agent Transfer Node
WebHook Node
Grouping Nodes
Connections & Transitions
Manage Dialogs
User Prompts
Knowledge Graph
Terminology
Building
Generation
Importing and Exporting
Analysis
Knowledge Extraction
Train
Build
Alert Tasks
Introduction
Ignore Words and Field Memory
How to Schedule a Smart Alert
Small Talk
Digital Views
Introduction
How to Configure Digital Views
Digital Forms
Overview
How to Configure Digital Forms
NATURAL LANGUAGE
Overview
Machine Learning
Introduction
Model Validation
Fundamental Meaning
Introduction
NLP Guidelines
Knowledge Graph
Traits
Introduction
How to Use Traits
Ranking and Resolver
Advanced NLP Configurations
INTELLIGENCE
Overview
Context Management
Overview
Session and Context Variables
Context Object
How to Manage Context Switching
Manage Interruptions
Dialog Management
Sub Intents & Follow-up Intents
Amend Entity
Multi-Intent Detection
Sentiment Management
Tone Analysis
Sentiment Management
Event Based Bot Actions
Default Conversations
Default Standard Responses
TEST & DEBUG
Talk to Bot
Utterance Testing
Batch Testing
Record Conversations
Conversation Testing
CHANNELS
PUBLISH
ANALYZE
Overview
Dashboard
Custom Dashboard
Overview
How to Create Custom Dashboard
Conversation Flows
NLP Metrics
ADVANCED TOPICS
Universal Bots
Overview
Defining
Creating
Training
Customizing
Enabling Languages
Store
Smart Bots
Defining
koreUtil Libraries
SETTINGS
Authorization
Language Management
PII Settings
Variables
Functions
IVR Integration
General Settings
Management
Import & Export
Delete
Bot Versioning
Collaborative Development
Plan Management
API GUIDE
API Overview
API List
API Collection
SDKs
SDK Overview
SDK Security
SDK App Registration
Web SDK Tutorial
Message Formatting and Templates
Mobile SDK Push Notification
Widget SDK Tutorial
Widget SDK – Message Formatting and Templates
Web Socket Connect & RTM
Using the BotKit SDK
Installing
Configuring
Events
Functions
BotKit SDK Tutorial – Agent Transfer
BotKit SDK Tutorial – Flight Search Sample Bot
Using an External NLP Engine
ADMINISTRATION
HOW TOs
Create a Simple Bot
Create a Banking Bot
Transfer Funds Task
Update Balance Task
Context Switching
Using Traits
Schedule a Smart Alert
Configure UI Forms
Add Form Data into Data Tables
Configuring Digital Views
Add Data to Data Tables
Update Data in Data Tables
Custom Dashboard
Custom Tags to filter Bot Metrics
Patterns for Intents & Entities
Build Knowledge Graph
Global Variables
Content Variables
Using Bot Functions
Configure Agent Transfer
RELEASE NOTES

Botビルダーへのアクセス方法

Kore.ai Botプラットフォームでは、Botビルダーを使用してエンタープライズ向けでAI対応の会話型チャットボットを立ち上げることができます。これは、Botを構築、トレーニング、テスト、監視するための直感的でグラフィカルなインターフェイスです。

条件付きルーティングでバックエンドシステムに複数の呼び出しをしなければならない複雑なBotを構築したい場合、ユーザーにコンテキスト通知を送信するBotを構築したい場合、あるいはユーザーの問い合わせに応答するBotを構築したい場合いずれにおいても、Botの構築はかつてないほど簡単になりました。

Botビルダーへのアクセス

Kore.ai Botビルダーのプラットフォームにアクセスするには、https://bots.kore.ai/にアクセスしてください。ログインページに移動します。

Kore.ai Botビルダーへの登録は、以下の2つの方法があります。

  • 新しいアカウントを作成する:Botビルダーでは、ご自身のメールアドレスを使用してどなたでも登録することができます。個人アカウントを作成するためにサインアップすることもできますし、Kore.aiのエンタープライズアカウントの設定を主導することもできます。アカウントの登録後は、自動的にアカウントの管理者になり、他のユーザーをアカウントに招待することができるようになります。
  • 既存のエンタープライズアカウントを登録する:お客様の会社がすでにKore.aiに登録されている場合、以下の方法でアカウントを登録することができます。
    • お客様のエンタープライズアカウントのBot管理者が招待状を送信します。まだ招待メールを受け取っていない場合は、Bot管理者に連絡してアクセス権を取得します。
    • エンタープライズの電子メールアカウントを使用して登録すると、エンタープライズネットワークに登録する、あるいは自分の個人アカウントを作成するように促されます。

新規アカウント登録

Botビルダーの新規アカウントに登録するには、以下の手順に従ってください。

  1. https://bots.kore.ai/botbuilder/loginにアクセスします。
  2. 登録ページのメールアドレスを入力フィールドにメールIDを入力します。
    :メールアドレスが既に登録されている場合、プラットフォームはサインインワークフローを開始し、パスワードの入力を促します。
  3. その他の詳細を入力してアカウントを作成します。
    :作成したアカウントは、会社名/アカウント名で識別されます。他のユーザーをアカウントに招待する場合、メールにはこの名前が含まれます。

  4. 登録をクリックします。入力したメールアドレスに確認メールが送信されます。新規アカウントにサインインするためのリンクを確認します。リンクの確認後、アカウントが作成されます。

ユーザーの招待 – Bot管理者

アカウント管理者は、Bot管理ポータルから招待することで、他のエンタープライズユーザーをBotアカウントに追加することができます。
Kore.ai Botビルダーのアカウントにユーザーを招待するには、以下の手順に従ってください。

  1. Bot管理者ポータルにサインインします。
  2. 左側のペインで登録 > 招待を選択します。
  3. 招待したいユーザーのメールIDを入力します。
  4. 招待の送信をクリックします。ユーザーに招待メールが送信されます。
  5. 招待を受けたユーザーが招待を承認すると、登録ページにリダイレクトされます。
    • ユーザーが初めてプラットフォームを利用する場合は、ステップ3に示す必要情報を入力して登録を完了させる必要があります。
    • ユーザーのメールアドレスがすでにプラットフォームに登録されている場合は、サインイン用のパスワードの入力を求められます。
:この時点では、ユーザーはこのアカウントで構築されたBotにしかアクセスすることができず、このアカウントのBotビルダーからBotを構築することはできません。

Botビルダーへのアクセス権の付与

管理者は、ユーザーがアカウントへの招待を受けた後、当該ユーザーに対してBotビルダーへのアクセスを有効にすることができます。アカウントユーザーにBotビルダーへのアクセス権を付与するには、以下の手順に従います。

  1. Bot管理者ポータルにサインインします。
  2. 左側のペインでユーザー管理 > ユーザーを選択します。
  3. ユーザーの管理ウィンドウで、Botビルダーへのアクセス権を割り当てるユーザーを選択します。
  4. アクションドロップダウンリストから、Botビルダーへのアクセス権を選択し、適用をクリックします

:アカウントから提供されるBotビルダーへのアクセス権によって、そのアカウント内でのみBotの構築や管理が許可されます。
OVERVIEW
Virtual Assistants
Kore.ai Platform
Key Concepts
Natural Language Processing (NLP)
Accessing Platform
VIRTUAL ASSISTANTS
Virtual Assistant Builder
Virtual Assistant Types
Getting Started
Create a Simple Bot
SKILLS
Storyboard
Dialog Tasks
Introduction
Dialog Builder (New)
Dialog Builder (Legacy)
User Intent Node
Dialog Node
Entity Node
Supported Entity Types
Composite Entities
Supported Colors
Supported Company Names
Form Node
Logic Node
Message Nodes
Confirmation Nodes
Bot Action Node
Service Node
Custom Authentication
2-way SSL for Service nodes
Script Node
Agent Transfer Node
WebHook Node
Grouping Nodes
Connections & Transitions
Manage Dialogs
User Prompts
Knowledge Graph
Terminology
Building
Generation
Importing and Exporting
Analysis
Knowledge Extraction
Train
Build
Alert Tasks
Introduction
Ignore Words and Field Memory
How to Schedule a Smart Alert
Small Talk
Digital Views
Introduction
How to Configure Digital Views
Digital Forms
Overview
How to Configure Digital Forms
NATURAL LANGUAGE
Overview
Machine Learning
Introduction
Model Validation
Fundamental Meaning
Introduction
NLP Guidelines
Knowledge Graph
Traits
Introduction
How to Use Traits
Ranking and Resolver
Advanced NLP Configurations
INTELLIGENCE
Overview
Context Management
Overview
Session and Context Variables
Context Object
How to Manage Context Switching
Manage Interruptions
Dialog Management
Sub Intents & Follow-up Intents
Amend Entity
Multi-Intent Detection
Sentiment Management
Tone Analysis
Sentiment Management
Event Based Bot Actions
Default Conversations
Default Standard Responses
TEST & DEBUG
Talk to Bot
Utterance Testing
Batch Testing
Record Conversations
Conversation Testing
CHANNELS
PUBLISH
ANALYZE
Overview
Dashboard
Custom Dashboard
Overview
How to Create Custom Dashboard
Conversation Flows
NLP Metrics
ADVANCED TOPICS
Universal Bots
Overview
Defining
Creating
Training
Customizing
Enabling Languages
Store
Smart Bots
Defining
koreUtil Libraries
SETTINGS
Authorization
Language Management
PII Settings
Variables
Functions
IVR Integration
General Settings
Management
Import & Export
Delete
Bot Versioning
Collaborative Development
Plan Management
API GUIDE
API Overview
API List
API Collection
SDKs
SDK Overview
SDK Security
SDK App Registration
Web SDK Tutorial
Message Formatting and Templates
Mobile SDK Push Notification
Widget SDK Tutorial
Widget SDK – Message Formatting and Templates
Web Socket Connect & RTM
Using the BotKit SDK
Installing
Configuring
Events
Functions
BotKit SDK Tutorial – Agent Transfer
BotKit SDK Tutorial – Flight Search Sample Bot
Using an External NLP Engine
ADMINISTRATION
HOW TOs
Create a Simple Bot
Create a Banking Bot
Transfer Funds Task
Update Balance Task
Context Switching
Using Traits
Schedule a Smart Alert
Configure UI Forms
Add Form Data into Data Tables
Configuring Digital Views
Add Data to Data Tables
Update Data in Data Tables
Custom Dashboard
Custom Tags to filter Bot Metrics
Patterns for Intents & Entities
Build Knowledge Graph
Global Variables
Content Variables
Using Bot Functions
Configure Agent Transfer
RELEASE NOTES

How to Access Bot Builder?

Kore.ai Bots platform enables you to launch enterprise-grade, AI-enabled conversational chatbots using Bot Builder; an intuitive graphical interface for building, training, testing, and monitoring bots.

Whether you are looking to build a complex Bot that has to make multiple calls to your backend systems with conditional routing, or a Bot that sends contextual notifications to your users, or even a Bot that responds to their queries, Bot building has never been easier.

Accessing Bot Builder

To access the Kore.ai Bot Builder platform, visit https://bots.kore.ai/. You will be directed to the login page.

You can sign up for Kore.ai Bot Builder in any of the following two ways:

  • Create a new account: Bot Builder allows any user to sign up for the platform using their email address. You can sign up to create a personal account or even take the lead in setting up your enterprise’s account in Kore.ai. After you sign up for the account, you automatically become the account’s Admin, which allows you to invite other users to the account.
  • Join an existing enterprise account: If your enterprise is already on Kore.ai, you can become a part of the account in one of the following ways:
    • Your enterprise account’s Bots Admin sends you an invite. If you haven’t already received the invitation email, reach out to your Bots Admin for access.
    • You can sign up using your enterprise email account and you are prompted to either join the enterprise network or create your own personal account.

New Account Sign-up

To sign up for a new Bot Builder account, follow the below steps:

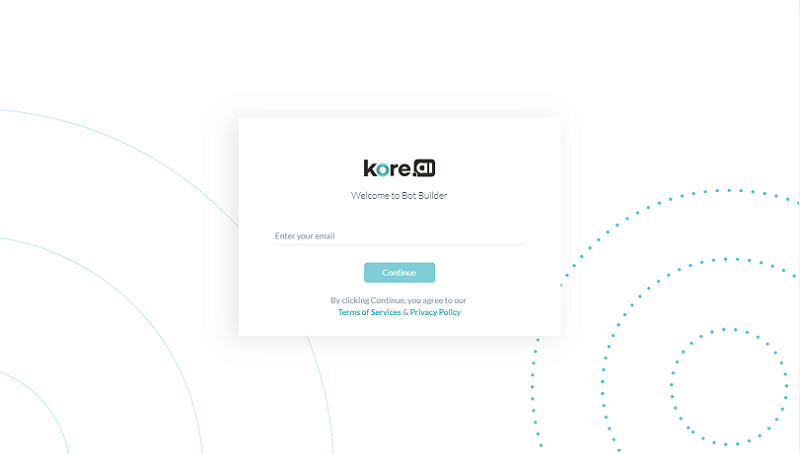
  1. Go to https://bots.kore.ai/botbuilder/login.
  2. On the Sign-up page, enter the email ID in the Enter your email field.
    Note: If the email address is already registered, the platform initiates the sign-in workflow and prompts for the password.
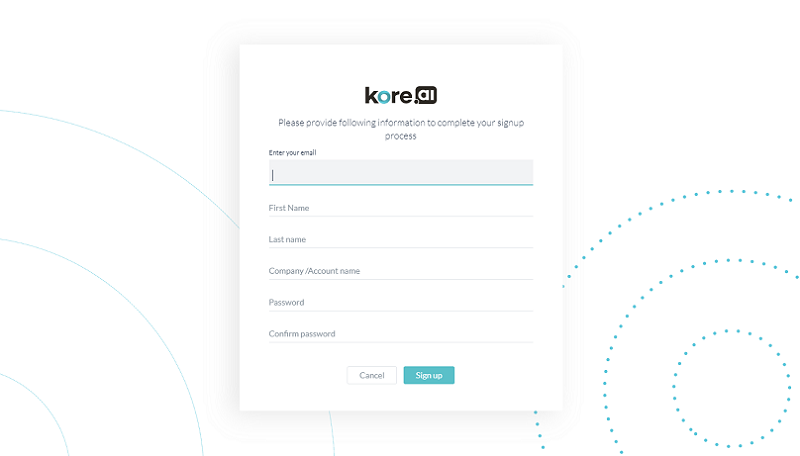
  3. Enter all the other details to create the account.
    Note: The account you create is identified by the Company/Account name. When you invite other users to the account, the email includes this name.
  4. Click Sign up. A confirmation email is sent to the email address entered. Confirm the link to sign in to the new account. Once you confirm the link, your account is created.

Landing Page

After you sign in to Kore.ai Bot Builder, you are directed to the landing page. From this page you can access various Kore.ai platform offerings:

  1. Virtual Assistants – Design, build, test, and deploy AI-powered chatbots. This is selected by default. Refer here for more.
  2. Process Apps – Build multi-step and multi-user workflows for automating internal and external processes, for example, expense reimbursement, leave approval, etc. Refer here for more.
  3. Data – Define Data Tables, Table Views, and manipulate them from your Virtual Assistants and Process Apps. Thus taking care of your data needs, without having to depend on external services. Refer here for more.
  4. Explore Store – Explore and import template bots from Kore.ai’s online marketplace that run on the Kore.ai platform. Refer here for more.

Inviting User – Bot Admin

Account administrators can add other enterprise users to the bot account by inviting them from the Bots Admin portal.
To invite users to your Kore.ai Bot Builder account, follow the below steps:

  1. Sign in to the Bots Admin portal.
  2. On the left pane, select Enrollment > Invite.
  3. Enter the email IDs of the users you want to invite.
  4. Click Send Invitation. An invitation email is sent to these users.
  5. When the invited user accepts the invitation, they are redirected to the Sign-up page.
    • If the user is new to the platform, they need to enter the required details shown in step 3 to complete the registration.
    • If the user’s email address is already registered on the platform, the user is prompted to enter the password to sign in.
Note: At this point, the user can only access bots built in this account and can not build bots from the Bot Builder for this account.

Giving Access to Bot Builder

After a user is invited to an account, the administrator can enable Bot Builder access to these users. To give Bot Builder access to an account user, follow the below steps:

  1. Sign in to the Bots Admin portal.
  2. On the left pane, select User Management > Users.
  3. On the Manage Users window, select the users to whom you want to assign the Bot Builder Access.
  4. From the Actions drop-down list, select Bot Builder Access and click Apply.

Note: Bot Builder access provided from an account gives permission to build and manage bots only in that account.