これは、Kore.ai BotKit SDK のインスタンスを設定して実行するためのエンド ツー エンドのチュートリアルです。この SDK は、Kore.ai ボットのメッセージと Webhook イベントを Web サービスで制御するために使用できるライブラリのコレクションです。このチュートリアルでは、旅行計画サンプル というサンプル ボットを使用します。このサンプル ボットは、新規ボットとしてインストールし、エージェント転送用のダイアログ タスクをインポートし、認証トークンを生成し、テスト コールバック サーバーとして ngrok を使用してボットをテストし、 LiveChat を使用してライブ エージェントへのエージェント転送にアクセスします。
必要条件
このチュートリアルを完了するには、以下の必要条件を設定し、構成する必要があります:
- LiveChat アカウント ー 登録するか、30 日間の無料トライアルをセットアップします。このチュートリアルで BotKit SDK の設定を行うには、LiveChat アカウントのライセンス番号が必要です。
- テスト用コールバック サーバーとしてngrok をインストールおよび実行します。テスト用コールバック サーバー アプリケーション ngrok は、コールバック サーバー アプリケーションのシミュレーションに使用します。
- node.jsをコンピュータにインストール ー BotKit SDK はサーバーと Kore.ai ボット プラットフォームとの通信に node.js を必要とします。
LiveChat 試用版アカウントのセットアップ
下記のように、」LiveChat をはじめましょう" の欄に勤務先のメールアドレスを入力すると、ご自身の LiveChat サブスクリプションを使用するか、LiveChatInc.com の30日間の無料試用版アカウントをセットアップすることができます。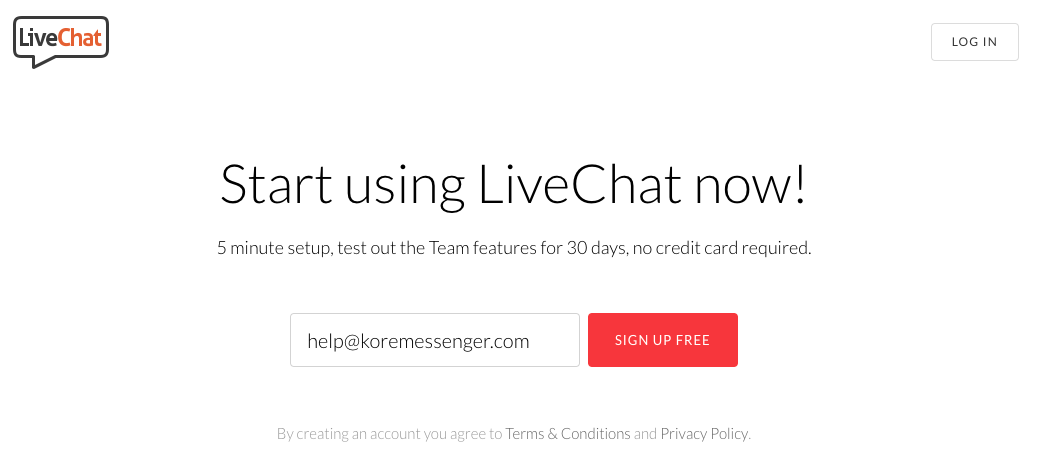 LiveChat の試用版アカウントを設定するには
- 「始めましょう」ページで、名前を入力し、ログオン パスワードを作成します。
- Web サイト のページで、会社の URL、たとえば www.koremessenger.comを入力し、 [サポート]をクリックして、さらに "続行 " をクリックします。
- 以下の「会社情報」ページで、業種、従業員数、携帯電話番号、配信対象を入力して、[アカウントの作成] をクリックします。
- 「LiveChat のインストール」ページの下部にある [アプリケーションに移動] をクリックします。
- 「エージェントの追加」ページで、必要に応じてエージェントを追加するか、 [このステップをスキップ] をクリックします。
- 「LiveChat のカスタマイズ」ページで、LiveChat のルック&フィールの設定をカスタマイズするか、 [このステップをスキップ] をクリックします。
- "デスクトップ インストール" ダイアログで [後に回す] をクリックし、"始めましょう" ダイアログで [LiveChat へようこそ ] をクリックして、[チュートリアルをスキップ] をクリックします。「チャット」ページが表示され、LiveChat エージェントの着信チャットが開きます。
BotKit SDK 設定用の LiveChat コードの無料ライセンスを取得するには、トップ ナビゲーション バーの 設定![]() アイコンをクリックし、左のナビゲーション バーで インストール メニューを展開し、以下の図のように チャット リンク をクリックします。
アイコンをクリックし、左のナビゲーション バーで インストール メニューを展開し、以下の図のように チャット リンク をクリックします。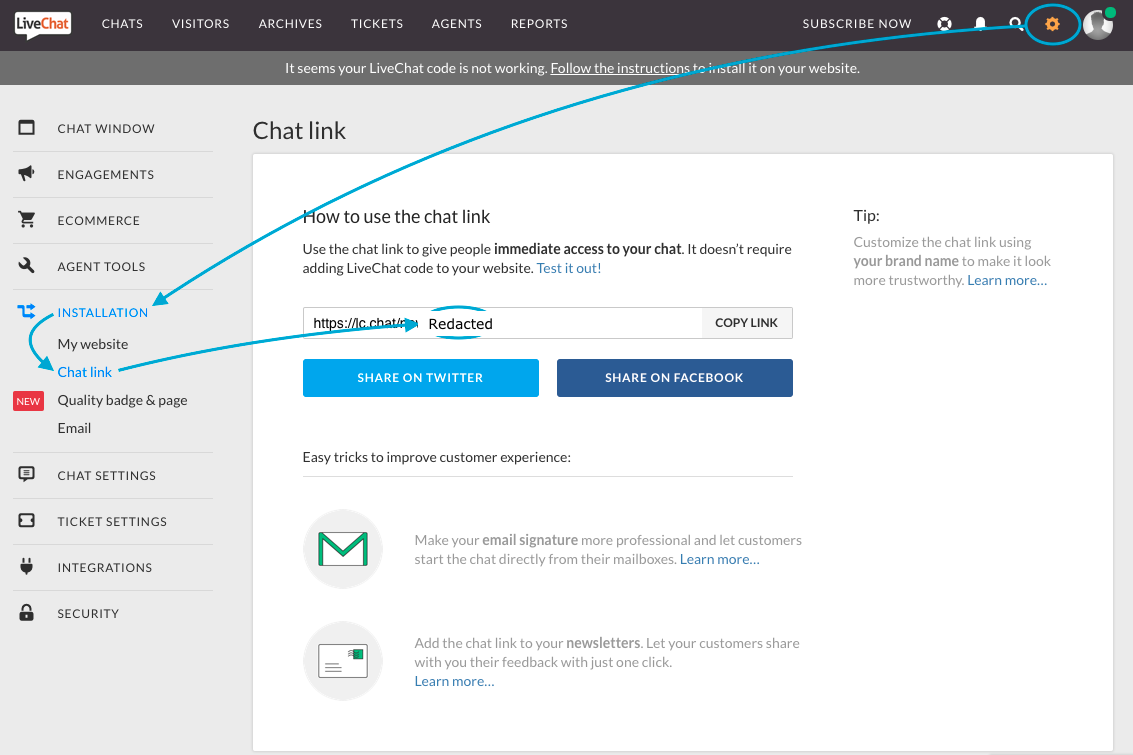 表示されたチャット リンクから LiveChatの ライセンスコードをコピーし(例: 89XXXX5)、トップ ナビゲーション バーの CHATS リンクをクリックして、このチュートリアルで作成するエージェント転送付き BotKit SDK ボットからのチャットを表示するウィンドウを開いたままにします。メモ: url-template および node-schedule モジュール (および LiveChat に関連する js ファイルで参照されているその他のモジュール) がコンピュータにインストールされていることを確認してください。
ngrok のインストールと実行
テスト用コールバック サーバー アプリケーションをダウンロードするには、https://ngrok.com/download をクリックして、お使いのオペレーティング システム用の ngrok ファイルをダウンロードしてインストールします。ターミナル ウィンドウで ngrok を起動し、以下のコマンドでポート 8003 を監視します。 ngrok http 8003  前図で示されるように、https 転送 URL をコピーします。例: https://1b47f1d2.ngrok.ioターミナル ウィンドウを開いたまま、ngrok を起動します。
Node.js のインストール
BotKit SDK は、SDK がインストールされているサーバー上で Node.js が動作している必要があります。https://nodejs.org/en/download/ にアクセスし、お使いの OS に応じて、Mac の場合は .pkg、Windows の場合は .msi のファイル タイプを選びます。ターミナルウィンドウで node -v コマンドを実行して、インストールとバージョンを確認します。たとえば次図 v6.10.2。 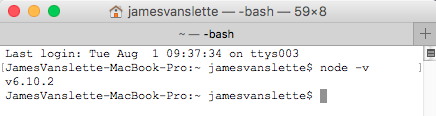
ボットのインストールと設定
必要条件をインストールして実行すると、旅行計画サンプル ボットをインストールし、 エージェント転送 ダイアログ タスクをボットにインポートする準備が整います。このセクションでは、以下を実行します:
- 旅行計画サンプルボットのインストール
- エージェント転送ダイアログ タスクのインポート
- アプリ登録の作成
- セキュリティ資格情報の生成
- BotKit SDKのインストールと設定 ー config.json、LiveChat.js、および LiveChatAPI.js ファイル
旅行計画サンプル ボットのインストール
Kore.ai にはすぐに使えるサンプル ボットが用意されており、ボットビルダーのインスタンスにインストールすることができます。このチュートリアルでは、旅行計画サンプル ボットをインストールする必要があります。 旅行計画サンプルボットをインストールするには
- ボットビルダーにログオンして、[新規ボット] > [サンプル ボットのインストール] をクリックします。
- [旅行計画サンプル] をポイントして、 [インストール]をクリックします。「旅行計画サンプル_KORE NAME_Instance# は正常にインストールされました」のメッセージが表示され、ボットの左のナビゲーション メニューにサンプル ボットが追加されます。
詳しくは「旅行計画サンプル ボット」をご覧ください。
エージェント転送ダイアログ タスクのインポート
このチュートリアルの一部では、ボットビルダーのエージェント転送コンポーネントを使用して、ボットユーザーをボットの会話からライブ エージェントに移行させる方法を紹介します。このセクションでは、エクスポートしたダイアログ タスクをダウンロードして、そのダイアログタスクを 旅行計画サンプル ボット のインスタンスにインポートします。エージェント転送ダイアログ タスクのダウンロードはこちら: エージェント転送 ダイアログ タスクをインポートするには
- ボットビルダーで、このチュートリアルのためにインストールした旅行計画サンプルのボットを選びます。
- 「ボット タスク」 ページで [ダイアログ タスク] タブにカーソルを合わせ、プラス記号をクリックします。
- インテント名フィールドに エージェント転送を入力して、[作成]をクリックします
- タスク エディターの右上にある 省略記号アイコンをクリックして、 [インポート] をクリックします。
- ダイアログのインポートダイアログで、[ファイルの選択] をクリックし、ダウンロードしたエージェント転送 ダイアログ ファイルに移動して、[インポート]をクリックします。
"インポート成功" ダイアログが表示され、インポートの結果が表示されます。
アプリの登録とクライアント資格情報の生成
BotKit SDK を Kore.ai ボット プラットフォームに登録するには、アプリの登録を行い、サーバー プラットフォームにインストールされた SDK と Kore.ai ボット プラットフォームとの間で安全に通信するためのセキュリティ資格情報を生成する必要があります。アプリ登録の作成
- ボットのサイド ナビゲーション パネルにカーソルを合わせ、「アプリとエージェント」をクリックします。
- 「アプリとエージェント」ページで、「BotKit SDK」 タブをクリックします。
- 「アプリ名」ドロップダウンリストの隣にある [追加] をクリックします。
- アプリ名を入力して、[次へ] をクリックします。
- クライアント ID とクライアント シークレットの詳細が表示されます。。[完了] をクリックします。
- "コールバック URL" フィールドには、必要条件の一部としてインストールして実行した ngrok アプリケーションの「転送 URL 」からコピーしたアプリケーションの URL を入力します。例: :https://1bXXXXd2.ngrok.io)
メモ: ngrok の各実行インスタンスは、セッション固有の URL を生成します。ngrok を停止して再起動した場合は、"コールバック URL" フィールドを更新する必要があります。
- [イベント] セクションにおいて、以下を選びます:
- OnMessage ー ユーザーからのメッセージを受信すると、イベントがトリガーされます。
- OnAgentTransferNode ー ダイアログのタスク フローでエージェント転送ノードが検出されると、イベントがトリガーされます。
- [資格情報の作成] をクリックします。"アプリの作成" ダイアログが閉じられ、新しいアプリの登録とクライアントの資格情報が [SDK 設定] セクションに表示されます。
- [保存] をクリックします。「サブスクライブが正常に登録されました」と表示されます。
BotKit SDK の設定には、以下が必要です:
- 「クライアント ID」をコピーします。例: cs-6e5eb411-XXXX-XXXX-9ba2-ccc748d4f719.
- 「クライアント シークレット」を表示して、コピーします。例: dTTmuTOgs8SOXXXXXXXXouE0EPy28fXojOJWedOEF6s=.
ボットの公開
開発者は、インストールされたボットをすぐにテストに使用できます。ボットは、所有者が保存すると利用できるようになります。このチュートリアルのためにこのボットを実行してテストする場合は、次のセクション [BotKit SDK のインストールと設定] にスキップできます。他のユーザーがボットを使用できるようにするには、他のユーザーのエンタープライズ管理者がエンタープライズ内のユーザーにボットを承認してデプロイできるように、ボットを公開する必要があります。詳しくは、「タスクの公開」をご覧ください。Bot Builder でボットを公開した後、そのボットの企業管理者は、ボットの 対象オーディエンスが エンタープライズユーザー または 一般ユーザー に設定されているかに応じて、ボット管理コンソールで以下のいずれか 1 つのボットのデプロイメントを行う必要があります。
- エンタープライズ ユーザー向け
- ボット管理者コンソールのボット管理モジュールで、エンタープライズ ボットページでデプロイしたいエージェント転送ボットの省略記号アイコンをクリックし、さらにボット タスクの管理をクリックします。"ボット タスクの管理" ダイアログが表示されます。
- "ボット タスク" フィールドを展開すると、デプロイされた使用可能なタスクが表示されます
- ボットのタスクをすべて選択して、[確認] をクリックします。
- "ボット タスクの管理" ダイアログで [確認] をクリックします。「ボットのステータスは正常に変更されました」というメッセージが表示されます。
- 「エンタープライズボット」 ページで、エンタープライズ ユーザーを割り当てたいエージェント転送ボットの 省略記号 のアイコンをクリックし、「ボットとタスクの割り当て」をクリックします。「ボットとタスクの割り当て" ダイアログが表示されます。
- エンタープライズ内の選択されたユーザーにボットを割り当てます。
ー または ー
- 一般パブリック ユーザー向け
- ボット管理者コンソールで、ボット管理 モジュールで、消費者ボットページでデプロイしたいエージェント転送ボットの省略記号アイコンをクリックし、さらにボット タスクの管理をクリックします。"ボット タスクの管理" ダイアログが表示されます。
- "ボット タスク" フィールドを展開すると、デプロイされた使用可能なタスクが表示されます。
- ボットのすべてのタスクを選択して、[確認] をクリックします。「ボットのステータスは正常に変更されました」というメッセージが表示されます。
BotKit SDK のインストールと設定
https://github.com/Koredotcom/BotKit から Kore.ai BotKit SDK をダウンロードして解凍する必要があります。必ず LiveChat.js ファイルを含む最新版をダウンロードしてください。
Config.json ー BotKit SDK フォルダ内で、コールバック サーバーへの接続情報を含む config.json ファイルを編集する必要があります。このチュートリアルでは、ngrokと、旅行計画サンプル ボットのアプリ登録を行った際に生成されたセキュリティ資格情報を使用し、LiveChat エージェント アプリケーションのライセンス キーを含む新しい行を config.json ファイルに追加します。デフォルトの config.json ファイルのパラメータを以下のように変更します:
url— ngrok の転送
URL の値を使用して、このパラメータを追加しますapikeyー クライアント シークレットを使用してパラメータを更新しますappId— クライアント IDを使用してパラメータを更新しますliveagentlicense— 以下のサンプルに示すように、LiveChat のチャット URL のライセンス キーの値を使用してこのパラメータを追加します。
{
    "server": {
        "port": 8003
    },
    "app": {
        "apiPrefix" : "",
        "url": "< ngrok Forwarding URL >"
    },
    "credentials": {
        "apikey": "< Client Secret from Bot Builder >",
        "appId": "< Client ID from Bot Builder >"
    },
    "redis": {
        "options": {
            "host": "localhost",
            "port": 6379
        },
        "available": false
    },
    "examples" : {
        "mockServicesHost"  : "http://localhost:8004"
    },
     "liveagentlicense": "< LiveChat License Key >"
}
以下のコードは、完全に定義されたサンプル config.json ファイルの例です:
{
    "server": {
        "port": 8003
    },
    "app": {
        "apiPrefix" : "",
        "url": "https://1b47f1d2.ngrok.io"
    },
    "credentials": {
        "apikey": "dTTmuTOgs8SOCwXXXXXXXXE0EPy28fXojOJWedOEF6s=",
        "appId": "cs-6e5eb411-XXXX-XXXX-9ba2-ccc748d4f719"
    },
    "redis": {
        "options": {
            "host": "localhost",
            "port": 6379
        },
        "available": false
    },
    "examples" : {
        "mockServicesHost"  : "http://localhost:8004"
    },
     "liveagentlicense": "89XXX15"
}
LiveChat.js と LiveChatAPI.js
BotKit SDK の LiveChat.js と LiveChatAPI.js ファイルには、ボット内の対話タスクからエージェント アプリケーションへのシームレスな移行を制御する JavaScript が含まれています。このチュートリアルでは、以下の情報により、LiveChat を使用したダイアログ転送を設定します: ボットビルダーで、旅行計画サンプルボットを選択し、[設定] タブで、[一般設定] セクションの [展開 ![]() ] アイコンをクリックします。[一般設定] セクションが表示されます。以下をコピーします:
] アイコンをクリックします。[一般設定] セクションが表示されます。以下をコピーします:
- ボット名 ー ボット プラットフォーム上でのボットの名前です。例: 旅行計画サンプル_KORE ADMIN_10
- ボット ID ー ボットのボット プラットフォーム システム固有の Id。例: st-26cfae3a-XXXX-XXXX-991a-376b7fe579d5.
LiveChat.js と LiveChatAPI.jsの両方で、以下の大文字と小文字を区別する変数を、ボット インスタンスの設定で更新および保存します。 var botId = "<Bot ID>"; var botName = "<Bot Name >"; 例: var botId = "st-26cfae3a-XXXX-XXXX-991a-376b7fe579d5"; var botName = "Travel Planning Sample_KORE ADMIN_10";
BotKit SDK アプリケーションの起動
BotKit SDK を利用したエージェント転送による 旅行計画サンプルボットの使用を開始するには、Node.js がインストールされ、ngrok がポート 8003でリスニングを実行していることが必要です。BotKit SDK を起動するには ターミナル ウィンドウで BotKit SDK のフォルダに移動し、以下のコマンドを入力します: node app.js Node.js が動作していれば、以下のようなレスポンスが得られるはずです。 app listening at http://:::8003
BotKit SDK ボットのテスト
作成したボットをテストするには、以下が必要です:
- ngrok running – Command =
ngrok http 8003 - node.js running – Command =
node app.js - LiveChat ー ログイン後、Web のチャット ページが開いている状態
- ボットビルダー ー ボットビルダー ページの右下隅にある以下のアイコンをクリックして、ボットとの対話を開始します。


エージェント転送ダイアログが開始されると、LiveChat と BotKit SDK の間でメッセージが交換されます。
次のステップ
Kore.ai ボットをアプリケーションで使用するには、BotKit SDK を設定し、コールバック URL が ngrokではなく自社のアプリケーション サーバーを指すように、アプリケーションを設定する必要があります。もちろん、他のユーザーとボットを共有するには、所属する会社のエンタープライズ管理者がボットを承認し、ボットを公開した後、それらのユーザーにボットをデプロイする必要があります。