[登録 > 一括招待] ページでは、アカウントに参加させたいユーザーのメール アドレスを含むテキスト ファイルを使用できます。このオプションは、多数のメンバーを登録する場合に便利です。
インポート ファイルは、1 行に 1 つのメール アドレスを含む基本的なテキスト ファイルであり、.txt ファイル形式として保存されている必要があります。一括招待ファイルを作成したら、ファイルをアップロードする必要があります。
一括招待について
一括招待ファイルを使用して新しいユーザーをアカウントに追加する場合は、次の点に注意する必要があります。
- 使用できないメール形式のエントリーは無視されます。
- 正常にインポートされたメール アドレスに招待メールが送信されます。
- 招待は、既存のアカウント ユーザーには送信されません。
次の図は、[登録] モジュールの [一括招待] ページの例です。 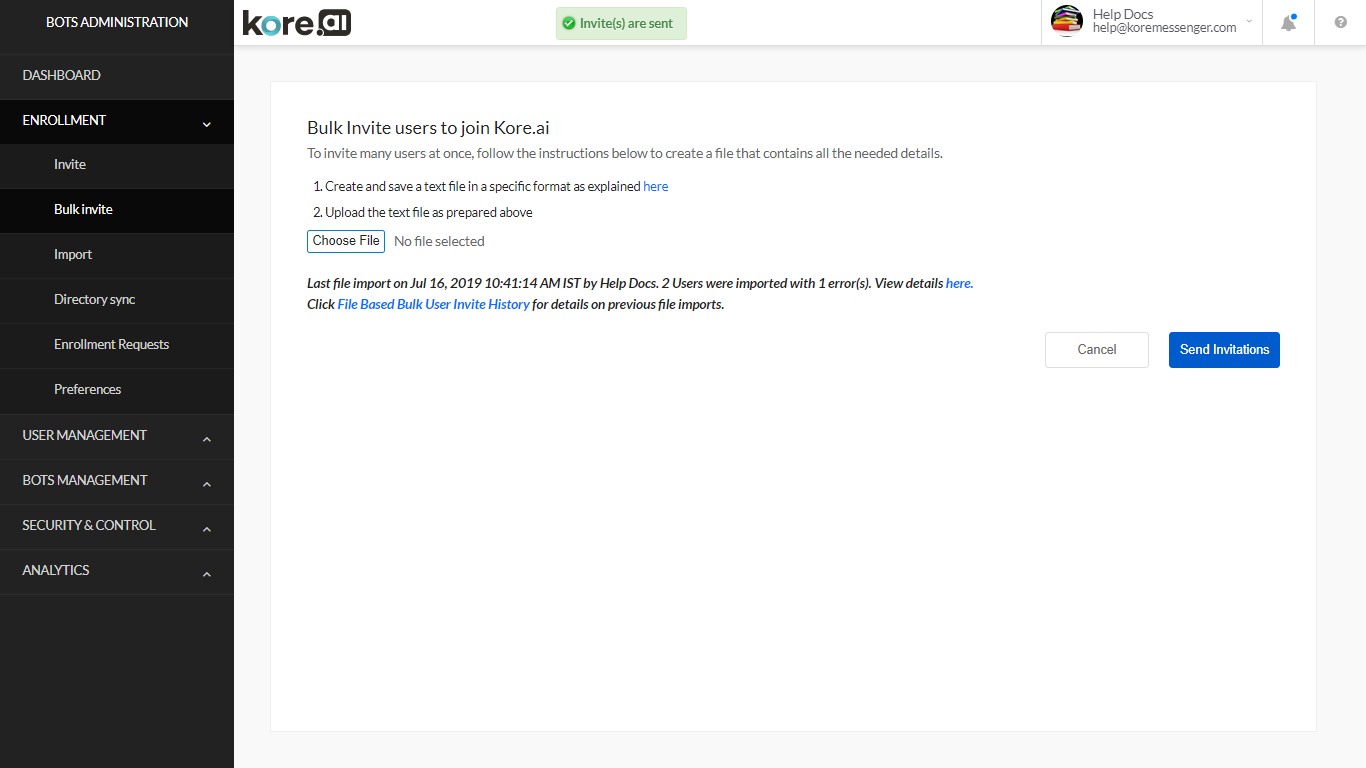
一括招待ファイルを作成する
エンタープライズ ボット プラットフォーム アカウントに追加させたいユーザーのすべてのメール アドレスを含む招待ファイルを作成できます。一括招待ファイルの作成
- テキスト エディターで、次の例に示すように、完全なメール アドレスを各行またはコンマ区切りのリストに入力します。.txt ファイルの場合: Kore.aiUser1@kore.com Kore.aiUser2@kore.com Kore.aiUser3@kore.com
- 一括招待ファイルを .txt ファイルとして保存します (例: Kore.aiImport.txt)。
- 一括招待ファイルを作成したら、ファイルをアップロードしてユーザーを招待できます。
次の画像は、Kore.ai アカウントに招待するユーザーのカスタム リストと共にアップロードできる一括招待ファイルの作成に使用されるテキスト エディターの例です。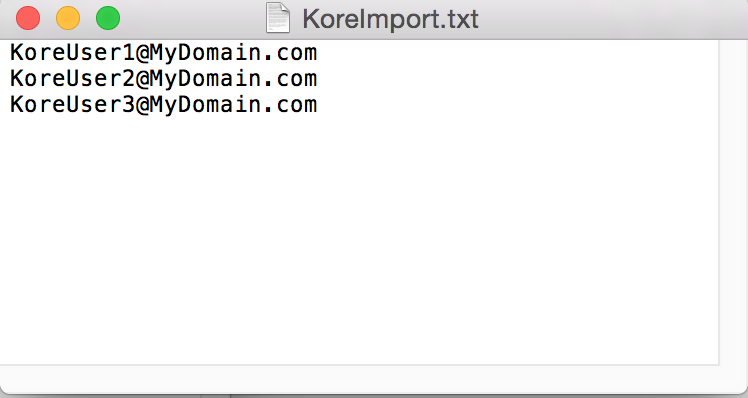
一括招待ファイルをアップロードする
このトピックでは、ユーザーのメール アドレスを含むファイルをアップロードして、ユーザーをアカウントの Kore.ai ユーザーになるために招待する方法について説明します。一括招待ファイルのアップロード
- [登録] モジュールの [一括招待] ページで、[ファイルを選択]をクリックします。
- 前のセクションで説明したように作成した一括招待ファイルに移動し、[開く]をクリックします。ファイル名は、[ファイルを選択] ボタンの右側に表示されます。
- [招待状を送信]をクリックします。招待状を送信ボタンの直後に、インポートのステータスが表示されます。
- 詳細をここに表示リンクをクリックして、インポートの詳細を確認します。さらに、ファイル ベースの一括ユーザー招待履歴リンクをクリックして、以前の一括招待インポートからインポート ステータスを確認できます。
次の画像は、アップロードの詳細の場所を示しています。 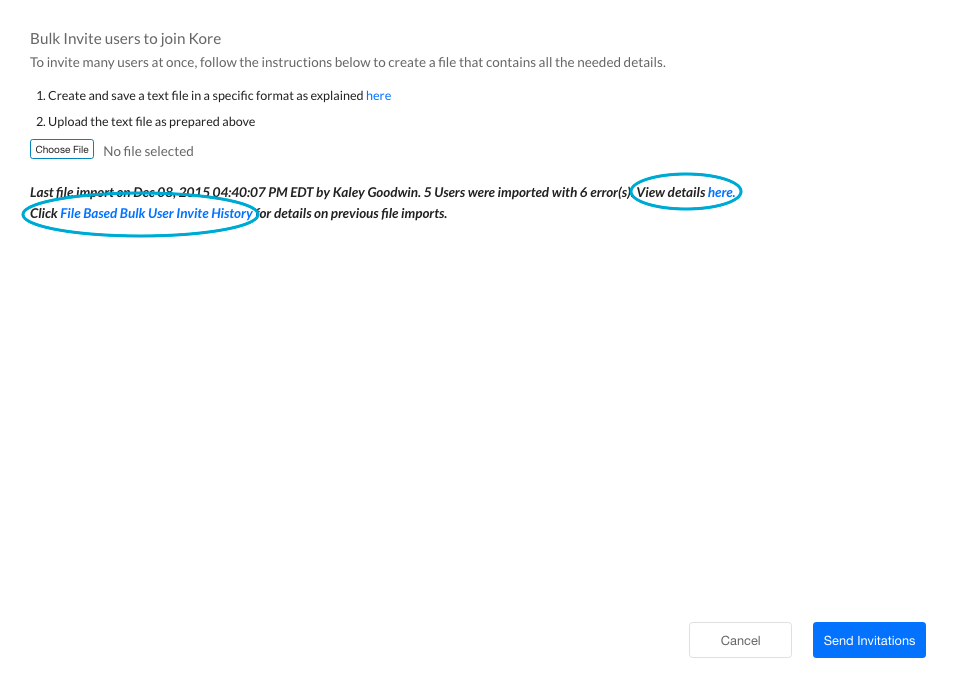
結果を表示する
必要に応じて、ユーザーごとに一括招待のインポート操作の結果を確認できます。一括ユーザー インポートの結果を表示する場合
- [登録] モジュールの [一括招待] ページで、ここに詳細を表示をクリックします。
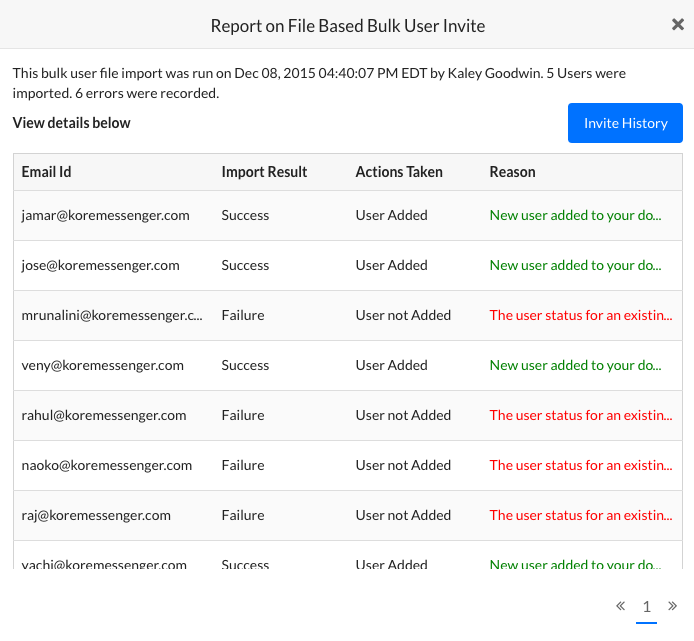
- 次の図に示すように、ファイル ベースの一括ユーザー招待に関するレポート ダイアログが表示されます。
[ 招待履歴]をクリックして一括ユーザー招待の履歴ダイアログを開き、以前の日付のレポートを選択します。
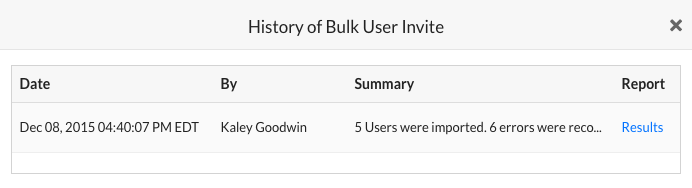
履歴の表示
インポートの結果とともに、すべての過去の一括招待インポート操作を確認できます。一括ユーザー招待の結果を表示する場合
- [登録 >一括招待] ページで、[ファイル ベースのユーザーの一括招待履歴]をクリックします。
- 次の図に示すように、一括ユーザー招待の履歴ダイアログが表示されます。
- インポートの結果を表示するには、表示するインポートのレポート列で [結果]をクリックします。
- 次の図に示すように、ファイル ベースの一括ユーザー招待に関するレポート ダイアログが表示されます。