これは、Kore.ai ボットと独自の Web アプリケーションとの連携に使用するライブラリのコレクションである Kore.ai ボット Web SDK の インスタンスをセットアップして実行するための、エンド ツー エンドのチュートリアルです。これは、 Kore.ai ボットを独自の Web アプリケーションに統合するために使用できるライブラリのコレクションです。
Web SDK チュートリアルの概要
このチュートリアルでは、Kore.ai のサンプル ボット、ボットをホストするためのテスト アプリケーション、および JSON Web トークン (JWT) 生成 Web サービスをインストールします。その際、ローカル サーバー上のボットと Kore.ai ボット プラットフォームとの通信に、ローカル ホスト サーバーを使用します。以下のリストでは、Web SDK のインストールと設定に必要な一般的な手順を説明しています。
- 統合するボットの構築 ー このチュートリアルでは、フライト情報や位置情報、天気予報を取得するために、オープン API を使用する旅行計画サンプル ボットをインストールします。
- Web/モバイル クライアント チャネルの設定 ー Web SDKで、旅行計画サンプルボットを使用するには、Web/モバイル クライアント チャネル用にボットを設定する必要があります。
- 新規クライアント アプリの作成 ー 旅行プ計画サンプル ボットに Web/モバイル クライアント チャネルを設定する場合、クライアント アプリを作成し、認証トークンの生成に使用する JWT 署名アルゴリズムを選択する必要があります。
- ボットの公開 ー 旅行計画サンプルボットの設定が完了したら、ボットをボット管理者に送信して承認を得るためのボットを公開する必要があります。
- ボットの承認とデプロイ ー ボット管理コンソールで、公開されたボットとタスクを承認してデプロイする必要があります。
- Node.js のダウンロードとインストール ー テスト アプリケーションのボットと Kore.ai ボット プラットフォームとの通信には、Web SDK の JWT トークン生成 Web サービスのホストに使用される Node.js をインストールする必要があります。
- テスト アプリケーションのダウンロードと解凍 ー テスト アプリケーションのSDKApp は、コンピュータのローカル ホスト サーバーを使用して、Kore.ai ボットを Web ページ上のチャネルとしてホストするアプリケーションをシミュレートするために使用されます。
- Kore.ai Web SDK のダウンロードと解凍 ー Web SDK には、Web/モバイル クライアント チャネルを使用して、テストアプリケーションでボットと通信したり実行するために使用されるライブラリが含まれています。お使いのコンピュータに合わせて、index.html ファイルの設定を行う必要があります。
- アプリケーションの起動と Web ブラウザでのボットの表示 ー ターミナル ウィンドウで、JWT サービスを起動し、Web ブラウザでボットを表示します。
それでは、実装についての詳細をひとつひとつ見ていきましょう。
Kore.ai Web SDK のインストールと実行
このセクションでは、Web SDK を使用した Kore.ai サンプル ボットと、コンピュータのローカル ホスト上で動作するテスト アプリケーションを実行する方法について、詳細な手順を説明します。まず、テスト アプリケーションで実行するボットを構築し、そのボットを Web/モバイルクライアント チャネルで実行できるように設定する必要があります。このチュートリアルでは、サンプル ボットをインストールします(詳しい手順についてはこちらをご参照ください)。
- ボットビルダーにログオンし、[+ 新規ボット] の隣にある下向き矢印をクリックし、[サンプルボットのインストール] を選択します。
- [旅行計画サンプル] にカーソルを合わせて、[インストール] をクリックします。
- 「旅行計画サンプルが正常にインストールされました」のメッセージが表示され、ボットの左のナビゲーションメニューにサンプルボットが追加されます。
次のセクションでは、新しいクライアント アプリを作成し、チャネル設定を定義することで、旅行計画サンプル ボットの Web/モバイル クライアント チャネルを定義します。詳しい手順についてはこちらをご覧ください 。
- ボットビルダーのトップメニューで、[デプロイ] タブを選択します。
- 左側のメニューで、[システム連携 > Web/モバイル SDK] をクリックします。
- アプリの選択ドロップダウンリストで、[アプリの作成] をクリックします。"クライアント アプリの作成" ダイアログが表示されます。
- “名前” フィールドに、アプリの名前を入力します。例: マイ SDK クライアント アプリ.
- [JWT 署名アルゴリズム] セクションでは、[HS256] を選択して認証トークンを生成します。
- [次へ > 完了] をクリックします。
- 「Web/モバイルクライアント チャネル」ページが以下の JWT 資格情報とともに表示されますので、これらの詳細をすべてメモしてください。これらは後ほど Web SDK のセットアップで使用します。
- ボット名
- ボット ID
- クライアント ID
- クライアント シークレット
- [保存] をクリックします。
ボットが作成され、Web/モバイル チャネル用に定義されたので、ボットを公開してデプロイする準備が整いました。
- [デプロイ] タブで [ボット管理 > 公開] をクリックします。
- [公開」ページで、すべてのタスクを選択し、[続行] をクリックします。
- コメントを入力し、公開を [確認] します。
エンタープライズの開発者がボットを公開した後、そのボットを承認し、使用するユーザーに割り当てる必要があります。
- ボットの対象ユーザーがエンタープライズ ユーザーと一般ユーザーのどちらに設定されているかに応じて、ボット管理者コンソールで以下のいずれか 1 つのボット デプロイメントを行います。以下のいずれか 1 つを完了させます:
- ボット管理者コンソールのボット管理vモジュールの「エンタープライズ ボット」ページでデプロイする旅行計画サンプル ボットの[省略記号] アイコンをクリックし、[ボット タスクの管理] をクリックします。「ボットタスクの管理" ダイアログが表示されます。
- 「ボットのタスク" フィールドで、
 展開アイコンをクリックして、利用可能でデプロイされたタスクを表示し、このボットのすべてのタスクを選択して、 [確認]をクリックします。
 - 「ボット タスクの管理" ダイアログで [確認]をクリックします。「ボットのステータスが正常に変更されました」というメッセージが表示されます。
- 「エンタープライズ ボット」ページで、ユーザーを割り当てたい旅行計画サンプル ボットの [省略記号] アイコンをクリックし、[ボットとタスクの割り当て] をクリックします。
- "ボットとタスクの割り当て" ダイアログが表示されます。自分自身を含むすべてのタスクについて、ボットをユーザーに割り当てます。
次に、Web SDK とテスト アプリケーションに必要なソフトウェア パッケージのダウンロード、解凍、インストール、設定を行い、ローカル ホスト サーバー上でボットを実行します。
- node.js をコンピュータにダウンロードしてインストールするには、https://nodejs.org/g/en/download/ へ進み、Mac の場合は .pkg、Windows の場合は .msiを選びます。
- ターミナル ウィンドウで
node -vコマンドを実行して、インストールとバージョンを確認します。例:v6.10.2。 - Kore ボットを統合する アプリをホストする Web サーバーの SDKApp/sdk フォルダを探します。このチュートリアルでは、テスト アプリケーションと JWT Web サービスをダウンロードするために SDKAppをクリックして、解凍します。
- Kore.ai Web SDK をダウンロードするには、https://github.com/Koredotcom/web-kore-sdkへ進み、[ダウンロード] をクリックします。上述のステップで、すべてのファイルを抽出して、上記の …/SDKApp/sdk フォルダに入れます。リリースの互換性は、リリース ノートで確認します。
- [デプロイ > チャネル] メニューの「ボットビルダー Web/モバイル クライアント チャネル」ページから、(上記のステップ 8 で述べたように)以下をコピーします。
- clientSecret
- clientId
- ボット名
- プラットフォームの Ver 7.2 では、Web SDK のリポジトリ構造が大きく変更されました。手順は、どのリポジトリを使用しているかによって異なります。
- プラットフォームの Ver 7.2 以降、つまり 2020 年 2 月以降にダウンロードした最新の Web SDK ファイルの場合は、この手順に従ってください。
- テキスト エディターを使用して、…/SDKApp/sdk/UI フォルダー内の index.html ファイルを開きます。以下の行を更新して、UI フォルダへのパスを追加します:
<script src="libs/jquery.js" type="text/javascript"></script><script src="libs/jquery.tmpl.min.js" type="text/javascript"></script><script src="libs/jquery-ui.min.js" type="text/javascript"></script><link href="libs/jquery-ui.min.css" rel="stylesheet"></link><script src="chatWindow.js" type="text/javascript"></script><link href="chatWindow.css" rel="stylesheet"></link> - kore-config.js を開き、botOptions パラメータの botInfo、clientId、 clientSecret を変更し、さらにメールアドレス ID を userIdentity に書き換えられます。
“clientSecret”: “{client secret}” $.ajax({ url: “http://localhost:3000/api/users/getJWT”, //this is sample url of a localhost.//This should include the url where you are hosting the bot. botOptions.userIdentity = ‘ ‘; // Provide users email id here botOptions.clientId= "{client id} "; // secure client-id _botOptions.botInfo= {name:"{bot name}","id":"{bot id"}; // Kore bot name is case sensitive })JWTUrl は、アプリ (Kore.ai ボットを連携させたい場所)がホストされている場所を指します。このチュートリアルでは、(ステップ 19 でセットアップした)JWT サーバーを使用しているため、ここでも同じものを使用しています。
- kore-config.js で、ボットの配信対象が設定されていることを確認します。以下のいずれか 1 つを選択します:
"isAnonymous": < false >;エンタープライズ ユーザー向けにボットをデプロイしている場合は、次のように設定しますbotOptions.userIdentity = '< Your email ID>';ー または ー"isAnonymous": < true >;ボットが コンシューマー向けにデプロイされている場合
- テキスト エディターを使用して、…/SDKApp/sdk/UI フォルダー内の index.html ファイルを開きます。以下の行を更新して、UI フォルダへのパスを追加します:
- この手順は、プラットフォームの Ver 7.2 以前、つまり 2020 年 2 月以前にダウンロードされた古い Web SDK ファイルに対して有効です。
- テキスト エディターを使用して、…/SDKApp/sdk/UI フォルダー内の index.html ファイルを開きます:
- 以下の行を更新して、UI フォルダへのパスを追加します:
<script src="libs/jquery.js" type="text/javascript"></script><script src="libs/jquery.tmpl.min.js" type="text/javascript"></script><script src="libs/jquery-ui.min.js" type="text/javascript"></script><link href="libs/jquery-ui.min.css" rel="stylesheet"></link><script src="chatWindow.js" type="text/javascript"></script><link href="chatWindow.css" rel="stylesheet"></link> - ローカル ホストとして実行するには、以下のパラメータを更新します
“clientSecret”: “{client secret}” $.ajax({ url: “http://localhost:3000/api/users/getJWT”, //this is sample url of a local host.//This should include the url where you are hosting the bot. botOptions.userIdentity = ‘ ‘; // Provide users email id here botOptions.clientId= "{client id} "; // secure client-id _botOptions.botInfo= {name:"{bot name}","id":"{bot id"}; // Kore bot name is case sensitive })メモ: 上記のコードスニペットに記載されている URL は、アプリ(Kore.ai のボットを統合させたい場所)がホストされている場所を指しています。このチュートリアルでは、(ステップ 18 で i セットアップした)JWT サーバーを使用しているため、ここでも同じものを使用しています。
- 以下のいずれか 1 つを選択してください:
"isAnonymous": < false >;エンタープライズ ユーザー向けにボットをデプロイしている場合は、次のように設定しますbotOptions.userIdentity = '< Your email ID>';ー または ー"isAnonymous": < true >;ボットがコンシューマー向けにデプロイされている場合
- 以下の行を更新して、UI フォルダへのパスを追加します:
- テキスト エディターを使用して、…/SDKApp/sdk/UI フォルダー内の index.html ファイルを開きます:
- プラットフォームの Ver 7.2 以降、つまり 2020 年 2 月以降にダウンロードした最新の Web SDK ファイルの場合は、この手順に従ってください。
- 変更を保存します: これで、JWT トークン生成サービスを開始し、設定した Web SDKを 使用して、ローカルの Web ブラウザからテスト アプリケーションにアクセスする準備ができました。
- ホーム ディレクトリに移動します
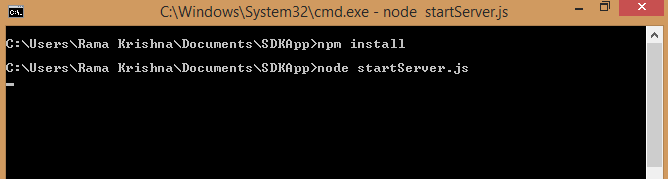
cd SDKApp - 以下のコマンドで依存関係をインストールします
npm install
- SDKApp の起動
node startServer.js - localhost:3000 を使用して、任意のブラウザでアプリケーションにアクセスします
webSDK 経由でのデータの受け渡し
index.html ファイル内の botInfo にカスタム データを追加することで、チャネルにアクセスするユーザーの追加情報を渡すことができます。
botOptions.botInfo = {name: "Banking Bot", "_id": "<bot_id>", customData: "value" };
電話番号、住所、所在地などの詳細は、 カスタムデータ内で渡せるデータのサンプルです。customData コンテキスト オブジェクトの BotUserSession の下の lastMessage からアクセスできます。このデータは、webSDK を使用しているユーザーに固有のもので、ユーザー セッションの間は有効です。複数の値はキーと値のペアとして、 index.html ファイルの customData に追加することもできます:
botOptions.botInfo = {name:"<bot_name>", "_id":"<bot_id", customData:{"name":"John", "age":30, "cars": {"car1":"Ford", "car2":"BMW", "car3":"Fiat" } } };

Passing Mapped Identities
The Web/Mobile SDKs support the passing of mapped identities of the users when they switch from one identity to another while interacting with the bot. This process allows the users to continue any ongoing conversation initiated using a previous identity.
For example, a user may have started the conversation with the bot using an anonymous or randomly generated identity. After exchanging a few messages, the user may become an authenticated or known user by logging into your website or any application. At this point, the user’s known identity can be passed to the bot from the SDK as part of the ‘JWT Grant API’ call using the parameter identityToMerge. The Platform uses this information to merge the user identities and allows the user to resume an ongoing conversation using the new known identity.
{
 "iat": 1611810186883,
 "exp": 1611813786.883,
 "aud": "https://idproxy.kore.com/authorize",
 "iss": "cs-d3042d3e-7da4-55da-a94d-783349270cc0",
 "sub": "knowuser1@test.com",
 "isAnonymous": "false",
 "identityToMerge": "anonymoususer1@test.com"
}
The following scenarios describe the bot behavior when dealing with the new identity and merged identity:
- When both the new and merged identities are not present in the system, then the new identity is created and a new conversation is started using new identity
- When the new identity is present but the merged identity is not present in the system, then the conversation is started or continued (in case of an active session) using new identity
- When the merged identity is present but the new identity is not present in the system, then the new identity is created and the conversation is continued using the new identity. All references to the merged identity are replaced with the new identity and the merged identity is removed.
- When both the merged identity and the new identity are present in the system and the new identity does not have an active session, then the conversation is continued using the new identity. All references to the merged identity are replaced with the new identity and the merged identity is removed.
- When both the merged identity and the new identity are present in the system and both have an active session, then the merged identity’s conversation is continued using the new identity. All references to the merged identity are replaced with the new identity and the merged identity is removed. The active session of the new identity is marked as “Drop-off” and closed
Due to the above-mentioned behavior in the user identity following changes can be seen:
- Analytics and Chat History will be updated associating all the sessions related to the merged identity with the new identity
- The sessions data is updated replacing the merged identity with the new identity
- The Billing Session tracking merged identity’s conversation will be marked as new identity
webSDK 経由のカスタム メタタグ
Ver 8.0 のプラットフォームのリリースにより、サポートされているすべての内部チャネル(Web SDK/IVR/IVRVoice/Webhook チャネル)からカスタム メタタグを直接追加できます。セッション、ユーザー、およびメッセージ レベルのメタタグを定義できます。これらのタグは、会話セッションが作成されるとすぐに追加されます。
botOptions.botInfo = {name:"<bot_name>", "_id":"<bot_id",
                           customData :{"name":"John"},
                           "metaTags": {
                                 "messageLevelTags": [{ "name": "tag1", value: "message"}],
                                 "sessionLevelTags": [{ "name": "tag2", value: "session"}],
                                 "userLevelTags": [{ "name": "tag3", value: "user"}]
                                 }
                          };
一般的に発生するエラー
- 誤った URL が記載されていると、ユーザーに対して 404 エラーが表示されます。URL を再確認します。URL は、自分の Web SDK でボットをホストしているか、Kore Web SDK でホストしているかによって異なります。Kore Web SDK であれば、URL は
http://demo.kore.net:3000/users/sts 7です。自社の Web SDK でホストしている場合は、それぞれの URL を入力します。 - missing/Invalid jwt.sub(): このエラーは、index.html ファイルにユーザーのメールアドレスが指定されていない場合に、エンタープライズ ボットで発生します。index.html 内で、以下に示すようにユーザーの識別情報を記述します
botOptions.userIdentity = ‘x@gmail.com’;// Provide users email id here. - 見つかりませんでした: clientID が間違っているか、clientID が指定されていない場合に、このエラーが表示されます。Bot – API Extensions オプションから正しい ClientID を確認します。
botOptions.clientId = “{clientID}”; // secure client-id - jwt の検証エラー: index.html 内の clientSecret に誤りがあります: ボット – API 拡張機能 オプションで、正しい ClientID を確認します。
“clientSecret”: "{clientSecret}” //provide clientSecret here
テスト アプリケーションとローカル ホスト サーバーを使用して Web SDK をインストールしてテストした後、同じコンセプトで自分のエンタープライズ アプリケーションに Web SDK をインストールして設定できます。Web SDK の index.html ファイル内のファイル パスと URL を、自身の Web サイトとサーバーを指すように再設定し、エンタープライズの JWT 資格情報を持つ Kore.ai ボットを Web/モバイル クライアント チャネルに設定するだけです。