これからサンプルのバンキングBotを作成するステップを詳しく説明しています。このBotは開発者向けドキュメントのハウツーセクションで紹介されているさまざまな使用事例のシナリオで使用されます。前提条件:
- Kore.aiのBotプラットフォームへのサインアップが必須となります
- Bot構築の基本についておさえている必要があります(こちらのリンクを参照してください)
- 簡単なBotを作成している必要があります(例としてこちらを参照してください)
- バンキングBotを作成している必要があります(例としてこちらを参照してください)
Botの概要
構築するBotは基本的な銀行取引を実行します。このBotは次のことを行います。
- ユーザーが入力した口座番号と口座タイプに基づいて口座残高を取得します(こちらをご覧ください)。
- 残高から口座を更新します(こちらをご覧ください)。
- 指定した金額をユーザーの口座から受取人口座に送金します。
資金の移動タスクを追加しましょう。
資金の移動のインテント
- 資金の移動タスクでは、受取人と支払人の口座番号を入力することが求められます。
- 次に、送金する金額の入力を求められます。
- 次に、サービスコールを行って口座を適切に更新します。
- 成功または失敗を示すメッセージが表示されます。
ステップ1:ダイアログタスク
Botの最初のステップとして、インテントダイアログを追加する必要があります。インテントダイアログは、ユーザーとBotの会話フローの最初のステップとなります。
- 残高取得および残高確認の2つの事前設定されたタスクでバンキングBotを開きます。
- 左側のナビゲーションメニューからBotタスクを選択します。
- ダイアログタスクの横にある+をクリックしてください。
- Botタスクページが開きます。
- 次の詳細事項を入力します。
- インテント名-インテント名を入力します。これはダイアログをトリガーするフレーズとなります。インテント名は3〜4語以内のシンプルなものにしてください(「資金の移動」など)。
- 詳細オプションで、説明およびその他のダイアログ関連の詳細を追加することができます。デフォルト設定を保持しておきましょう。
- 作成して続行をクリックします。
- ユーザーインテントのプロパティパネルが表示されます。デフォルトのプロパティを保持しておきます。
- ユーザーインテントのプロパティパネルを閉じます。
ステップ2:エンティティノード
エンティティノードは通常、ユーザーから情報を収集するために使用されます。ここでは、受取人と支払人の口座番号および送金額に対するユーザー入力を取得するために使用します。
- ユーザーインテントノードの横にある+をクリックします。
- エンティティオプションを選択します。
- 新しいエンティティノード+をクリックします。
- エンティティノードのプロパティパネルが表示されます。
- 次の詳細事項を入力します。
- 名前:PayerAccount
- 表示名:支払人口座
- タイプ:数
- ユーザープロンプト:次のテキストを入力し、Enterキーを押して保存します。
Enter the Account from where you want to transfer funds.
- PayerAccountエンティティのプロパティパネルを閉じます。
- 上記のステップを繰り返して、次の詳細で別のエンティティを追加します。
- 名前:PayeeAccount
- 表示名:受取人 口座
- タイプ:数
- ユーザープロンプト:次のテキストを入力し、Enterキーを押して保存します。
Enter the Account to which you want to transfer funds.
- PayeeAccountエンティティのプロパティパネルを閉じます。
- 上記のステップを繰り返して、次の詳細で別のエンティティを追加します。
- 名前:金額
- 表示名:金額
- タイプ:数
- ユーザープロンプト:次のテキストを入力し、Enterキーを押して保存します。
Enter the amount to transfer.
- 金額エンティティのプロパティパネルを閉じます。
次のステップでは、支払人と受取人の両方の口座残高を更新します。すでに残高確認タスクがあるので、現在のタスクから実行する方法を見ていきます。
ステップ3:ダイアログタスクの実行
事前定義されたダイアログタスクは、別のタスク内からトリガーできます。その方法を見ていきましょう。
- 金額エンティティノードの横の+をクリックします
- ダイアログタスクを選択します
- 指定されたタスクリストから、必要なタスクであるUpdateBalanceを選択します
- ダイアログノードのプロパティパネルが表示されます
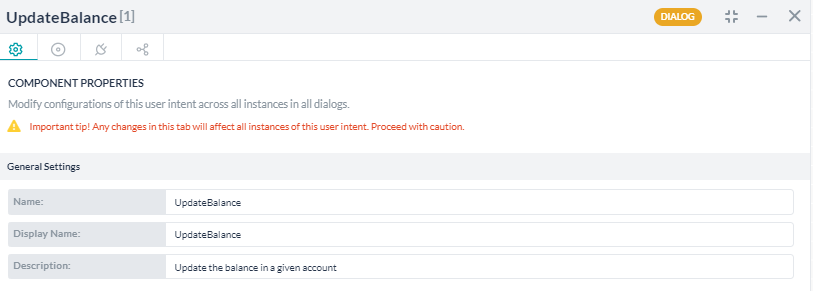
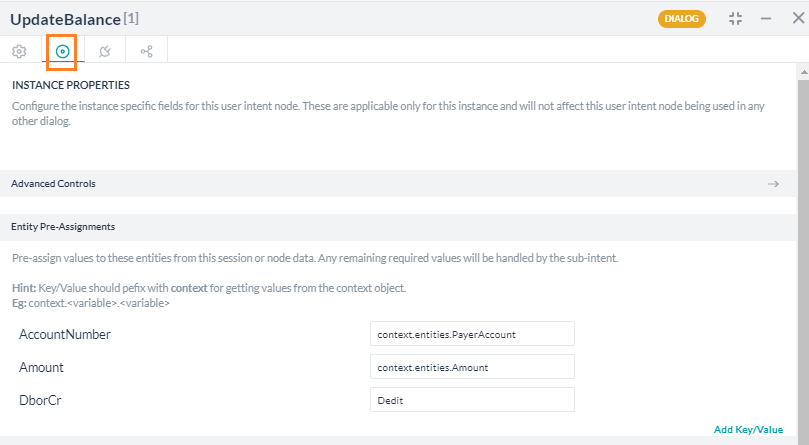
- インスタンスプロパティタブに移動して、次の詳細事項を入力します。
- エンティティの事前割り当てセクション-ダイアログタスクに必要なエンティティ値ですが、ここに入力されていない場合、ユーザーは同じ値を入力するように求められます。前のステップで定義したエンティティを介して情報をすでに収集しているため、ユーザーが入力した値をUpdateBalanceタスクに渡します。
- AccountNumber: context.entities.PayerAccount
- 金額: context.entities.Amount
- DBorCR: デビット(支払人の口座から送金金額を差し引く必要があります)

- UpdateBalanceダイアログのプロパティパネルを閉じます
- 同じステップを繰り返して、受取人口座を次の値で更新します
- エンティティの事前割り当てセクション
- AccountNumber: context.entities.PayeeAccount
- 金額:context.entities.Amount
- DBorCR: クレジット
- UpdateBalanceダイアログのプロパティパネルを閉じます

ステップ4:メッセージノード
メッセージノードは、Botからユーザーへメッセージを表示するために使用されます。ここでは、メッセージノードを使用して残高を表示します。
- UpdateBalance [2] サービスノードの横の+をクリックします
- メッセージを選択し、新しいメッセージノード+をクリックします。
- メッセージノードのプロパティパネルが表示されます。
- 次の詳細事項を入力します。
-
- 名前:FinalMessage
- 表示名:最終メッセージ
- Botの応答:
-
- Botの応答プロパティパネルで、接続アイコンをクリックして接続タブを開きます。
- デフォルトの接続を接続なしからダイアログの終了に変更します。
- 保存をクリックします
- プロパティパネルを閉じます。
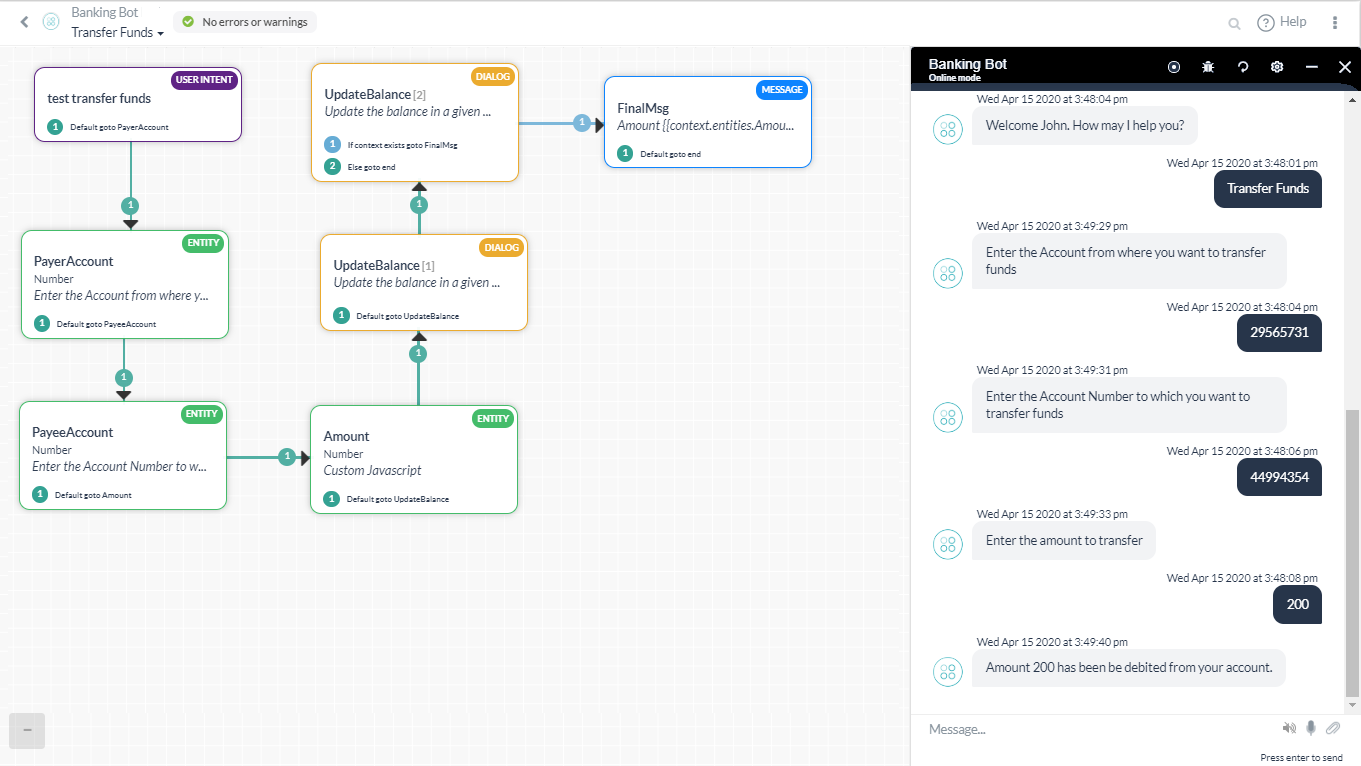
テスト
ダイアログタスクをテストするには、右下隅にある「Botとの会話」を使用できます。次の発話(インテント名)を入力してください「資金の移動」次のBotの指示に従ってください。
- 支払人口座を入力してください-02929664
- 受取人口座を入力してください-44994354
- 送金金額を入力してください-200
- 成功メッセージを参照してください。
