Bot 管理者コンソールの [セキュリティおよび管理] モジュールにあるKore.ai [シングル サインオン] ページで、以下を使用して Kore.ai 管理対象ユーザー用のシングル サインオン(SSO)認証を設定できます。
- OpenID コネクト
- セキュリティ アサーション マークアップ ランゲージ (SAML)
- WS-フェデレーション サインオン プロトコル
SSO により、既存の ID プロバイダーを使って Kore.ai アプリケーションに簡単にアクセスすることができます。SSO を利用することで、ユーザーは、例えば会社のアカウントに一度ログオンすれば、ユーザーが自分の Kore.ai アプリケーションにアクセスする際に、同じログイン認証情報をシステムが自動的に使用することができます。たとえば、WS-フェデレーションサインオンプロトコルを使用すると、Microsoft® Active Directory® サーバー クレデンシャルを使用して、ユーザーが Kore.ai アプリケーションにサインオンできるようになります。以下の説明は、Bot 管理者コンソールの[セキュリティおよび管理] モジュールにある[シングル サインオン] ページを示しています。 
SSO の有効化または無効化
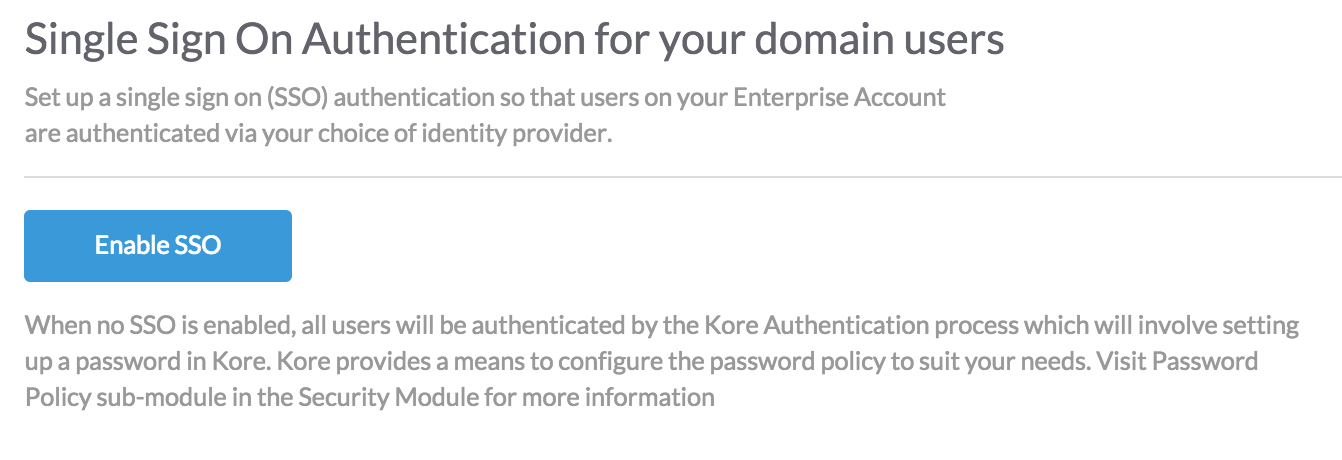
会社に必要なセキュリティに応じて、Kore.ai アプリケーションにアクセスするユーザーのシングル サインオン(SSO)を有効または無効にすることができます。SSOを無効にした場合や、SSO認証の有効期間が終了した場合、ユーザーはクレデンシャルを作成して、それを使ってログオンする必要があります。アカウント固有のパスワード ポリシーが定義されていない場合は、デフォルトの Kore.ai パスワード ポリシーがユーザーに対して自動的に有効になります。
シングル サインオンを有効にするには
- [セキュリティおよび管理] モジュールにある[シングル サインオン] ページで、[SSO を有効にする]をクリックします。

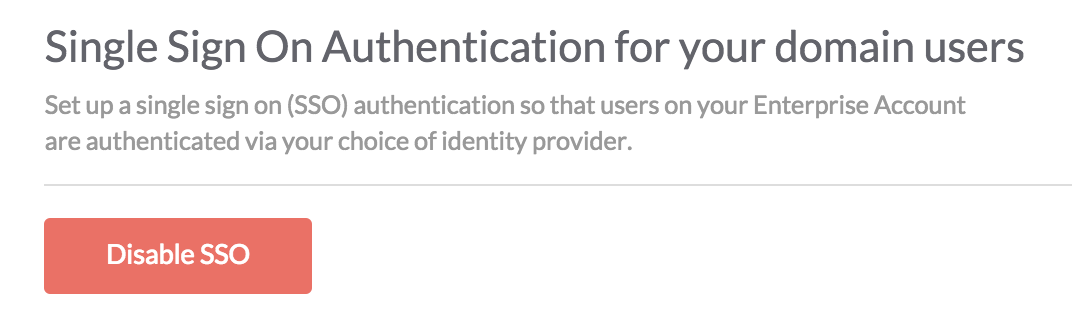
シングル サインオンを無効にするには
- [セキュリティおよび管理] モジュールにある[シングル サインオン] ページで、[SSO を無効にする]をクリックして、ユーザー パスワード ポリシーを設定します。
OpenID コネクト
以下の手順で、Bot 管理者コンソールの[セキュリティおよび管理] モジュールで、Open ID コネクト プロトコルを使用して SSO を設定します。Kore.ai は、WS-フェデレーションと SAML コネクト プロトコルもサポートしています。
- Bot 管理者コンソールの[セキュリティおよび管理] モジュールにある[シングル サインオン] ページで、[SSO を有効にする]をクリックします。
- [適切なサインオン プロトコルの選択] セクションで、[OpenID コネクト]をクリックします。
- [OpenID コネクト の SSO の設定] セクションで、ID プロバイダー、たとえば、[Google でサインイン]を選択します。
- [保存]をクリックします。
- ID プロバイダー情報が正常に更新されましたメッセージが、ページの上部に表示されます。
WS-フェデレーション
以下の手順で、Bot 管理者コンソールの[セキュリティおよび管理] モジュールで、WS-フェデレーション プロトコルを使用したシングル サインオン(SSO)を設定します。
- Bot 管理者コンソールの[セキュリティおよび管理] モジュールにある[シングル サインオン] ページで、[SSO を有効にする]をクリックします。
- [適切なサインオン プロトコルの選択] セクションで、[WS-フェデレーション]を選択します。
- [WS-フェデレーションの SSO の設定] セクションでは、[ID プロバイダー]を選択し、以下の設定を行います。
- Windows Azure®
- Azure AD サインオン エンドポイントの URL – Azure を使用して、Kore.ai がサインオンとサインオフのリクエストを送信する URL です。認証の応答は、Azure Active Directory の構成設定で定義された応答 URL に送信されます。
- Azure AD フェデレーションのメタデータ ドキュメント – Azure Active Directory での認証に使用されるフェデレーション メタデータ ドキュメントの URL です。
- その他 – Azure 以外の汎用 WS-フェデレーション ID プロバイダーの設定
- AD サインオン エンド ポイントの URL – Kore.ai がWS-フェデレーションの ID プロバイダーを使って、サインオンおよびサインオフのリクエストを送る URL です。
- AD フェデレーションのメタデータ ドキュメントの URL – Active Directory での認証に使用される WS-フェデレーション メタデータド キュメントの URL です。
- Windows Azure®
-
シングル サインオン プロバイダーの管理コンソールでは、Kore.ai と SSO プロバイダー間のデータ交換に使用される URL も定義する必要があります。SSO プロバイダーによって URL 名が異なる場合がありますが、これらの URL を定義する必要があります。
- SAML 2.0
- LDAP 属性: nameId
- クレーム属性: uri
- SAML 1.1
- LDAP 属性: nameId
- クレーム属性: emailAddress
- アサーション コンシューマー サービス(ACS)の URL または https://idp.kore.ai/authorize/callback としての コールバック URL。
- ADFS を使用する際には、認証値に加えて、ユーザーの電子メール アドレスを Active Directory から LDAP 属性として渡す必要があります。詳細については、ADFS の属性を参照してください。
- [保存]をクリックします。
- SAML 2.0
ID プロバイダー情報が正常に更新されましたメッセージが、ページの上部に表示されます。
SAML
セキュリティ アサーション マークアップ ランゲージ(SAML) とは、セキュアートークンを使用するウェブ ブラウザのシングル サインオン(SSO) の標準プロトコルです。 SAML は、すべてのパスワードを完全に排除し、代わりに標準的な暗号とデジタル署名を使用して、ID・プロバイダから SaaS アプリケーションに安全なサインイン・トークンを渡します。
SAML は、ID・プロバイダとサービス・プロバイダが互いに別々に存在することを可能にするソリューションを提供します。ユーザーが SAML 対応アプリケーションにログインすると、サービス・プロバイダは適切な ID プロバイダに認証を要求します。ID プロバイダはユーザーの資格情報を認証した後、ユーザーに対する認可をサービス・プロバイダに返し、ユーザーはアプリケーションを使用できるようになります。
SAMLの仕組み
SAML SSO は、ユーザーの ID をある場所(ID プロバイダ)から別の場所(サービス・プロバイダ)に移すことで機能します。これは、デジタル的に署名された XML 文書の交換によって行われます。
次のようなシナリオを考えてみましょう。ユーザーは、ID プロバイダとして機能するシステムにログインします。ユーザーは、サポート・アプリケーションやアカウンティング・アプリケーションなどのリモート・アプリケーション(サービス・プロバイダ)にログインします。次のようになります。
- ユーザーが、イントラネット上のリンク、ブックマークなどを使用してリモート・アプリケーションにアクセスすると、アプリケーションがロードされます。
- アプリケーションはユーザーの発信元を(アプリケーションのサブドメイン、ユーザーの IP アドレスなどで)識別し、ユーザーを ID プロバイダにリダイレクトして認証を求めます。これが認証リクエストです。
- ユーザーは、ID プロバイダとの既存の有効なブラウザ・セッションを持っているか、ID プロバイダにログインしてセッションを確立します。
- ID プロバイダは、ユーザーのユーザー名または電子メール・アドレスを含む XML 文書の形式で認証応答を作成し、X.509 証明書を使用して署名し、この情報をサービス・プロバイダに掲示します。
- サービス・プロバイダは、ID プロバイダをすでに知っており、証明書のフィンガープリントを持ってい るので、認証応答を取得し、証明書のフィンガープリントを使用してそれを検証します。
- ユーザーのアイデンティティが確立され、ユーザーにアプリへのアクセスが提供されます。
Kore.ai の導入
Kore.ai Bots プラットフォームで SAML を利用するには、2つの方法があります。
- ボット ビルダーにアクセスするための開発者認証用。
- ボット にアクセスするためのユーザー認証用。
ユースケース 1: Bot ビルダーの認証。
エンタープライズは、エンタープライズ SSO を使って Bot ビルダー ツールへのアクセスをセットアップすることができます。Bot の開発者や管理者は、エンタープライズの ID プロバイダーが行うSSOを利用して、Bot ビルダーにログインすることができます。
Kore.ai Bot プラットフォームからの SSO フロー: SAMLを使って SSO を設定した場合の Kore.ai Bot プラットフォーム内の流れは以下の通りです。
- クライアントは、ユーザーの詳細を使って(ログイン URL を使って) Kore アプリ サーバを呼び出し、ID プロバイダ情報を取得します(SAML)。
- Kore アプリ サーバは、Kore idproxy サーバとのハンドシェイク要求を開始します。
- Kore idproxy サーバは、ユーザーの詳細情報を使って、ID プロバイダ(SAML)へのリクエストを開始します。
- 認証に成功すると、ID プロバイダ(SAML)は、Kore idproxy サーバにアサーション応答を返します。
- ID プロバイダからの応答を検証すると、Kore idproxy サーバは、Kore app サーバへの要求を開始します。
- Kore idproxy サーバからのトークンの認証に成功すると、Kore app サーバはユーザーにアクセスを許可します。
v7.2 以降のリリースでは、Kore.ai は IDP が開始したフローをサポートしており、プラットフォームは SAML 応答で直接ポストバックを取得し、アサーションを検証し、ユーザーを登録/識別できます。これらのモード(SPベースとIDPベースのフロー)の設定は異なり、以下の設定ステップで説明します。
SAMLを用いた SSO の設定については、以下を参照してください。
ユースケース 2: エンドユーザー認証
このシナリオでは、SSO によるユーザー認証を必要とするカスタマー ポータルやモバイル アプリに Bot チャット インターフェースが組み込まれています。
Bot へのアクセスは、自動的に認証されたユーザーに制限されます。SSO ベースの認証が必要な API の呼び出しを必要とするタスクの場合、開発者は以下のステップを実行できます。
- クライアントでは、開発者はログインしたユーザーの SSO トークンを取得し、Bot SDK API の secureCustomPayload パラメータを使用して Bot に渡す必要があります。
- Bot の開発者は、ダイアログ タスクの中で、カスタムロジックを書いてこのトークンを読み取り、サービス ノードや webhook ノードを使用して行われたセキュア API コールの API ヘッダーとして追加することができます。
クライアントに関するトークン情報は、SSO プロバイダやペイロードに応じて異なるため、開発者はカスタム ロジックを記述する必要があります。
SAMLを用いた SSO の設定
以下の手順で、Kore.ai Bot の管理コンソールで SAML(セキュリティ アサーション マークアップ ランゲージ)プロトコルを使用したシングル サインオン(SSO)を設定します。Kore.ai は、WS-フェデレーションと OpenID コネクトプロトコルもサポートしています。詳細については、シングル サインオンの使用を参照してください。.
- Bot 管理者コンソールの[セキュリティおよび管理] モジュールにある[シングル サインオン] ページで、[SSO を有効にする]をクリックします。
- [適切なサインオン プロトコルの選択] セクションで、[SAML]を選択します。
- [SAMLの SSO の設定] セクションでは、[ID プロバイダー]を選択し、以下の設定を行います。
- Okta – –
- Okta シングル サインオンの URL – Okta用の SSO URL: これは、サービスプロバイダーが開始したSAML フローを有効にするために使用される。
- ID プロバイダー発行者 – ユーザーを認証する機能を含むユーザーIDを提供するエンティティ。
- 証明書 – ユーザー署名の検証に使用される ID プロバイダーからサービス プロバイダーが保存する公開証明書。複数(最大2つ)の証明書を追加したり、既に追加されている無効な証明書を削除したりすることができます。プラットフォームは最新の証明書を認証に使用しますが、それが無効な場合は古い証明書が使用されます。
- SP が開始した SAML フローの ACS URL – これは サービスプロバイダーが開始した SAML フロー用の転送 URL です。
- IDP が開始した SAML フローの ACS URL – これは ID プロバイダーが開始した SAML フロー用のアカウント固有の URL です。
Kore.ai SSO 用のOkta
Oktaで Kore.ai のシングル サインオンを設定するには、まず Kore.ai アプリをOktaアカウントに追加し、URL とセキュリティ証明書を Okta から Kore.ai アカウントにコピーする必要があります。このトピックでは、Kore.ai アプリを Okta アカウントに追加してから、Oktaを使った SSO のための Kore.ai 設定に必要な URL と証明書にアクセスする方法を説明します。
この手順を実行するには、Bot 管理者コンソールの[シングル サインオン] ページで、SAML プロバイダとしてOktaを既に選択している必要があります。
Kore.ai アプリを Okta に追加するには、- Okta にログオンします。
- [ホーム] ページで、[管理者]をクリックします。[ダッシュボード] ページが表示されます。
- 上のナビゲーションバーで、[アプリケーション]をクリックします。[アプリケーション] ページが表示されます。
- [アプリケーションの追加]をクリックします。[アプリケーションの追加] ページが表示されます。
- [アプリケーションの作成]をクリックします。
- [一般設定] に、[アプリ名] を指定し、[次へ]をクリックします。
- [SAML の設定] に、[シングル サインオン URL] を指定します。取得するには、
- Kore.ai Bot ビルダー管理者コンソールにログオンします
- [セキュリティおよび管理] -> [シングル サインオン] ページで、
- [SAML] を有効にした後、[Okta]を選択します
- SP が開始した SAMLフローの ACS URL フィールドには、必要な URL が含まれます
- 対象者 URI フィールドに https://idp.kore.com を入力します
- 注意: オンプレミス アカウントの場合は、SP が開始した SAML フロー用の ACS URL が https://idproxy-dev.kore.com/authorize/callback として表示されます。これを Okta プラットフォームの 「シングル サインオン URL 」として更新し、https://idproxy-dev.kore.com を “対象者 URL “として更新する必要があります。
- emailIdやfirstNameなどの属性情報を、必要に応じて指定できます。
- [終了]をクリックします。
- Okta – –
- [設定] セクションの[サインオン] タブで、[セットアップ指示の表示]をクリックします。[<アプリ名> アプリケーションの SAML 2.0 の設定方法] ページが表示されます。
- 以下に URL をコピーします。
- [ID プロバイダー シングル サインオン ] フィールドを、Kore.ai の [Okta シングル サインオン URL] フィールドに。
- [ID プロバイダー発行者] フィールドを Kore.ai の[ID プロバイダー発行者] フィールドに。
- Okta [X.509 証明書] フィールドで、証明書データをコピーして、そのデータを Kore.ai の[証明書] テキストボックスにペーストします。
注意: —–BEGIN CERTIFICATE—–ヘッダーの後のデータと —–END CERTIFICATE—- フッターの前のデータのみをコピーして、Kore.ai にペーストします。
- Kore.aiで、[保存]をクリックします。これで、Okta ログインのシステム連携は完了です。
ID プロバイダー情報が正常に更新されましたメッセージが、ページの上部に表示されます。設定をテストするには、Kore.ai Bot 管理者コンソールをログオフし、再度ログオンします。Okta ポータルが表示されます。
- OneLogin – 詳細については、以下を参照するか、 OneLogin ドキュメントで、Kore.ai の SSO の設定を参照してください。
- SAML 2.0 エンドポイント – サービスプロバイダーが開始したSAML フローを有効にするための OneLogin の HTTP SSO エンドポイント (例えば、https://app.onelogin.com/trust/saml2/http-post/sso/358111)。
- 発行者の URL – OneLogin 発行者の URL、例えば、https://app.onelogin.com/saml/metadata/358111。
- X.509証明書 – ユーザー署名の検証に使用される ID プロバイダーからサービス プロバイダーが保存する公開証明書。複数(最大2つ)の証明書を追加したり、既に追加されている無効な証明書を削除したりすることができます。プラットフォームは最新の証明書を認証に使用しますが、それが無効な場合は古い証明書が使用されます。
- SP が開始した SAML フローの ACS URL – これは サービスプロバイダーが開始した SAML フロー用の転送 URL です。
- IDP が開始した SAML フローの ACS URL – これは ID プロバイダーが開始した SAML フロー用のアカウント固有の URL です。
Kore.ai SSO 用 OneLogin
OneLoginを使って Kore.ai でシングル サインオンを設定するには、まず Kore.ai アプリを OneLogin アカウントに追加し、OneLogin から URL とセキュリティ証明書を Kore.ai アカウントにコピーする必要があります。このトピックでは、Kore.ai アプリをOneLogin アカウントに追加してから、OneLoginを使った SSO のための Kore.ai 設定に必要な URL と証明書にアクセスする方法を説明します。
この手順を実行するには、Bot 管理者コンソールの[シングル サインオン] ページで、SAML プロバイダとして[OneLogin]を選択しておく必要があります。
Kore.ai アプリを OneLogin に追加するには、
- [OneLogin] にログオンします。
- [APPS] メニューで、[アプリの追加]をクリックします。[アプリケーションの検索] ページが表示されます。
- [検索] フィールドに、Kore.ai を入力してから、[Enter] キーを押します。OneLogin 用 Kore.ai アプリが表示されます。
- Kore.ai アプリをクリックします。[Kore.aiの追加] ページが表示されます。
- 必要に応じて、[OneLogin] ポータルでユーザーに表示される表示名やアイコンを変更し、[保存]をクリックします。Kore.ai アプリがOneLoginの会社のアプリに追加され、Kore.ai アプリページが表示されます。
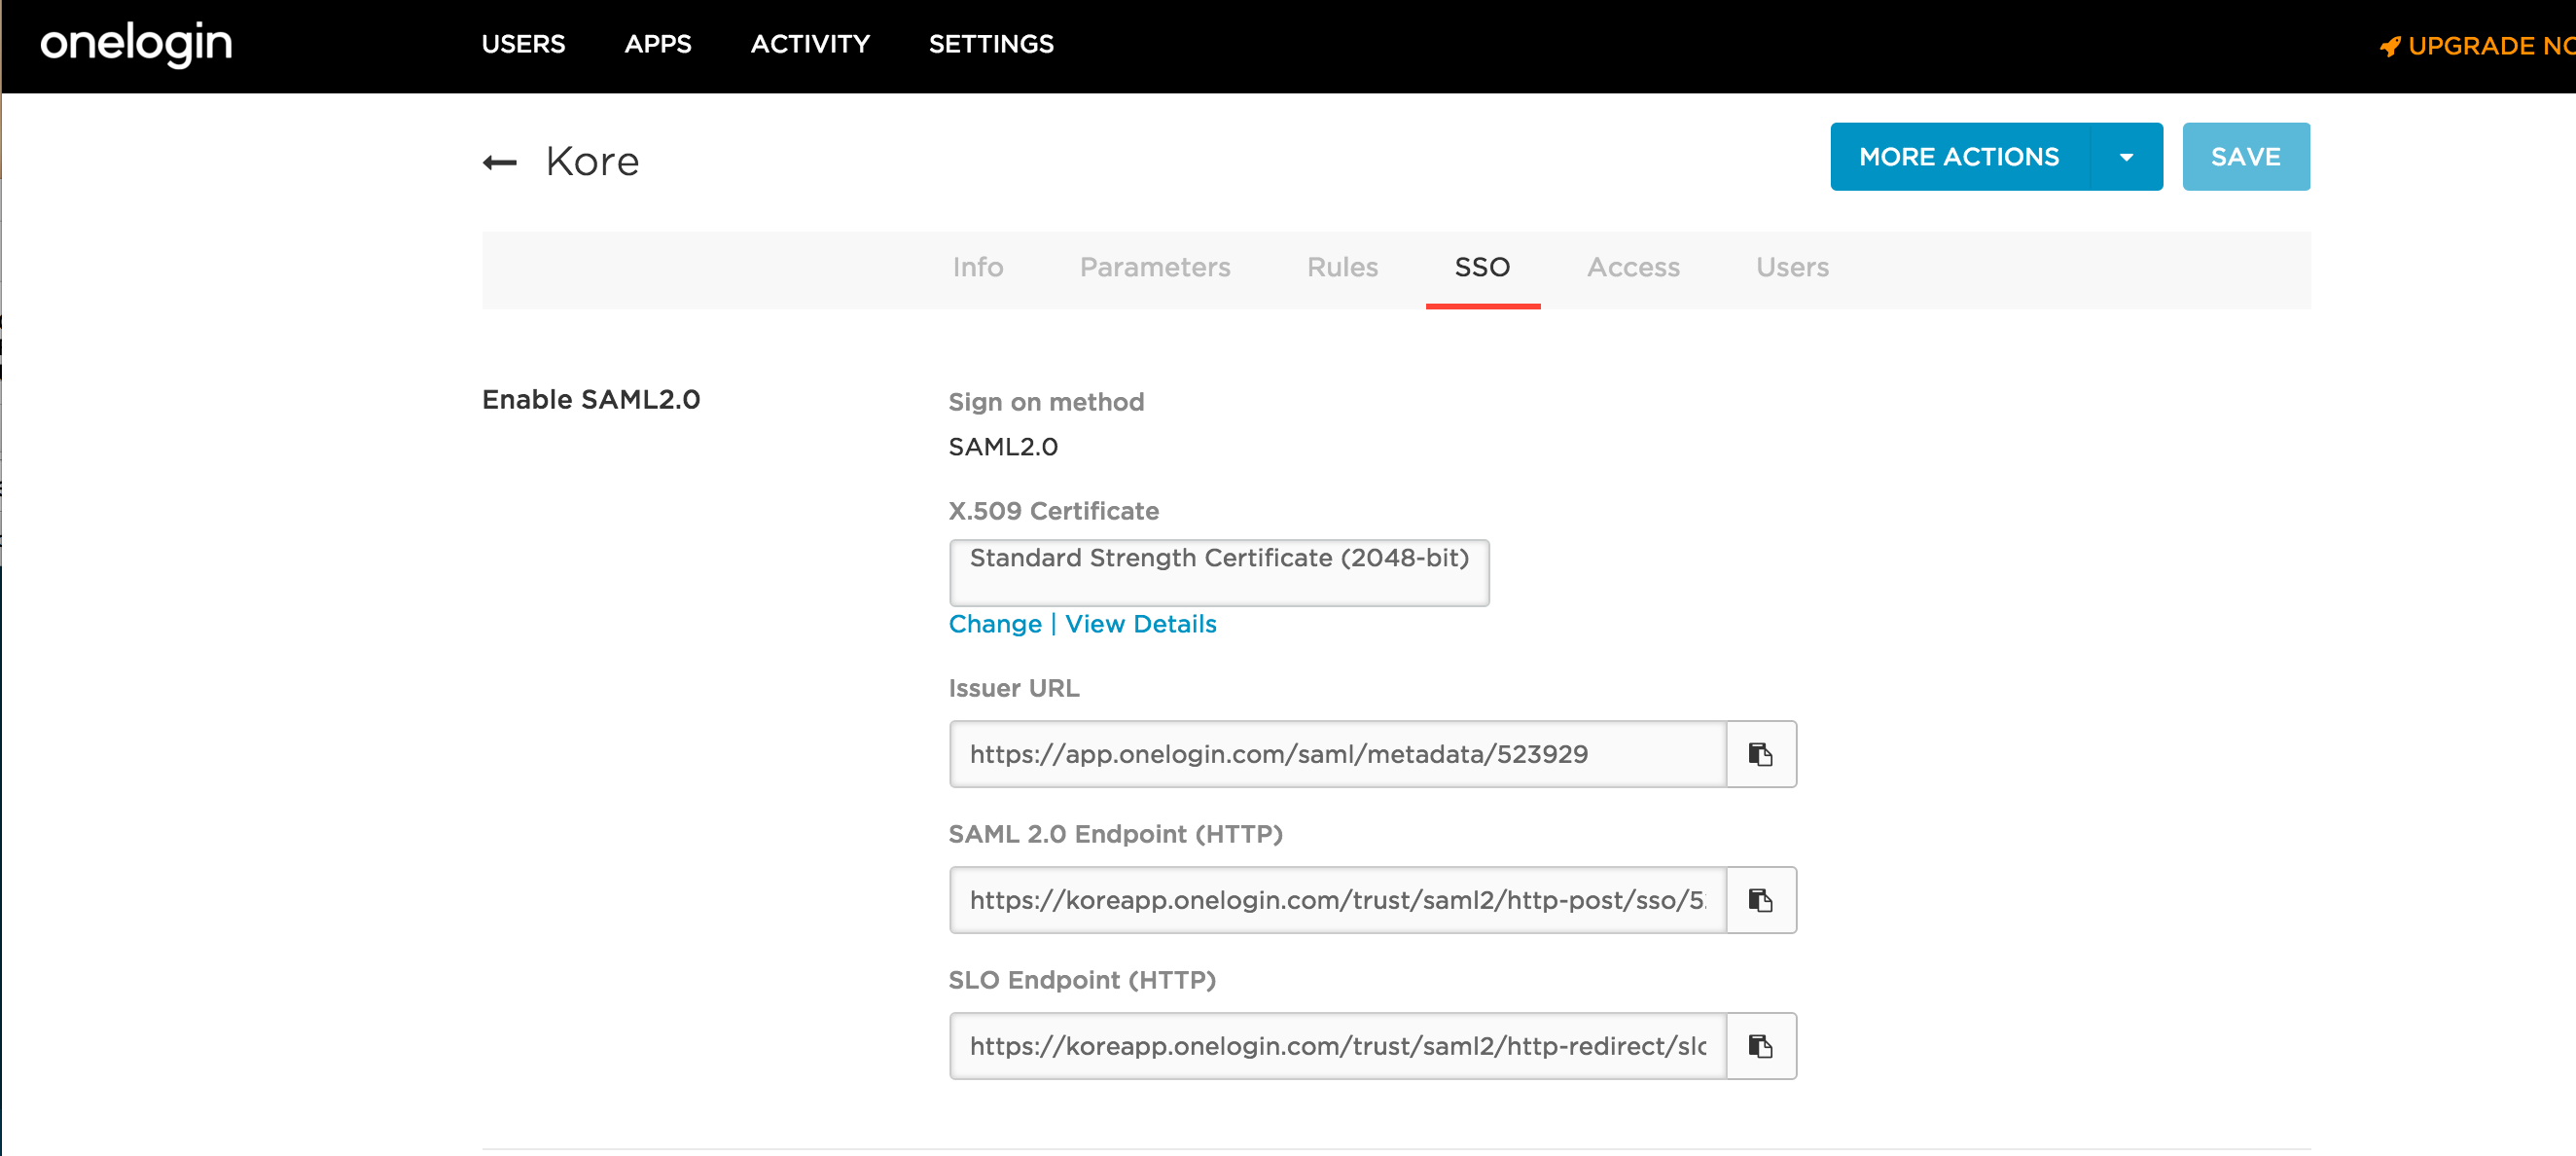
- SAML2.0を有効にするセクションの[SSO] タブで、以下に URL をコピーします。
- [OneLogin SAML 2.0 エンドポイント(HTTP)] フィールドを Kore.ai [SAML 2.0 エンドポイント] フィールドに
- [OneLogin 発行者 URL] フィールドを Kore.ai [発行者 URL] フィールドに
- [OneLogin X.509 証明書] フィールドで[詳細を表示]をクリックします。[標準強度証明書 (2048 bit)] ページが表示されます。
- [X.509 証明書] セクションで、証明書データをコピーして、そのデータを Kore.ai の[X.509 証明書] テキストボックスにペーストします。
注意: —–BEGIN CERTIFICATE—–ヘッダーの後のデータと —–END CERTIFICATE—- フッターの前のデータのみをコピーして、Kore.ai にペーストする必要があります。
- Kore.aiで、[保存]をクリックします。
ID プロバイダー情報が正常に更新されましたメッセージが、ページの上部に表示されます。設定をテストするには、Kore.ai Bot 管理者コンソールをログオフし、再度ログオンします。OneLogin ポータルが表示されます。
- Bitium –
- シングル サインオン URL – サービス プロバイダーが設定した SAML フローを有効にするための Bitium の HTTP SSO エンドポイント、例えば https://www.bitium.com/7655。
- 発行者の URL – OneLogin 発行者の URL、例えば、https://bitium.com/7655/saml/82456/metadata.xml。
- 証明書 – ユーザー署名の検証に使用される ID プロバイダーからサービス プロバイダーが保存する公開証明書。複数(最大2つ)の証明書を追加したり、既に追加されている無効な証明書を削除したりすることができます。プラットフォームは最新の証明書を認証に使用しますが、それが無効な場合は古い証明書が使用されます。
- SP が開始した SAML フローの ACS URL – これは サービスプロバイダーが開始した SAML フロー用の転送 URL です。
- IDP が開始した SAML フローの ACS URL – これは ID プロバイダーが開始した SAML フロー用のアカウント固有の URL です。
Bitium 用 Kore.ai SSO
Bitiumで Kore.ai のシングル サインオンを設定するには、まず Kore.ai アプリをBitium アカウントに追加して、URL とセキュリティ証明書をBitium から Kore.ai アカウントにコピーする必要があります。このトピックでは、Kore.ai アプリをBitium アカウントに追加してから、Bitiumを使った SSO のための Kore.ai 設定に必要な URL と証明書にアクセスする方法を説明します。
この手順を行うには、Bot 管理者コンソールの[シングル サインオン] ページで、SAML プロバイダとして[Bitium]を選択しておく必要があります。
Kore.ai アプリを Bitium に追加するには、
- Bitium にログオンします。
- [管理 < 会社名 >] メニューで[アプリを管理]をクリックし、[アプリを追加]をクリックします。アプリを追加ダイアログが表示されます。
- [検索] フィールドに、Kore.ai を入力してから、[Enter] キーを押します。Bitium 用 Kore.ai アプリのインストールダイアログが表示されます。
- [組織の管理] メニューで、[アプリを管理] をクリックし、[Kore.ai]をクリックします。
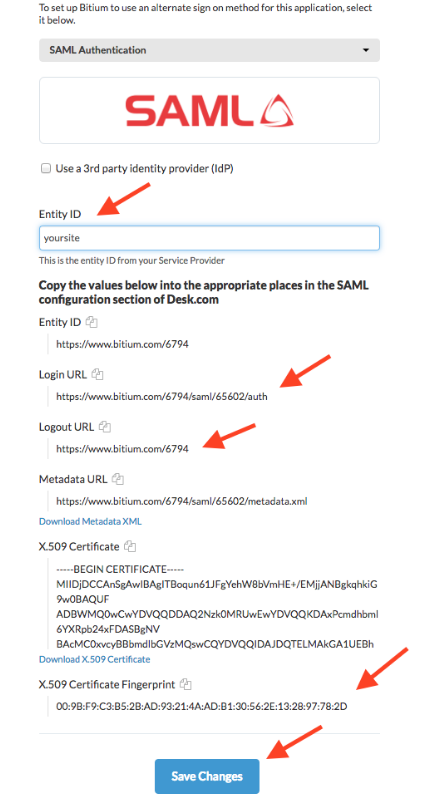
- [シングル サインオン] タブの [シングル サインオン プロバイダーの選択] セクションで、 [SAML 認証]を選択します。
- 以下の URL を、Bitium から Bot 管理者コンソールの Bitium 設定セクションにコピーします。
- [Bitium ログイン URL] フィールドから Kore.ai [シングル サインオン] フィールドに
- [Bitium ログアウト URL] フィールドを Kore.ai [発行者 URL] フィールドに
- Bitium[ X.509 証明書] フィールドで、証明書データをコピーして、そのデータを Bot 管理者コンソールの[証明書] テキスト ボックスにペーストします。
注意: —–BEGIN CERTIFICATE—–ヘッダーの後のデータと —–END CERTIFICATE—- フッターの前のデータのみをコピーして、Kore.ai にペーストします。
- Kore.aiで、[保存]をクリックします。
ID プロバイダー情報が正常に更新されましたメッセージが、ページの上部に表示されます。設定をテストするには、Kore.ai Bot 管理者コンソールをログオフし、再度ログオンします。Bitium ポータルが表示されます。
- その他 – 汎用 SAML ID プロバイダー設定。Kore.ai ビルトイン設定を使用していない場合は、このオプションを選択します。
- シングル サインオンの URL – WS-フェデレーション ID プロバイダーを使用して、Kore.ai がサインオンおよびサインオフ リクエストを送信する URL。これは SAML フローを開始したサービス プロバイダーを有効にします。
- 発行者の URL – Active Directory の認証に使用される WS-フェデレーションのメタデータドキュメントの URL。
- 証明書 – ユーザー署名の検証に使用される ID プロバイダーからサービス プロバイダーが保存する公開証明書。複数(最大2つ)の証明書を追加したり、既に追加されている無効な証明書を削除したりすることができます。プラットフォームは最新の証明書を認証に使用しますが、それが無効な場合は古い証明書が使用されます。
- SP が開始した SAML フローの ACS URL – これは サービスプロバイダーが開始した SAML フロー用の転送 URL です。
- IDP が開始した SAML フローの ACS URL – これは ID プロバイダーが開始した SAML フロー用のアカウント固有の URL です。
- シングル サインオン プロバイダーの管理コンソールでは、Kore.ai と SSO プロバイダー間のデータ交換に使用される URL も定義する必要があります。SSO プロバイダーによって URL 名が異なる場合がありますが、これらの URL を定義する必要があります。
- アサーション コンシューマー サービス(ACS)の URL または https://idp.kore.ai/authorize/callback としての コールバック URL。
- ADFS を使用する際には、認証値に加えて、ユーザーの電子メール アドレスを Active Directory から LDAP 属性として渡す必要があります。詳細については、ADFS の属性を参照してください。.
- https://idp.kore.ai としての ID の URL または サインオン URL
- [保存]をクリックします。
ID プロバイダー情報が正常に更新されましたメッセージが、ページの上部に表示されます。
ADFSの属性 ADFS 用の LDAP を使用してシングル サインオンを設定する場合、認証属性に加えて、サード パーティの SSO プロバイダーは、アサーション コンシューマー サービス(ACS)URL またはコールバック URL を通じて、Kore.ai に追加の属性を送信することができます。WS-フェデレーション プロトコルのWindows Azureや SAML プロトコルのOneLoginなど、SSO に内蔵された Kore.ai アプリを使用している場合、SSO プロバイダーの管理コンソールに Kore.ai アプリを追加すると、必要な属性がすでに Kore.ai に設定されます。以下のデータは、コールバック URL で Kore.ai に渡される属性データの一例です。
<Attribute Name="FirstName" NameFormat="urn:oasis:names:tc:SAML:2.0:attrname-format:uri" FriendlyName="First Name">
<AttributeValue>Michael</AttributeValue>
</Attribute>
<Attribute Name="LastName" NameFormat="urn:oasis:names:tc:SAML:2.0:attrname-format:uri" FriendlyName="Last Name">
<AttributeValue>Mehra</AttributeValue>
</Attribute>
<Attribute Name="DisplayName" NameFormat="urn:oasis:names:tc:SAML:2.0:attrname-format:uri" FriendlyName="Display Name">
<AttributeValue>Michael Mehra</AttributeValue>
</Attribute>
<Attribute Name="EmailAddress" NameFormat="urn:oasis:names:tc:SAML:2.0:attrname-format:uri" FriendlyName="Email">
<AttributeValue>michael.mehra@acme.com</AttributeValue>
</Attribute>
これらの属性は、必須である EmailAddress 以外はオプションです。Email Address 属性は、以下の nameId 形式を使用します。
SAML 2.0:
NameID Format="urn:oasis:names:tc:SAML:2.0:attrname-format:uri"
SAML 1.1:
NameID Format="urn:oasis:names:tc:SAML:1.1:nameid:format:emailAddress
ADFSでの属性のマッピング ADFSは、Microsoft が Windows サーバーの標準ロールとして提供しているサービスで、既存の Active Directory の認証情報を使用してウェブ ログインを提供します。SAML または WS-フェデレーション プロトコルを使用して ADFS でログオンする際には、認証値に加えて他の値を渡すことができます。この属性値は、SQL サーバー管理コンソールの依拠当事者の信頼ダイアログでクレームルールとして定義されます。[クレーム ルール] を編集するには、[ADFS 管理] の[依拠当事者の信託] フォルダを選択して、[アクション] サイドバーの[クレーム ルールの編集]をクリックします。新しいルールを追加するには、[ルールの追加]をクリックして、[LDAP 属性の送信] テンプレートを選択します。以下のマッピング値を入力します。
- SAML 2.0
- LDAP 属性: nameId
- クレーム属性: uri
- SAML 1.1
- LDAP 属性: nameId
- クレーム属性: emailAddress
SSO の代わりに管理者パスワードを使ってログオンする
Bot 管理者として、Google などのサードパーティのセキュリティ システムを使用してシングル サインオン(SSO)を有効にすることができます。何らかの理由で SSO セキュリティ システムに障害が発生した場合や、サードパーティのセキュリティ システムの SSO ログオン認証情報を忘れてしまった場合でも、Kore.ai Bot 管理者コンソールにログオンして SSO をバイパスすることができます。カスタム管理ロールを持つBot 管理者は、少なくとも1つのモジュールでカスタム権限が有効になっている場合のみ、SSOをバイパスして管理者パスワードを使用することができます。Kore.ai ディレクトリ エージェントにログオンするには、カスタム管理者は[登録 – ディレクトリの同期]の権限を有効にする必要があります。SSO を有効にする前に、Bot 管理者は、サインアップ時に提供されたログオン認証情報を使用してBot 管理コンソールにログオンしている必要があります。Bot 管理者が SSO を設定して有効にした後も、以下の URL で直接 Bot 管理コンソールにアクセスすることができます。
次のようなログオン ページが表示され、Bot 管理者のパスワード認証情報を使用して、Bot 管理者 コンソールにログオンし、SSO が有効な場合は SSO をバイパスすることができます。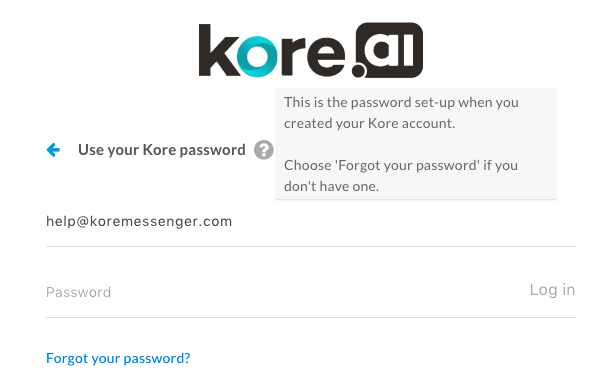 Bot 管理者のパスワードが思い出せない場合は、メール ID を入力して、前の画像にある[パスワードをお忘れですか?]リンクをクリックします。Bot 管理者のパスワードをリセットする方法が記載されたメールが、Kore.ai のメールアカウントに送信されます。
ログオフ
Bot 管理者 コンソールでのセッションが終了したら、Bot アカウントを安全に保つために、コンソールをログオフしてセッションを閉じます。ログオフするには、次の図に示すように、[ユーザー名]をクリックして、[ログアウト]をクリックします。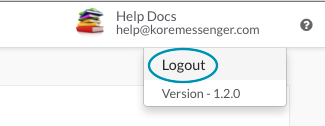 Bot 管理コンソールのセッションが15分以上アイドル状態になると、セッションは自動的に終了し、セッション ウィンドウの次のアクションでは、代わりに Kore.ai のウェブ クライアントが開きます。新しいセッションを開始するには、[Bot 管理コンソール]
![]() アイコンをクリックして、ログオンします。
アイコンをクリックして、ログオンします。