SearchAssist’s Field Management allows you to add, delete and manage the properties of the fields. Field properties created here are used in creating the search index schema.
When you extract a web page, document, or add an FAQ manually, corresponding fields are automatically added to the Fields table. You can add to this default list. All the derived and custom fields can be viewed on the Fields page under selected Index Configuration. Also, make changes in field properties for custom fields to use the field for multiple purposes such as weights, facets, etc.

Adding
To add a field, follow the below steps:
- Click the Indices tab on the top.
- On the left pane, under the Index Configuration section, click Fields.
- On the Fields page, click + Add Field on the top-right.
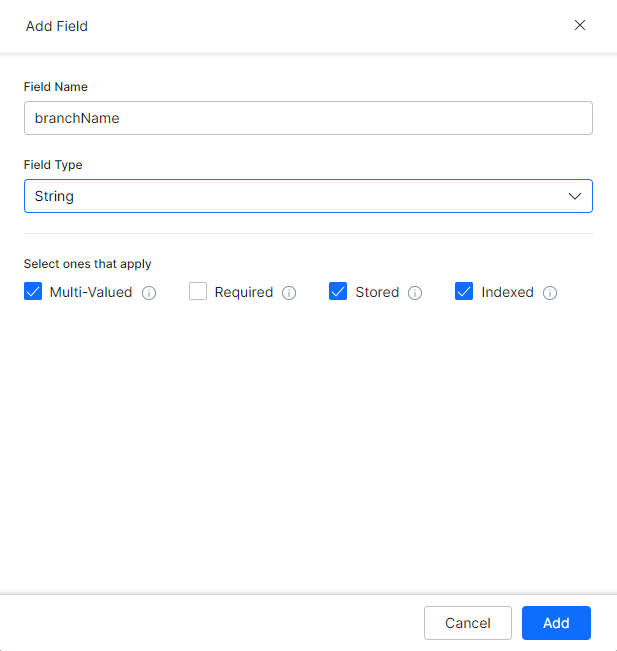
- On the Add Field dialog box, enter a name in the Field Name field.
- Select a field type from the Field Type drop-down list. It can be
- String
- Number
- Trait
- Dense Vector
- Entity
- Keyword
- Array
- Object
- Under the Select ones that apply section, select: Multi-Valued, Required, Stored, or Indexed.
- Multi-Valued – When enabled, indicates that a document can contain multiple values for this field type. Enabled by default.
- Required – When enabled, a document that does not have a value for this field would not be considered by the index pipeline. Disabled by default.
- Stored – When enabled, the actual value of the field is retrieved by queries. Enabled by default.
- Indexed – When enabled, the value of the field is used in queries to retrieve matching documents. Only these fields can be used in Search Configuration to optimize search results. Enabled by default.
- Click Add.

Actions
Note: System fields (with prefix sys_) cannot be edited or deleted.
To edit a custom field, follow the below steps:
- On the left pane, under the Index Configuration section, click Fields.
- On the Fields page, hover over the corresponding field to see the edit/delete options
- Click the edit icon of the field you want to edit.
- On the Edit Field dialog box, make the required changes.
- Click Save.
- You can delete the field using the delete icon.


