Introduction
Queues are virtual, temporary waiting rooms that hold and process incoming requests for conversations between agents and customers. These are the holding areas for both digital and audio conversations waiting to be assigned to agents.
All conversations will be assigned to queues as they come in based on the agent selection logic and proficiency match. A conversation can only be in one queue at any given time. Once conversations have been assigned to queues, agents are assigned to these conversations based on pre-established rules and criteria as shown in the illustration below:
Routing Queues
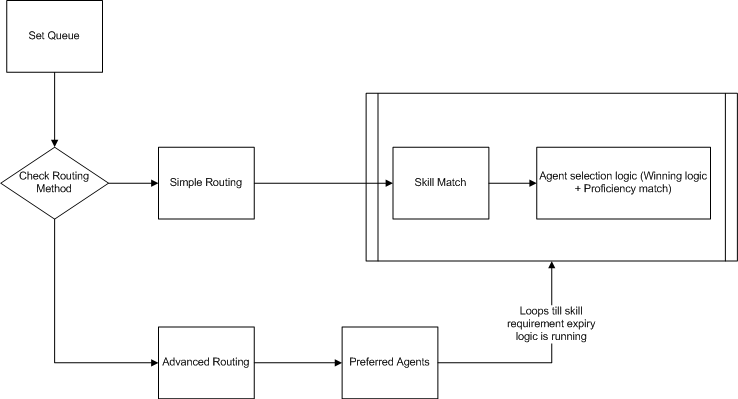
As soon as a conversation is received, it is assigned to a queue. After the conversation is set to a queue, the next step is to check the routing method.
Simple routing method checks for agent skills and agent availability. After the skill and availability match the agent is assigned to the conversation.
Advanced routing method checks for preferred agents. If preferred agents have been specified for a queue, admins can specify a configurable time period after which the routing extends to skill match. If a preferred agent becomes available before the configured time expires, they will be given priority over agents who were selected via skill match.
In order for the agent to answer the conversation, they must have a skill that is attached to the conversation. The conversation cannot be assigned to the agent if the skill does not match.
It is possible, however, to define a skill and the expiry period for that skill. An agent with the mentioned skill will be searched for the configured period of time. If no agent with that skill can be found before the skill expiration period, the skill is dropped from the requirement.
Queue Routing Types
All conversations will get assigned to queues as they come in. This is based on Routing as described below:
- Standard Routing:
- For routing to a certain queue, the highest average skill & proficiency match for a given conversation is considered as the primary criteria. Proficiency is taken into consideration only after a skill match has occurred.
- If multiple agents match a primary criterion, an agent’s current utilized slots are taken into consideration. Agents with a lesser number of utilized slots are given a preference, in accordance with proficiency thresholds. Also, agents with a higher time passed since the last conversation was received are given preference.
- Advanced Routing:
- In this case, the conversation is first routed to a preferred agent configured up by the admins.
- If the timeout expires and a preferred agent is still unavailable, then the conversations are now routed per Standard Routing given above. This keeps running in loops till the skill requirement logic is true.
Queue Level Properties
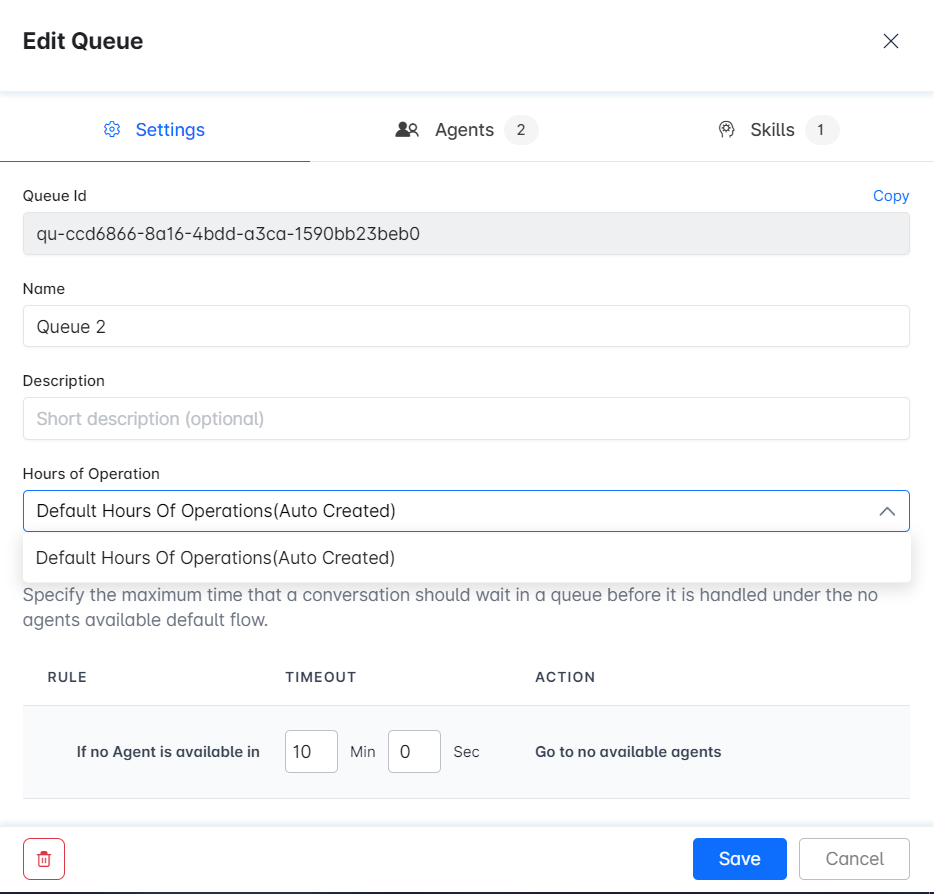
- Name: Name of the Queue, for example, Loan Accounts Queue.
- Description: Description of the Queue, for example, Loan Accounts Queue is a queue for
handling loan related issues for customers. - Hours of Operation: The hours of operation for the queue. E.g, Night Shift, Regular Shift, or Default hours of Operation.
- Max wait timeout: The maximum time that a conversation should wait in a Queue before it is handled under the no agents available default flow.
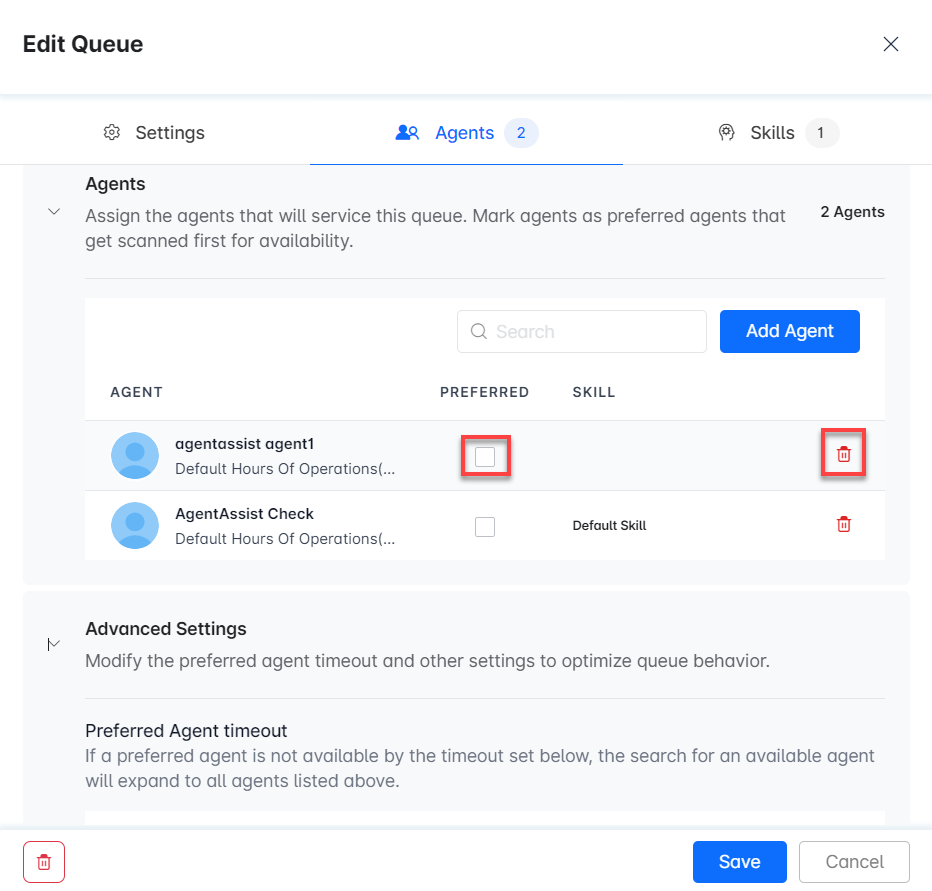
- Agents: The agents that will service the queue. The matching criteria are based on skill match (the highest average skill & proficiency match for a given conversation is considered for conversation matching).
- Advanced Routing: If you enable Advance Routing, you can configure preferred agents and skill drop-offs.
- For each new customer, preferred agents (if any) are checked for availability. During a preferred agent check, skills are ignored. If a preferred agent is not assigned and the preferred agent timeout expires, the check is expanded to the full agent list, and skills are matched to select the best possible available agent for the customer.
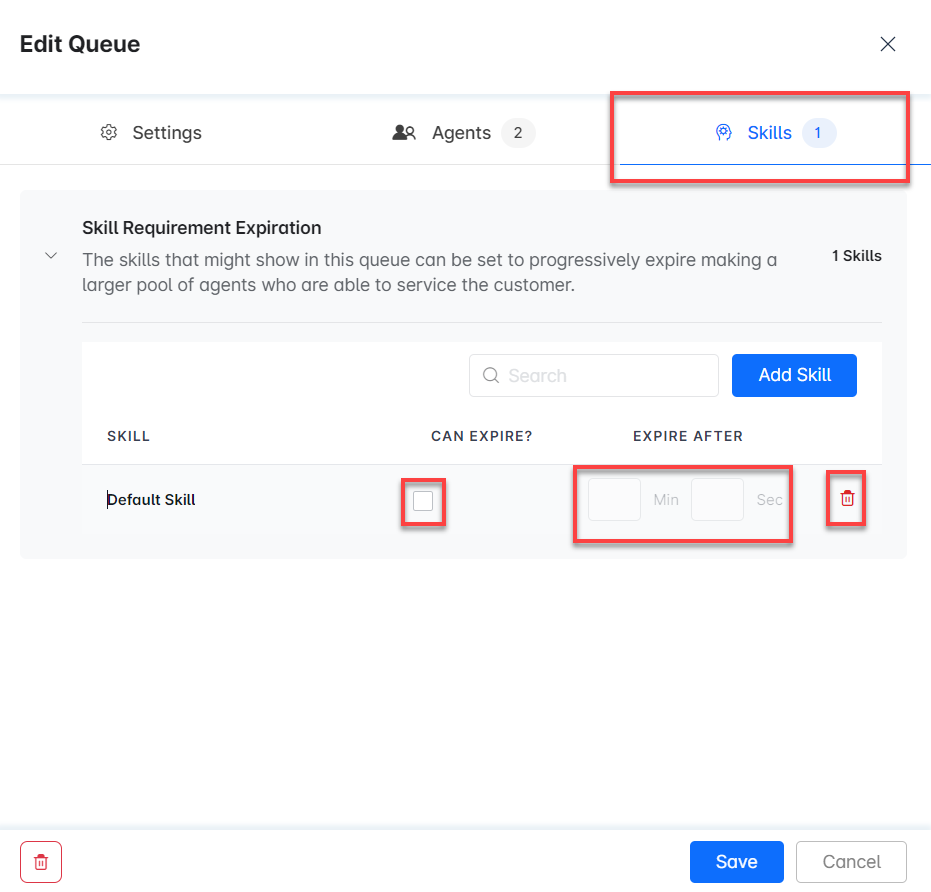
- Skill Requirement Expiration: The skills that might show in this queue can be set to progressively expire making a larger pool of agents who are able to service the customer.
Queuing allows admins to track conversations between agents and customers. The online queue system enables admins to collect consumer feedback, providing insight into how customers truly feel about the quality of your services.
Panel
To access Queues for an inbound call/chat between a contact and an agent, follow these steps:
Go to the Configuration section. On the left navigation pane under Routing, click on the Queues option.

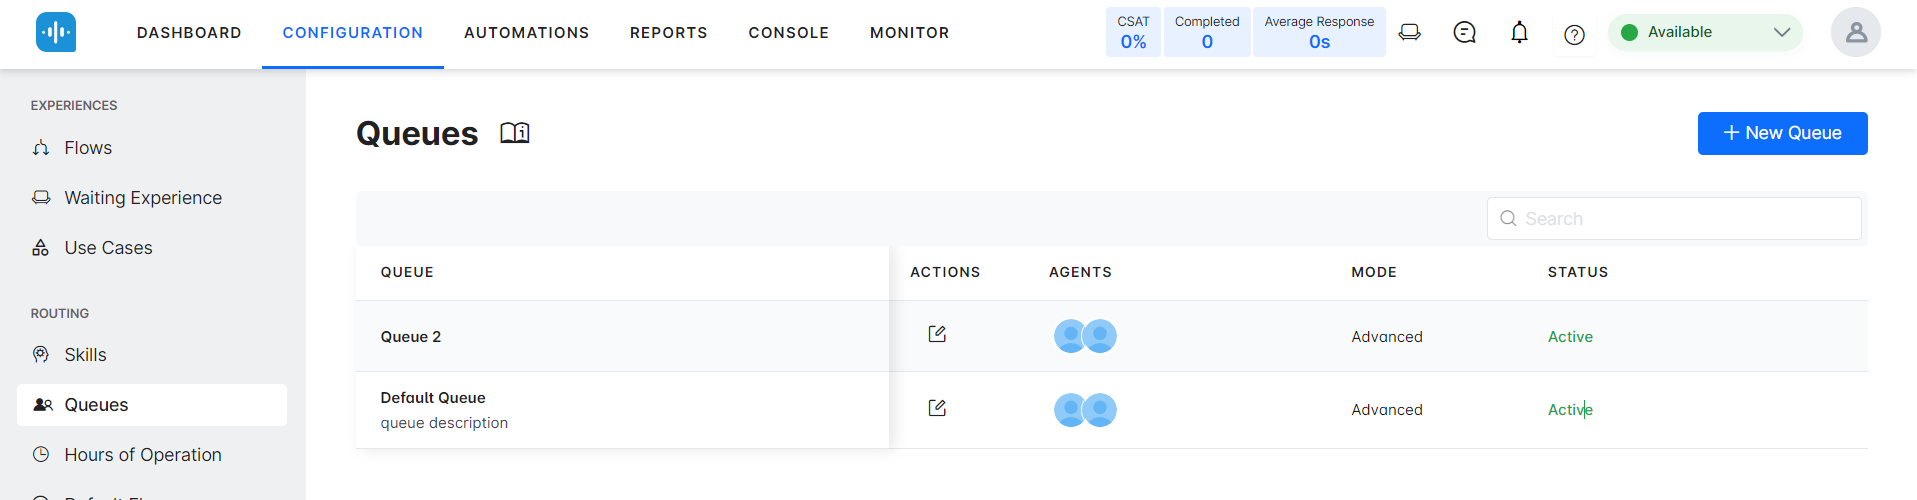
After clicking on the Queues option, the following page is displayed.
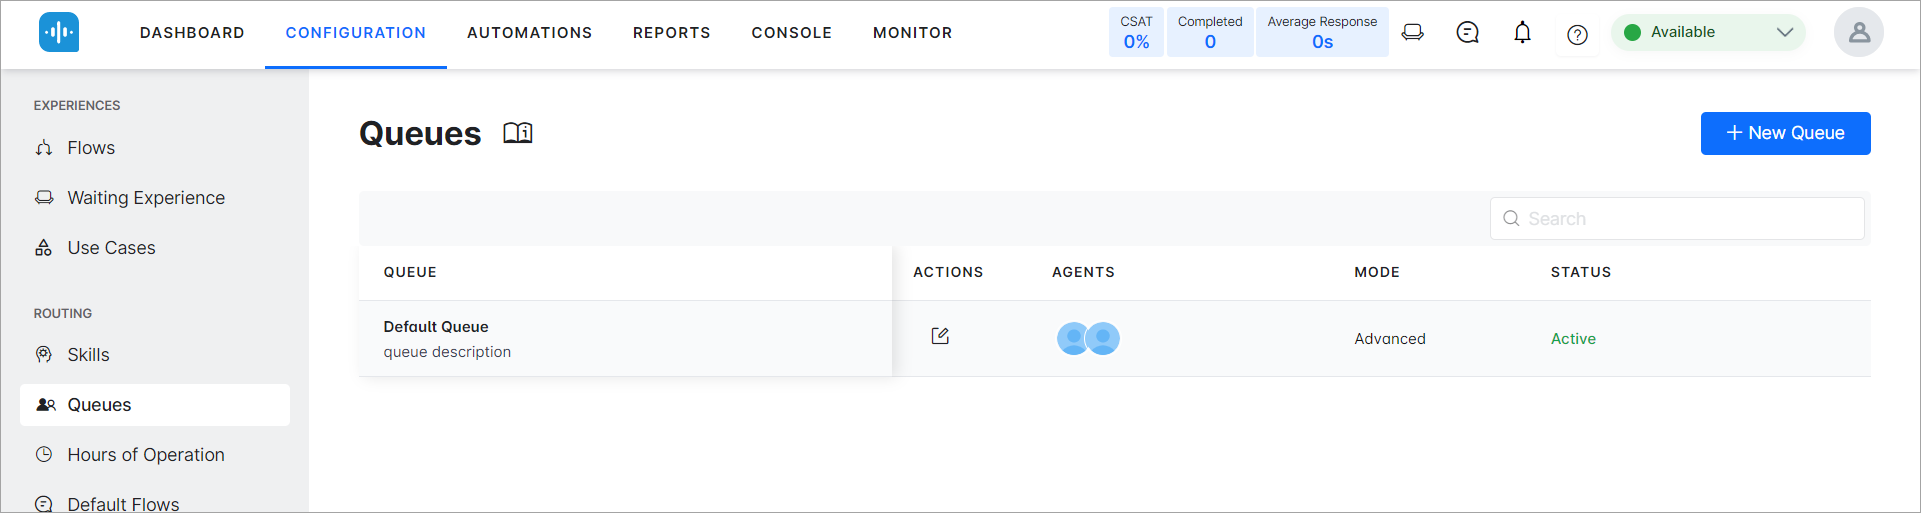
On this page, the following details of the queues are displayed:
- Queues: it shows the number of queues available.
- Actions: Takes you to the Edit Queue option for changing settings, agent preferences, and skills.
- Agents: It shows the number of agents available for a particular queue.
- Mode: specifies whether the conversation is in Advanced or Simple mode.
- Status: The status of the conversation, Active or Inactive, is displayed.
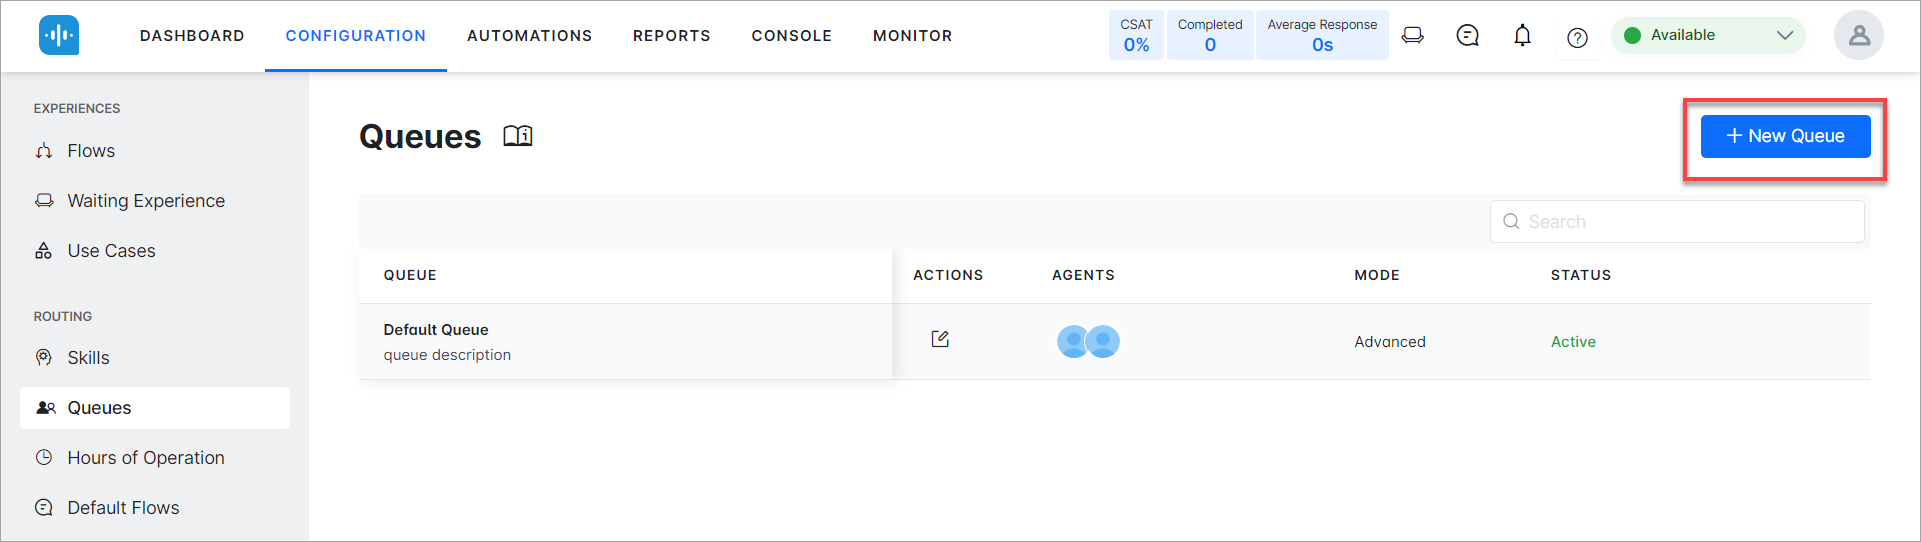
Adding a new queue
- Click on the New Queue option in the top-left corner.
- Fill in the details such as queue Name, Hours of Operation, Maximum Wait Timeout, and Description.

2. Upon enabling the Advanced Routing option, you can select preferred agents based on your previous experience and skill.

3. Under the Agents option, you can search and select from the available agents.

4. Under the Skills option, you can search or add a specific skill-set and get a list of agents proficient in that skill.
5. Click on the Create option and the new queue is added to the Queue section.
Editing the Queue
- Click on the Actions icon in front of a queue to be edited.

2. You can make the required changes in the Settings of the Edit Queue page.
3. In the Agents option, you can mark certain agents as PREFERRED or delete some agents. You can also modify preferred agent timeout in the Advanced Settings option.
4. In the Skills section, you can mark the CAN EXPIRE option, set expiry time for a skill, or delete a particular skill.
5. Click the Save option after making changes.