Agent Use Cases are customer scenarios for which virtual agents can be configured for conversational support. For example, when a customer asks for direction to a business location or requests for an order or refund status.
SmartAssist supports adding, updating, and deleting Conversation agent use cases.
Add an Agent Use Case (Conversation)
1. Click the Configuration tab.

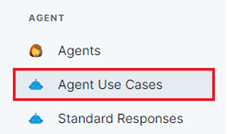
2. Click the Agent Use Cases menu option under the AGENT section.
3. Click the + New Conversation button under Conversations.

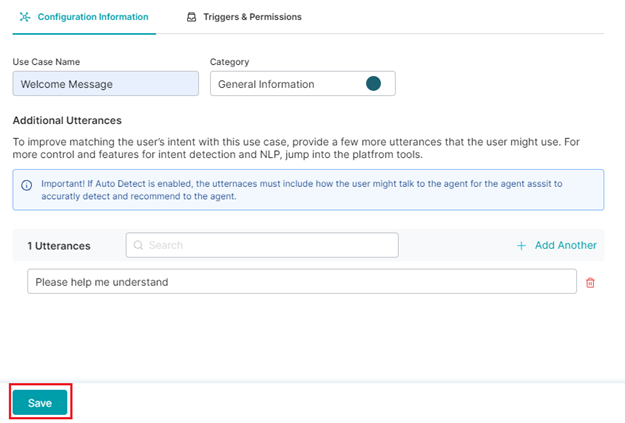
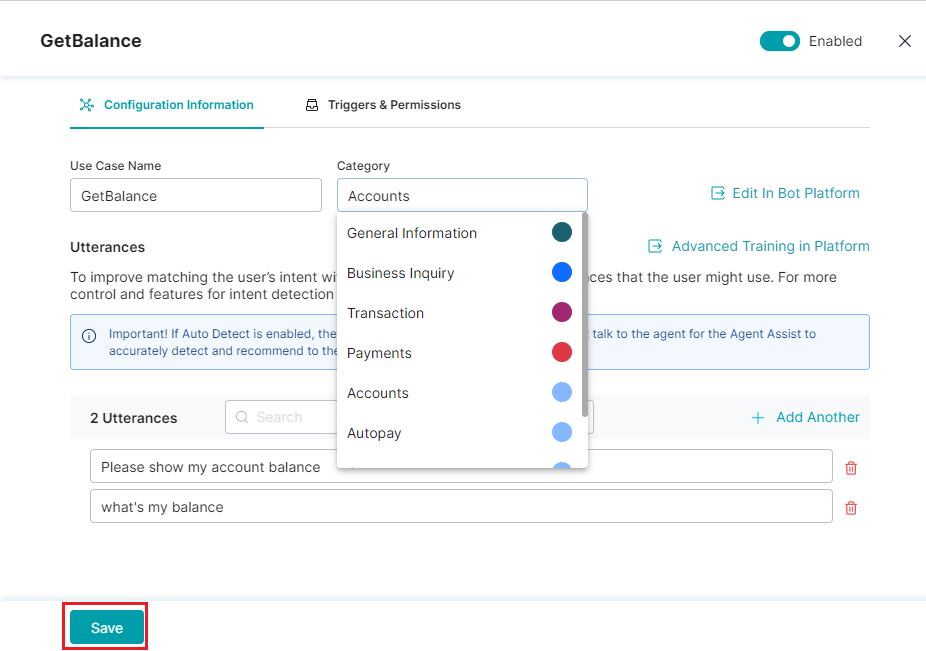
4. In the New Conversation window click the Configuration Information tab and provide inputs for the following fields:
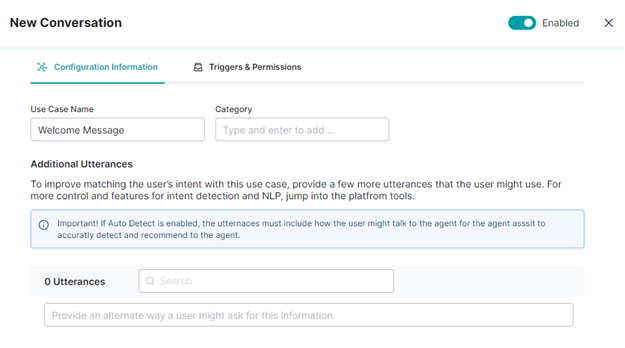

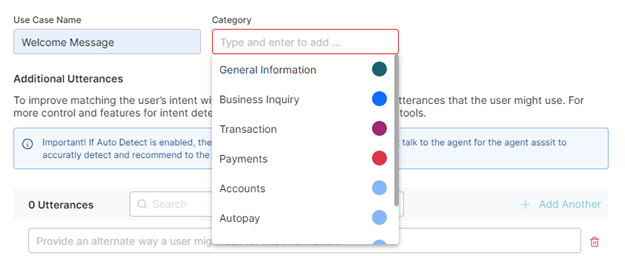
- Use Case Name – Provide a name to identify the agent conversation use case.
- Category – Select any category name from the list and click enter.
6. Provide the keyword(s) or phrases under Additional Utterances to include any alternative phrases or keywords to be mapped to this conversation. This increases the scope of utterances from the user to be checked during intent detection.
7. Type the keyword(s) or the utterance phrase in the Provide an alternative way a user might ask for this information textbox.
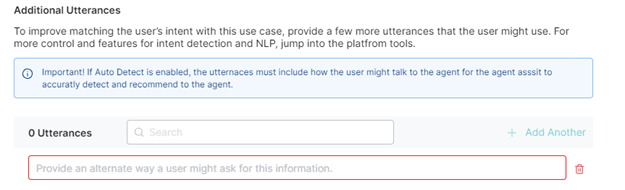
8. (Optional) Click the + Add Another button to add another utterance instance to the conversation.

To delete an utterance instance, click the delete icon.

The Utterance Counter helps track the number of utterances you’re adding to a use case conversation. This counter gets updated when you add or delete an utterance instance.

The utterance search textbox helps search for an existing utterance phrase or keyword to be added to the new conversation use case.
9. Click Save.
10. On the Agent Use Cases page, a success confirmation message appears after use case creation.
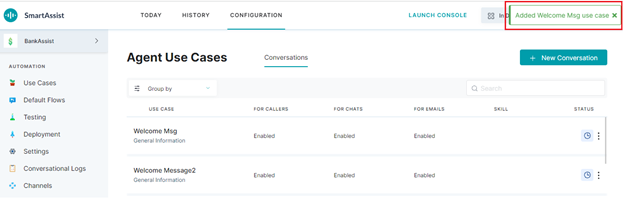
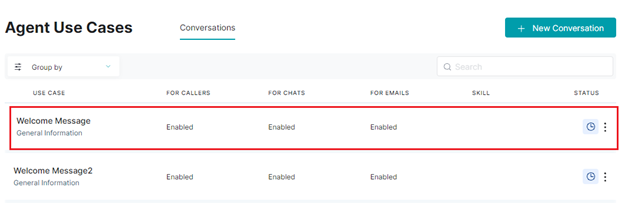
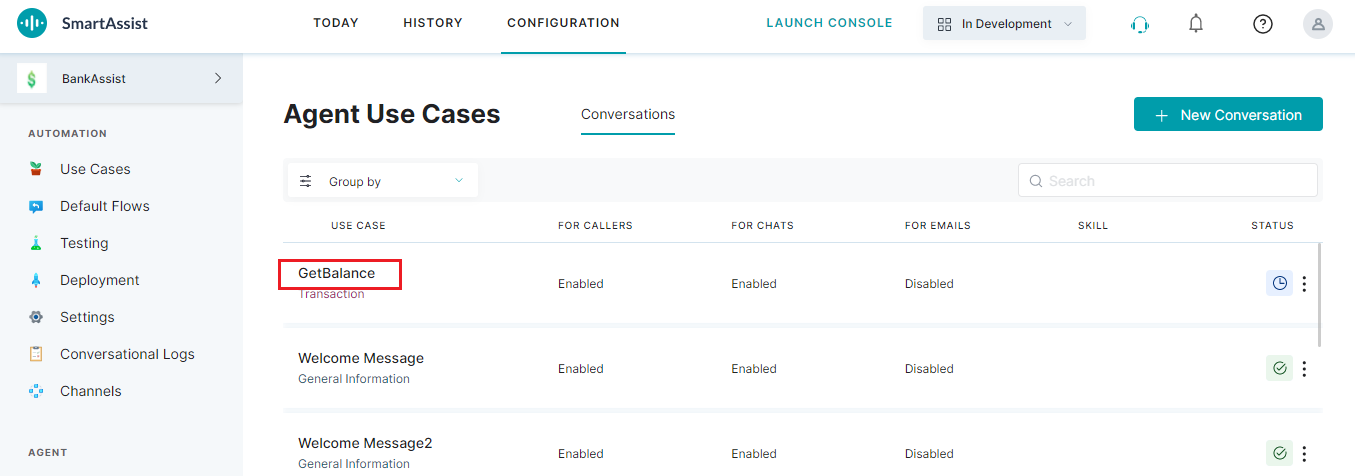
The use case created by you is listed at the top of the USE CASE list.
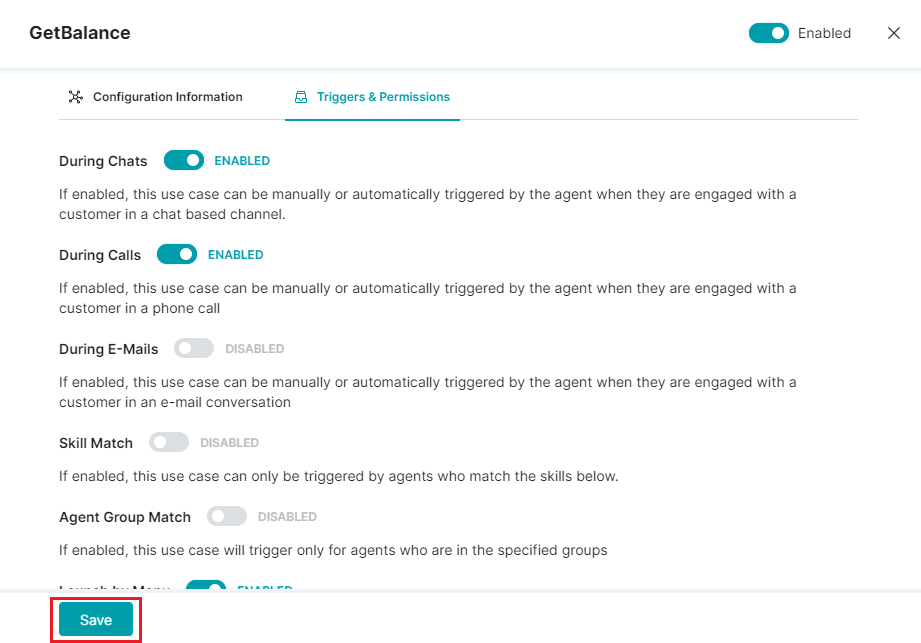
11. Set the permissions for the new conversation and when it should be triggered under the Triggers & Permission section.
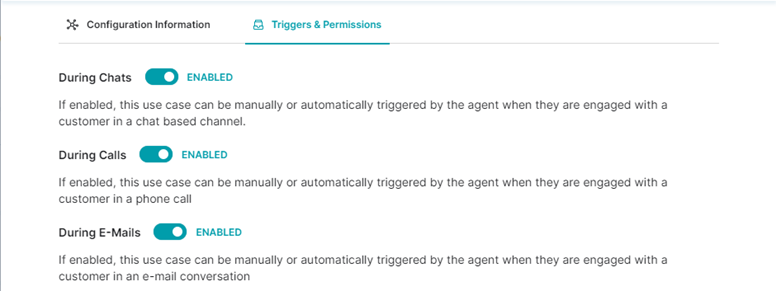
The following options can be enabled or disabled in this section:
- During Chats: If enabled, this use case can be manually or automatically triggered by the agent when they are engaged with a customer in a chat channel.
- During Calls: If enabled, this use case can be manually or automatically triggered by the agent when they are engaged with a customer in a phone call.
- During E-Mails: If enabled, this use case can be manually or automatically triggered by the agent when they are engaged with a customer in an email conversation.
- Skill Match: If enabled, this use case can only be triggered by agents who match the skills below.
- Agent Group Match: If enabled, this use case will trigger only for agents who are in the specified groups.
- Launch by Menu: If enabled, the use case will be listed in the menu of use cases in the agent assist window allowing the agent to browse and find this use case to trigger it.
12. Click Save.
Edit an Agent Use Case
To edit an agent use case, follow these steps:
1. Click the required use case entry on the list.
2. The window with the current values set for the conversation use case appears. Make the required changes in the Configuration Information and Triggers & Permissions sections.
3. Click Save.
4. A success confirmation message is displayed once the changes are updated on the dashboard.

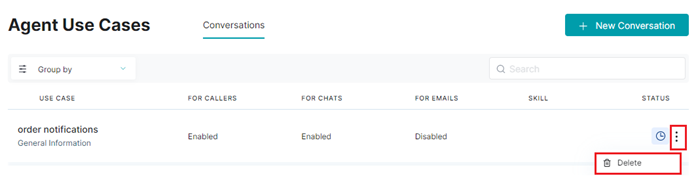
Delete an Agent Use Case
To delete an existing agent’s Use Case entry, follow these steps:
1. Navigate to Agent Use Cases > Conversations.
2. Click the ellipsis icon of the use case you want to delete, and click Delete.
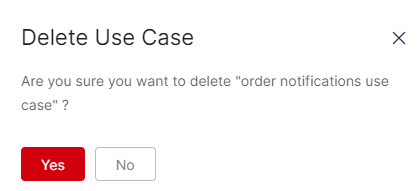
3. Click Yes in the confirmation window.
4. A success confirmation message is displayed once the conversation use case is deleted.
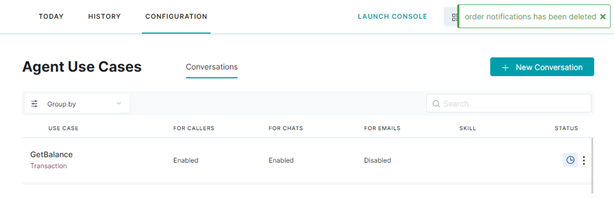
The deleted conversation use case cannot be mapped to an agent.
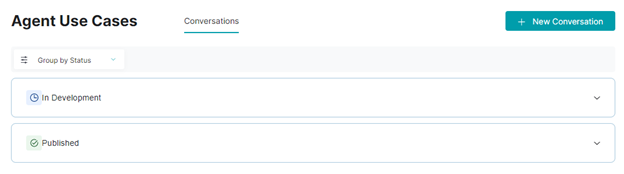
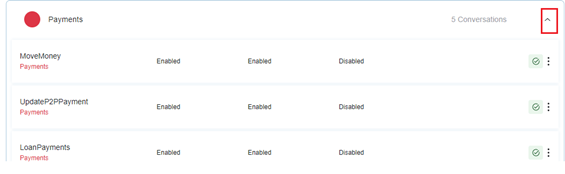
Group by Use Case
The following parameters help group and view the list of use cases:
- None: No grouping is applied.
- Category: Group by selecting one of the configured use case categories for the agent.
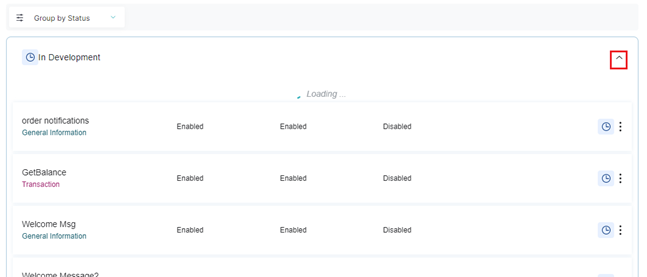
- Status: Group based on either Development or Published status.
To group the listed use cases, follow these steps:
1. Click the Conversations > Group by dropdown list.
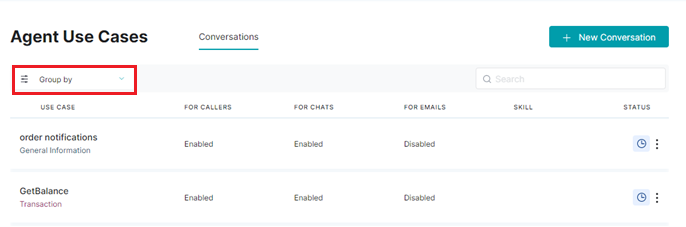
2. From the list, click the required option.

-
- Click category to view the conversations based on category.

- Click status, to view the conversations based on deployment status. The two available options include In Development and Published.