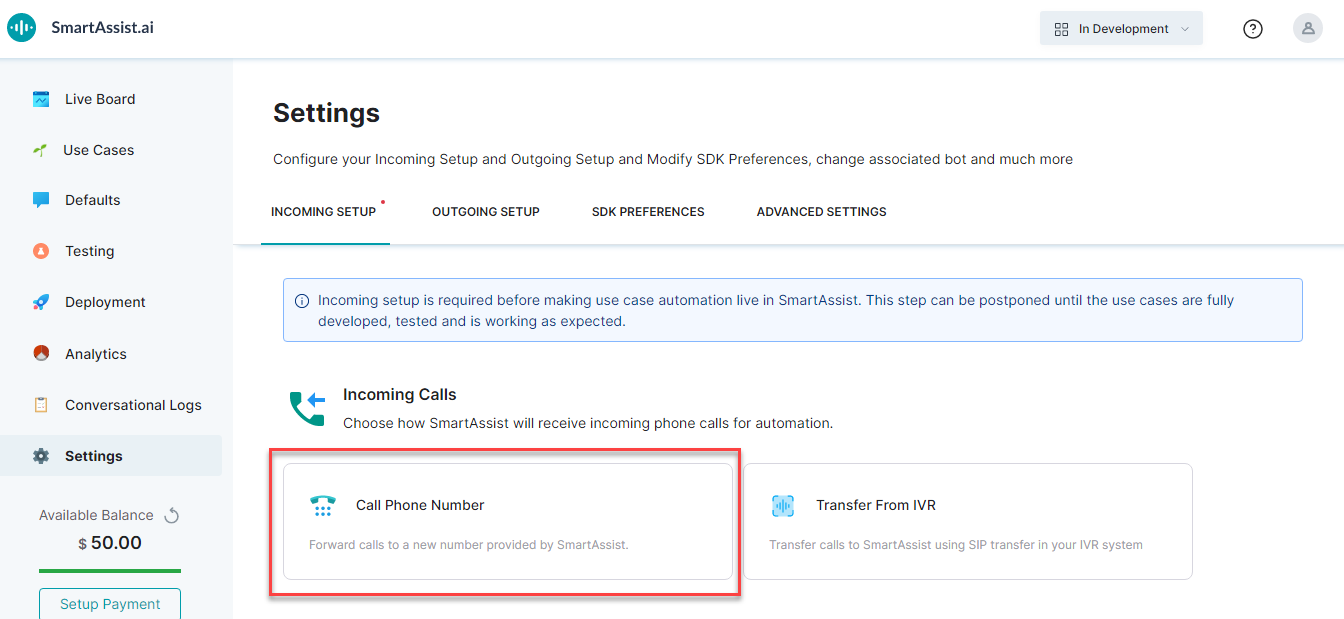
In general, to receive calls to your application, you must configure incoming call settings. In SmartAssist, this configuration is to choose how your users can reach SmartAssist.
With the incoming call setup, you can:
- Allow SmartAssist to set up a Phone Number that you can share with your callers.
- Transfer calls from an existing IVR system.
Call Phone Number
In case you do not have an IVR system or do not want to use it, SmartAssist can allocate a dedicated phone number that you can provide to your users. Your users can directly reach your SmartAssist app by calling this number. SmartAssist uses Twilio to procure these phone numbers. For certain countries, Twilio requires an address before the number is used. You must provide the same during the configuration process.
To configure the Call Phone Number setup, follow the below steps:
- On the left pane, click Settings.
- On the Settings page, by default, the Incoming Setup tab is selected.
- Under the Incoming Calls section, click Call Phone Number.
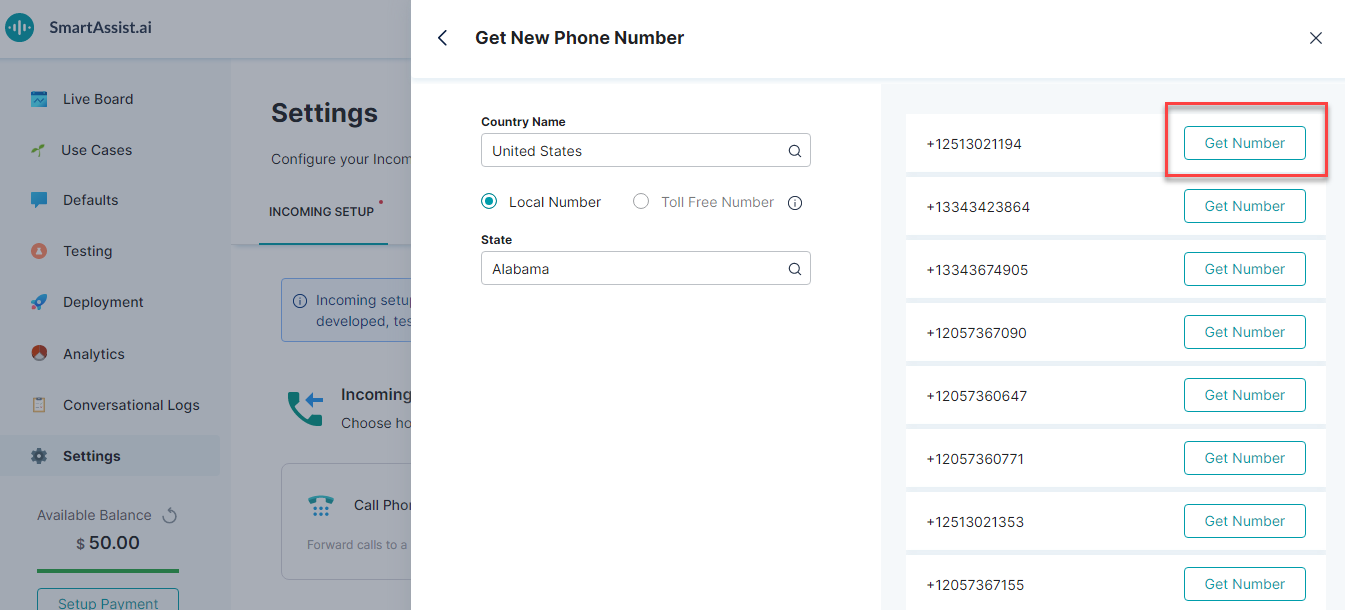
- On the Call Phone Number window, click Get New Phone Number.

- On the Get New Phone Number window, search and select a country from the Country Name field. Choose a country of your preference and phone numbers from this country are displayed. Based upon your choice of country, the following options are available:
- For the United States of America:
- You can further choose between a Local Number or a Toll-free Number.
- Click Get Number from the list of numbers provided.
- For local numbers, you can choose the state of your choice from the State field and the number within that area code is listed.
- For other countries:
- Click Get Number from the list of numbers provided.
- You must provide a local address that is validated for various local law and regulation compliance.
You can use this number for testing purposes before going live with it.
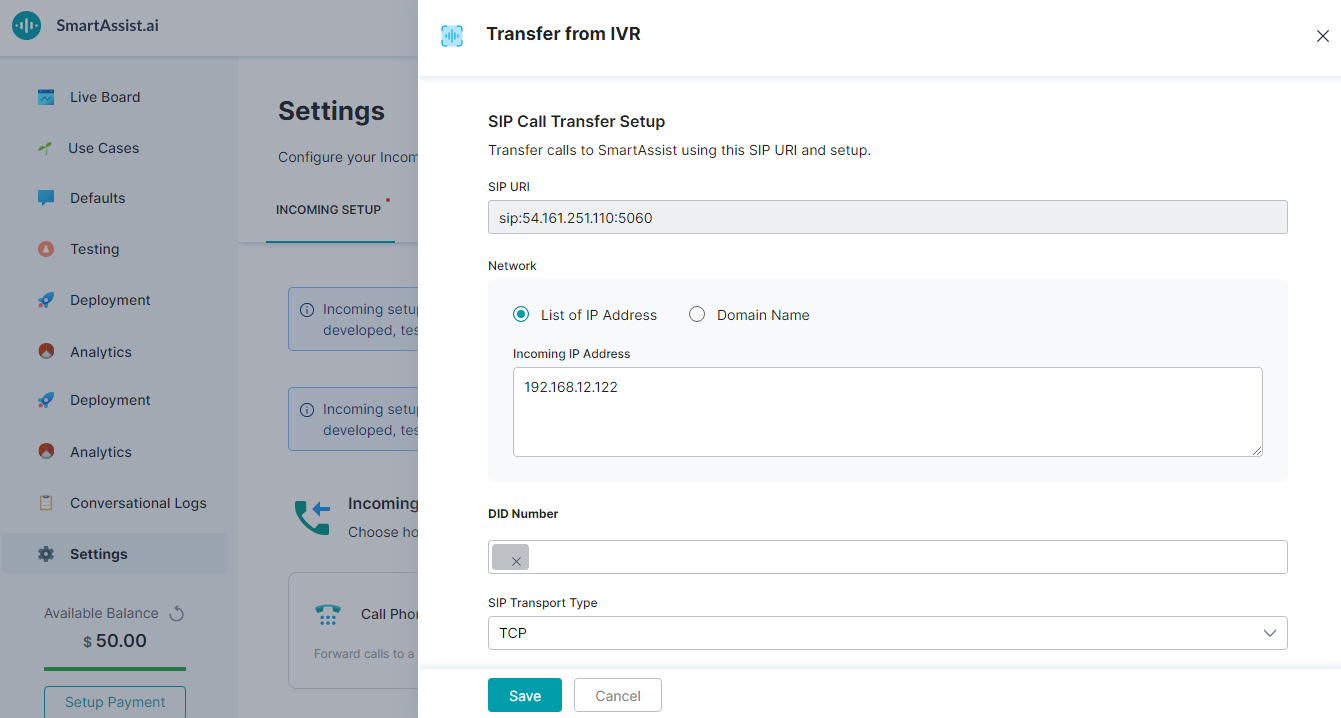
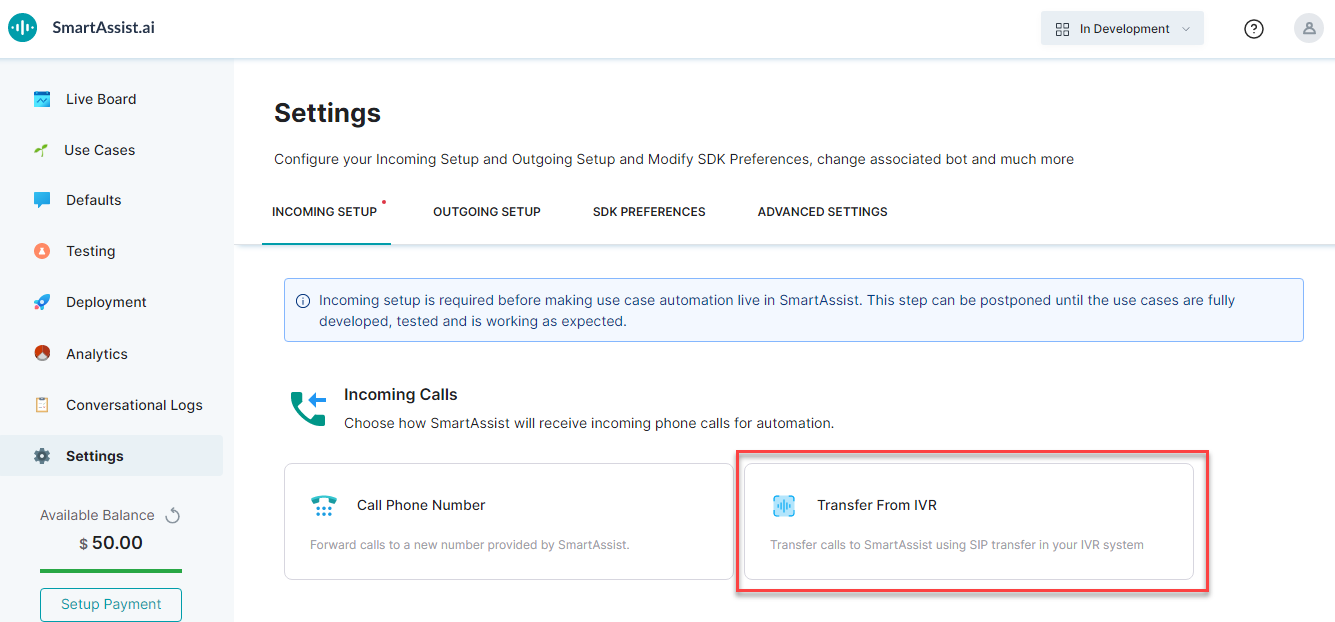
Transfer from IVR
Calls from your IVR system are redirected to SmartAssist through SIP sessions. This entails two basic configurations based on the network selected.
To configure this setup, follow the below steps:
- On the left pane, click Settings.
- On the Settings page, by default, the Incoming Setup tab is selected.
- Under the Incoming Calls section, click Transfer from IVR.
- On the Transfer from IVR window, in the SIP URI field, a unique SIP domain URI is generated by SmartAssist and assigned to your account. You can configure this in your IVR system so that the calls are redirected to SmartAssist.
- Under the Network section, you can specify a list of IP Addresses or Domain Names of the enterprise from which the calls are expected to your IVR systems.
- Select List of IP Address and in the Incoming IP Address field, enter multiple comma-separated addresses.
- Select Domain Name and in the Fully Qualified Domain Name (FQDN) field, enter an FQDN; and select a DNS Resolve Method from the DNS Resolve Method drop-down list.
- In the DID Number field, enter Direct Inward Dialing (DID) numbers.
- From the SIP Transport Type drop-down list, select:
- Under the SIP Credentials section, you can enter the Username and Password. (optional)
- Click Save.