This feature lets you configure the incoming mail setup and outgoing mail setup automation for your enterprise communication.
To add and configure a new email, follow these steps:
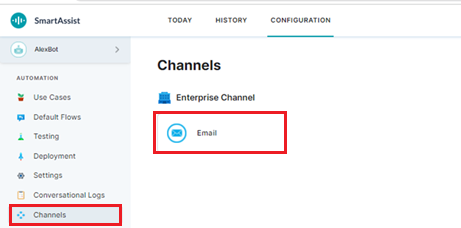
1. On the left pane, click Channels under Automation.
2. Then, click the Email tab under Enterprise Channel.
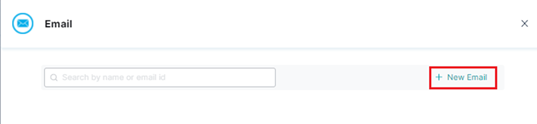
3. In the Email window, click + New Email.
4. To configure Email Connection in the Add New Email window, follow these steps:
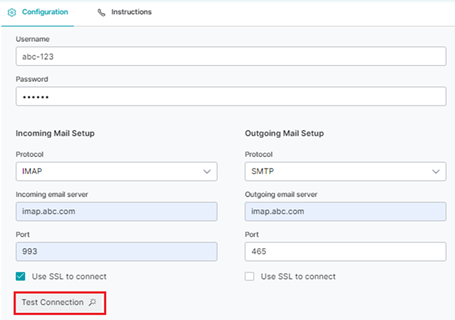
- Click the Configuration tab, and provide inputs for the following fields:
- Email Address: Type a valid email address to be added.
- Username: Set the username for the email address.
- Password: Set the password for the email address.

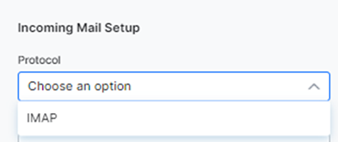
- Incoming Mail Setup: Provide inputs for the following values to configure the incoming emails:
- Protocol: Select the protocol used for accessing email from a local client. Currently, Internet Message Access Protocol (IMAP) is available.
- Incoming email server: The email server that will handle incoming emails.
- Port: The configured port number to connect using IMAP securely.
- Use SSL to Connect: Check this option to secure the email communication between the sender and receiver with strong encryption.
- Outgoing Mail Setup: Provide inputs for the following values to configure the outgoing emails:
- Protocol: Select the protocol used for sending an email from a local client. Currently, Internet Message Access Protocol (IMAP) is available.
- Outgoing email server: The email server that will handle outgoing emails.
- Port: The configured port number to connect using SMTP securely.
- Use SSL to Connect: Check this option to secure the email communication between the sender and receiver with strong encryption.
- Click Test Connection to test if the configured set up works.
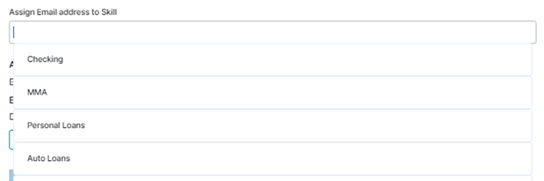
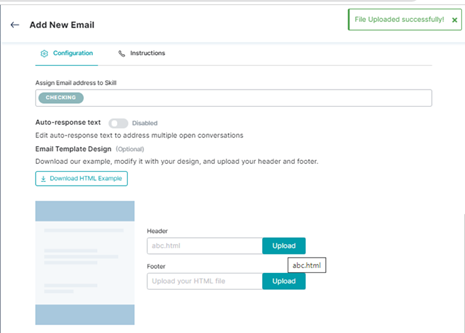
5. Type the required skill or select from the listed options for Assign Email address to Skill to map an agent skill to the email address.
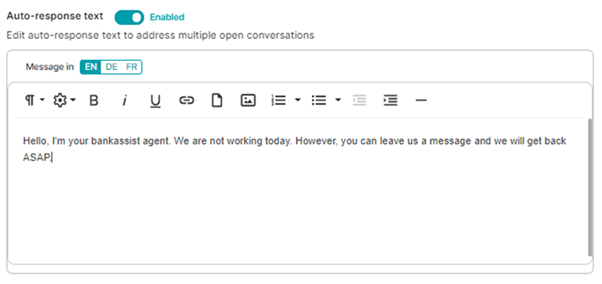
6. Enable the Auto-response text option and type the text to be sent in the auto-response email if required after selecting the language.
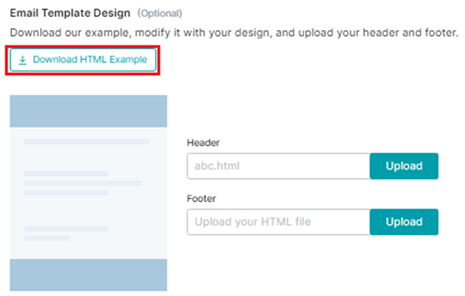
7. (Optional) Set the email template design by uploading the header and footer HTML files. To upload the files, follow these steps:
- Click Upload.
- Select the file to be uploaded from the source location.
- A success confirmation message is displayed after the upload.
- Alternatively, click Download HTML Example to download the default example, modify the design, and upload the header and footer.
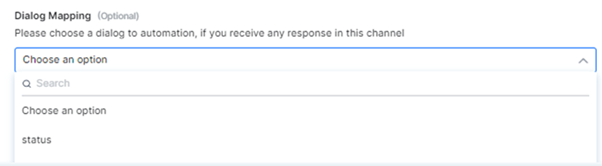
8. (Optional) To set a dialog that adds context to current conversation, select an option from the list under Dialog mapping.
9. After all the required fields are filled, click Done.
