이 튜토리얼은 웹 서비스에서 Kore.ai 봇의 메시지 및 webhook 이벤트의 세부적인 제어를 위해 사용할 수 있는 라이브러리의 모음인 Kore.ai BotKit SDK의 인스턴스를 설정하고 실행하기 위한 엔드투엔드 워크스루입니다. 이 튜토리얼에서는, 새 봇으로 설치할 수 있는 여행 계획 샘플이라는 샘플 봇을 사용하고, 인증 토큰을 생성한 다음, 테스트 콜백 서버로 ngrok를 사용하여 봇을 테스트하고, LiveChat을 사용하여 라이브 상담사로 상담사 전환에 접근할 수 있습니다.

참고: 이 튜토리얼에서는 최신 버전의 BotSDK 파일이 필요할 수 있습니다. 다운로드한 BotKit SDK 파일에 LiveChat.js 및 LiveChatAPI.js 파일이 포함되어 있지 않은 경우, Kore 지원팀에 문의하세요.

필수 구성 요소

이 튜토리얼을 완료하려면, 다음과 같은 필수 구성 요소를 설정하고 구성해야 합니다.

  • LiveChat 계정 – 구독하거나 30일 무료 평가판을 설치합니다. 이 튜토리얼의 BotKit SDK 설정을 구성하려면 LiveChat 계정의 라이선스 번호가 필요합니다.
  • 테스트 콜백 서버로 ngrok 설치 및 실행. 테스트 콜백 서버 애플리케이션, ngrok는 콜백 서버 애플리케이션을 시뮬레이션하는 데 사용됩니다.
  • 컴퓨터에 node.js 설치 – BotKit SDK는 서버 및 Kore.ai 봇 플랫폼 간 통신을 위해 node.js가 필요합니다.

LiveChat 평가판 계정 설정

자신만의 LiveChat 구독을 사용하거나 아래 그림과 같이 Start using LiveChat now! 필드에 비즈니스 이메일을 입력하여 LiveChatInc.com에서 무료 30일 평가판 계정을 설정할 수 있습니다. 
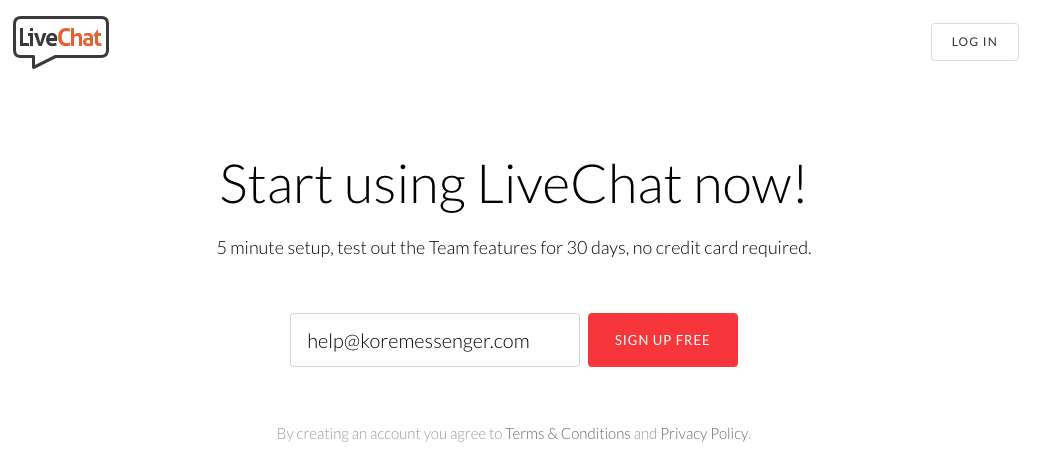
LiveChat 평가판 계정 설정 방법

  1. Let’s get started 페이지에서, 이름을 입력하고 로그인 암호를 만듭니다.
  2. Your website 페이지에서, 회사 URL(예: www.koremessenger.com)을 입력하고 Support를 클릭한 다음 Continue를 클릭합니다.
  3. 다음 Your company 페이지에서, 귀하의 업종, 직원 수, 휴대전화 번호, 대상자를 입력한 다음 Create Account를 클릭합니다.
  4. Install LiveChat 페이지의 하단에서, Go to the application을 클릭합니다.
  5. Add agents 페이지에서, 필요한 경우 추가 상담사를 추가하거나 skip this step을 클릭합니다.
  6. Customize your LiveChat 페이지에서, LiveChat 룩 앤드 필의 설정을 사용자 정의하거나 skip this step을 클릭합니다.
  7. Desktop Install 대화 상자에서 Maybe Later을 클릭하고, Let’s Start 대화 상자에서 Welcome to LiveChat을 클릭한 다음, skip the tutorial을 클릭합니다. LiveChat 상담사에게 수신 대화가 열리는 Chats 페이지가 표시됩니다.

BotKit SDK 설정을 위한 무료 라이선스 LiveChat 코드를 얻으려면, 상단 탐색 바에서 설정  아이콘을 클릭하고, 왼쪽 탐색 바에서 설치 메뉴를 확장한 다음, 다음 그림과 같이 Chat link를 클릭합니다. LiveChat 라이선스 표시된 대화 링크에서 LiveChat 라이선스 코드(예: 89XXXX5)를 클릭하고, 상단 탐색 바에서 CHATS 링크를 클릭한 다음, 이 튜토리얼에서 만들 상담사 전환이 있는 BotKit SDK 봇으로 부터 대화가 표시되도록 창을 열어둡니다. 참고: url-template 및 node-schedule 모듈(및 LiveChat과 관련된 js 파일에서 참조된 기타 모듈)이 컴퓨터에 설치되어 있는지 확인합니다.

ngrok 설치 및 실행하기

테스트 콜백 서버 애플리케이션을 다운로드하려면, https://ngrok.com/download를 클릭한 다음, 귀하의 운영 체제에 해당하는 ngrok 파일을 다운로드하고 설치합니다. 터미널 창에서, 다음 명령어를 사용하여 포트 8003을 모니터링하는 ngrok를 시작합니다. ngrok http 8003 
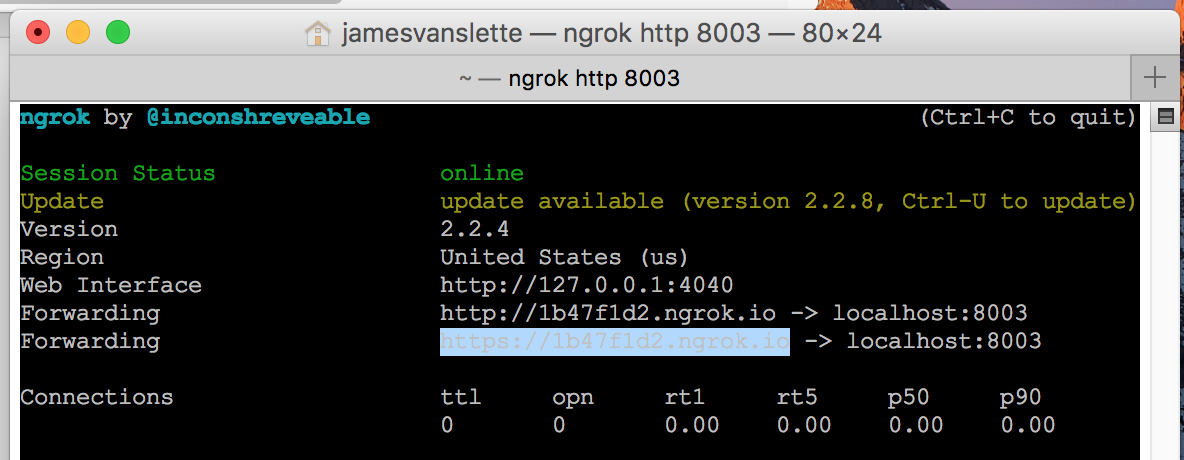
이전 그림에서 볼 수 있듯이 https 포워딩 URL을 복사합니다. 예: https://1b47f1d2.ngrok.io. 터미널 창을 열어두고 ngrok를 실행 중인 상태로 둡니다.

node.js 설치하기

BotKit SDK는 SDK가 설치된 동일한 서버에서 실행하려면 node.js가 필요합니다. https://nodejs.org/en/download/로 이동한 다음, Mac의 경우 .pkg 파일 유형으로, Windows의 경우 .msi 파일 유형으로 운영체제를 선택합니다. 터미널 창에서, node -v 명령어를 실행하여 다음 그림과 같이 설치 및 버전(예: v6.10.2)을 확인합니다.
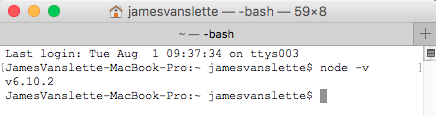
봇 설치 및 설정하기

필수 구성 요소가 설치되고 실행 중이면, 여행 계획 샘플 봇을 설치하고 난 다음, 상담사 전환 대화 작업을 해당 봇으로 가져올 준비가 되었습니다. 이 섹션에서는, 다음을 수행합니다.

  1. 여행 계획 샘플 봇 설치
  2. 상담사 전환 대화 작업 가져오기
  3. 앱 등록 생성
  4. 보안 자격 증명 생성
  5. BotKit SDK(config.json, LiveChat.js, LiveChatAPI.js 파일) 설치 및 설정

여행 계획 샘플 봇 설치하기

Kore.ai는 봇 인스턴스에 설치할 수 있는 바로 사용 가능한 샘플 봇을 제공합니다. 이 튜토리얼에서는, 여행 계획 샘플 봇을 설치해야 합니다. 여행 계획 샘플 봇 설치 방법

  1. 봇 빌더에 로그인한 다음, 새 봇 > 샘플 봇 설치를 클릭합니다.
  2. 여행 계획 샘플을 가리킨 다음, 설치를 클릭합니다. 여행 계획 샘플_KORE NAME_Instance#가 성공적으로 설치됨 메시지가 표시되고 샘플 봇이 왼쪽 탐색 메뉴에 있는 에 추가됩니다.

자세한 내용은, 여행 계획 샘플 봇을 참조하세요.

상담사 전환 대화 작업 가져오기

이 튜토리얼의 일부는 봇 빌더에서 상담사 전환 구성 요소를 사용하여 봇 대화에서 봇 사용자를 라이브 상담사로 전환하는 방법을 보여줍니다. 이 섹션에서, 내보낸 대화 작업을 다운로드한 다음 해당 대화 작업을 여행 계획 샘플 봇의 인스턴스로 가져옵니다. 여기서 상담사 전환 대화 작업 다운로드: 상담사 전환  대화 작업을 가져오는 방법

  1. 봇 빌더에서, 이 튜토리얼을 위해 설치한 여행 계획 샘플 봇을 선택합니다.
  2. 봇 작업 페이지에서, 대화 작업 탭 위로 마우스를 이동한 다음, 더하기 기호를 클릭합니다.
  3. 의도 이름 필드에서, 상담사 전환을 입력한 다음, 생성을 클릭합니다.
  4. 작업 편집기의 오른쪽 상단 모서리에서, 줄임표 아이콘을 클릭한 다음, 가져오기를 클릭합니다.
  5. 대화 가져오기 대화 상자에서, 파일 선택을 클릭하고, 다운로드한 상담사 전환 대화 파일로 이동한 다음, 가져오기를 클릭합니다.

가져오기 성공 대화 상자 및 가져오기 결과가 표시됩니다.

앱 등록 및 클라이언트 자격 증명 생성하기

BotKit SDK를 Kore.ai 봇 플랫폼에 등록하려면, 앱 등록을 생성한 다음, 귀하의 서버 플랫폼에 설치된 SDK와 Kore.ai 봇 플랫폼 간 안전한 통신을 위해 사용되는 보안 자격 증명을 생성해야 합니다. 앱 등록 생성하기

  1. 봇의 측면 탐색 패널위로 마우스를 가져간 다음 앱 및 상담사를 클릭합니다.
  2. 앱 및 상담사 페이지에서, BotKit SDK 탭을 클릭합니다.
  3. 앱 이름 드롭다운 목록 옆에 있는, 추가를 클릭합니다.
  4. 앱의 이름을 입력한 후, 다음을 클릭합니다.
  5. 클라이언트 ID 및 클라이언트 시크릿이 나타납니다. 완료를 클릭합니다.
  6. 콜백 URL 필드에서, 필수 구성 요소의 일부로 설치하고 실행한 ngrok 애플리케이션의 포워딩 URL에서 복사한 애플리케이션 URL을 입력합니다. 예: https://1bXXXXd2.ngrok.io.
    참고: 실행 중인 각 ngrok 인스턴스는 세션 고유 URL을 생성합니다. ngrok를 중지하고 다시 시작하려는 경우, 콜백 URL 필드를 업데이트해야 합니다.
  7. 이벤트 섹션에서, 다음을 선택합니다.
    1. OnMessage – 사용자로부터 메시지가 수신될 때 이벤트가 실행됩니다.
    2. OnAgentTransferNode – 대화 작업 흐름에서 상담사 전환 노드가 발견될 때 이벤트가 실행됩니다.
  8. 자격 증명 생성을 클릭합니다. 앱 생성 대화 상자가 닫히고, 클라이언트 자격 증명과 함께 새 앱 등록이 SDK 설정 섹션에 표시됩니다.
  9. 저장을 클릭합니다. 성공적으로 구독됨 메시지가 표시됩니다.

BotKit SDK 설정을 구성하려면, 다음을 수행해야 합니다.

  • 클라이언트 ID(예: cs-6e5eb411-XXXX-XXXX-9ba2-ccc748d4f719)를 복사합니다.
  • 클라이언트 시크릿(예: dTTmuTOgs8SOXXXXXXXXouE0EPy28fXojOJWedOEF6s=)을 확인한 다음, 복사합니다.

봇 게시하기

저장 시 소유자는 봇을 사용할 수 있으므로 개발자는 설치된 봇을 즉시 테스트에 사용할 수 있습니다. 이 튜토리얼에서만 이 봇을 실행하고 테스트하려는 경우, 다음 섹션인 BotKit SDK 설치 및 설정하기로 건너뛸 수 있습니다. 다른 사용자에게 봇을 활성화하려면, 다른 사용자의 엔터프라이즈 관리자가 해당 기업의 사용자를 위해 봇을 승인하고 배포할 수 있도록 봇을 게시해야 합니다. 자세한 내용은, 작업 게시하기를 참조하세요. 봇 빌더에서 봇을 게시한 후, 봇의 엔터프라이즈 관리자는 봇의 이용 대상엔터프라이즈 사용자 또는 일반 대중 중에 어느 것으로 설정되어 있는지에 따라 봇 관리자 콘솔에서 다음 봇 배포 중 하나를 완료해야 합니다.

  • 엔터프라이즈 사용자의 경우
    1. 봇 관리자 콘솔에서, 봇 관리 모듈의 엔터프라이즈 봇 페이지에서, 배포하려는 상담사 전환 봇의 줄임표 아이콘을 클릭한 다음 봇 작업 관리를 클릭합니다. 봇 작업 관리 대화 상자가 표시됩니다.
    2. 봇 작업 필드를 확장하여 사용 가능한 작업과 배포된 작업을 봅니다.
    3. 봇의 모든 작업을 선택한 다음 확인을 클릭합니다.
    4. 봇 작업 관리 대화 상자에서, 확인을 클릭합니다. 봇 상태가 성공적으로 변경됨 메시지가 표시됩니다.
    5. 엔터프라이즈 봇 페이지에서, 엔터프라이즈 사용자를 할당하려는 상담사 전환 봇의 줄임표 아이콘을 클릭한 다음 봇 및 작업 할당을 클릭합니다. 봇 및 작업 할당 대화 상자가 표시됩니다.
    6. 엔터프라이즈에서 선택된 사용자에게 봇을 할당합니다.

 – 또는 –

  • 일반 대중 사용자의 경우
    1. 봇 관리자 콘솔에서, 봇 관리 모듈의 소비자 봇 페이지에서, 배포하려는 상담사 전환 봇의 줄임표 아이콘을 클릭한 다음 봇 작업 관리를 클릭합니다. 봇 작업 관리 대화 상자가 표시됩니다.
    2. 봇 작업 필드를 확장하여 사용 가능한 작업과 배포된 작업을 봅니다.
    3. 봇의 모든 작업을 선택한 다음 확인을 클릭합니다. 봇 상태가 성공적으로 변경됨 메시지가 표시됩니다.

BotKit SDK 설치 및 설정하기

https://github.com/Koredotcom/BotKit에서 Kore.ai BotKit SDK를 다운로드한 다음 압축을 풀어야 합니다. LiveChat.js 파일이 포함된 최신 버전을 다운로드해야 합니다.

참고: 이 튜토리얼에서는 최신 버전의 BotSDK 파일이 필요할 수 있습니다. 다운로드한 BotKit SDK 파일에 LiveChat.jsLiveChatAPI.js 파일이 포함되어 있지 않은 경우, Kore 지원팀에 문의하세요.

config.json BotKit SDK 폴더에서, 콜백 서버에 대한 연결 정보가 포함된 config.json 파일을 편집해야 합니다. 이 튜토리얼에서는, 여행 계획 샘플 봇을 위한 앱 등록을 만들 때 생성된 보안 자격 증명과 함께 ngrok를 사용하고, LiveChat 상담사 애플리케이션을 위한 라이선스 키가 포함된 config.json 파일에 새 줄을 추가합니다. 다음 매개변수를 위한 기본 config.json 파일을 다음과 같이 수정합니다.

  • urlngrok포워딩 URL과 함께 이 매개변수 추가
  • apikey클라이언트 시크릿을 사용하여 매개변수 업데이트
  • appId클라이언트 ID를 사용하여 매개변수 업데이트
  • liveagentlicense – 다음 예시와 같이 LiveChat Chat URL에서 라이선스 키와 함께 이 매개변수를 추가합니다.
{
    "server": {
        "port": 8003
    },
    "app": {
        "apiPrefix" : "",
        "url": "< ngrok Forwarding URL >"
    },
    "credentials": {
        "apikey": "< Client Secret from Bot Builder >",
        "appId": "< Client ID from Bot Builder >"
    },
    "redis": {
        "options": {
            "host": "localhost",
            "port": 6379
        },
        "available": false
    },
    "examples" : {
        "mockServicesHost"  : "http://localhost:8004"
    },
     "liveagentlicense": "< LiveChat License Key >"
}

다음 코드는 완전히 정의된 샘플 config.json 파일의 예입니다.

{
    "server": {
        "port": 8003
    },
    "app": {
        "apiPrefix" : "",
        "url": "https://1b47f1d2.ngrok.io"
    },
    "credentials": {
        "apikey": "dTTmuTOgs8SOCwXXXXXXXXE0EPy28fXojOJWedOEF6s=",
        "appId": "cs-6e5eb411-XXXX-XXXX-9ba2-ccc748d4f719"
    },
    "redis": {
        "options": {
            "host": "localhost",
            "port": 6379
        },
        "available": false
    },
    "examples" : {
        "mockServicesHost"  : "http://localhost:8004"
    },
     "liveagentlicense": "89XXX15"
}

LiveChat.js 및 LiveChatAPI.js

BotKit SDK의 LiveChat.jsLiveChatAPI.js 파일에는 봇의 대화 작업에서 상담사 애플리케이션으로의 원활한 전환을 제어하는 JavaScript가 포함되어 있습니다. 이 튜토리얼에서는, 다음 정보를 사용하여 LiveChat을 사용한 대화 전환을 설정합니다. 봇 빌더에서, 여행 계획 샘플 봇을 선택한 다음, 설정 탭에서, 일반 설정 섹션의 확장  아이콘을 클릭합니다. 일반 설정 섹션이 표시됩니다. 다음을 복사합니다.

  • 봇 이름 – 봇 플랫폼의 봇 이름입니다. 예: 여행 계획 샘플_KORE ADMIN_10.
  • 봇 ID – 봇에 대한 봇 플랫폼 시스템 고유 ID입니다. 예: st-26cfae3a-XXXX-XXXX-991a-376b7fe579d5.

LiveChat.jsLiveChatAPI.js 모두에서, 봇 인스턴스의 설정으로 다음 대/소문자를 구분하는 변수를 업데이트하고 저장합니다.
var botId = "<Bot ID>";
var botName = "<Bot Name >";

예:
var botId = "st-26cfae3a-XXXX-XXXX-991a-376b7fe579d5";
var botName = "Travel Planning Sample_KORE ADMIN_10";

BotKit SDK 애플리케이션 시작하기

BotKit SDK를 이용한 상담사 전환이 있는 여행 계획 샘플 봇을 사용하려면, node.js가 설치되어 있고 8003 포트를 수신하는 ngrok가 실행되어 있어야 합니다.
BotKit SDK
시작 방법
터미널 창에서, BotKit SDK 폴더로 이동한 다음, 다음 명령어를 입력합니다.
node app.js
node.js가 실행 중일 때, 다음과 같은 응답을 받아야 합니다.
app listening at http://:::8003

BotKit SDK 봇 테스트하기

봇을 테스트하려면, 다음이 필요합니다.

  • ngrok 실행 중 – 명령어 = ngrok http 8003
  • node.js 실행 중 – 명령어 = node app.js
  • LiveChat – 로그인 중이며 웹 대화 페이지 열림
  • 봇 빌더 – 봇 빌더 페이지의 오른쪽 하단에 있는 다음 아이콘을 클릭하여 봇과 대화를 시작합니다.

상담사 전환 대화가 시작된 후, LiveChat 및 BotKit SDK 간에 메시지가 교환됩니다.

다음 단계

귀하의 애플리케이션에서 Kore.ai 봇을 사용하려면, BotKit SDK를 설정하고 애플리케이션을 콜백 URL에 등록하여 ngrok 대신 회사 애플리케이션 서버를 가리키도록 해야 합니다. 또한, 다른 사용자와 봇을 공유하려면, 회사의 엔터프라이즈 관리자가 봇을 승인하고 게시한 후 해당 사용자에게 배포해야 합니다.

これは、Kore.ai BotKit SDK のインスタンスを設定して実行するためのエンド ツー エンドのチュートリアルです。この SDK は、Kore.ai ボットのメッセージと Webhook イベントを Web サービスで制御するために使用できるライブラリのコレクションです。このチュートリアルでは、旅行計画サンプル というサンプル ボットを使用します。このサンプル ボットは、新規ボットとしてインストールし、エージェント転送用のダイアログ タスクをインポートし、認証トークンを生成し、テスト コールバック サーバーとして ngrok を使用してボットをテストし、 LiveChat を使用してライブ エージェントへのエージェント転送にアクセスします。

メモ: このチュートリアルでは、BotSDK ファイルの新しいバージョンが必要になる場合があります。ダウンロードした BotKit SDK ファイルに LiveChat.js と LiveChatAPI.js ファイルが含まれていない場合は、Kore サポートまでお問い合わせください。

必要条件

このチュートリアルを完了するには、以下の必要条件を設定し、構成する必要があります:

  • LiveChat アカウント ー 登録するか、30 日間の無料トライアルをセットアップします。このチュートリアルで BotKit SDK の設定を行うには、LiveChat アカウントのライセンス番号が必要です。
  • テスト用コールバック サーバーとしてngrok をインストールおよび実行します。テスト用コールバック サーバー アプリケーション ngrok は、コールバック サーバー アプリケーションのシミュレーションに使用します。
  • node.jsをコンピュータにインストール ー BotKit SDK はサーバーと Kore.ai ボット プラットフォームとの通信に node.js を必要とします。

LiveChat 試用版アカウントのセットアップ

下記のように、」LiveChat をはじめましょう" の欄に勤務先のメールアドレスを入力すると、ご自身の LiveChat サブスクリプションを使用するか、LiveChatInc.com の30日間の無料試用版アカウントをセットアップすることができます。 LiveChat の試用版アカウントを設定するには

  1. 始めましょう」ページで、名前を入力し、ログオン パスワードを作成します。
  2. Web サイト のページで、会社の URL、たとえば www.koremessenger.comを入力し、 [サポート]をクリックして、さらに "続行 " をクリックします。
  3. 以下の「会社情報」ページで、業種、従業員数、携帯電話番号、配信対象を入力して、[アカウントの作成] をクリックします。
  4. LiveChat のインストール」ページの下部にある [アプリケーションに移動] をクリックします。
  5. エージェントの追加」ページで、必要に応じてエージェントを追加するか、 [このステップをスキップ] をクリックします。
  6. LiveChat のカスタマイズ」ページで、LiveChat のルック&フィールの設定をカスタマイズするか、 [このステップをスキップ] をクリックします。
  7. "デスクトップ インストール" ダイアログで [後に回す] をクリックし、"始めましょう" ダイアログで [LiveChat へようこそ ] をクリックして、[チュートリアルをスキップ] をクリックします。「チャット」ページが表示され、LiveChat エージェントの着信チャットが開きます。

BotKit SDK 設定用の LiveChat コードの無料ライセンスを取得するには、トップ ナビゲーション バーの 設定 アイコンをクリックし、左のナビゲーション バーで インストール メニューを展開し、以下の図のように チャット リンク をクリックします。LiveChat ライセンス 表示されたチャット リンクから LiveChatの ライセンスコードをコピーし(例: 89XXXX5)、トップ ナビゲーション バーの CHATS リンクをクリックして、このチュートリアルで作成するエージェント転送付き BotKit SDK ボットからのチャットを表示するウィンドウを開いたままにします。メモ: url-template および node-schedule モジュール (および LiveChat に関連する js ファイルで参照されているその他のモジュール) がコンピュータにインストールされていることを確認してください。

ngrok のインストールと実行

テスト用コールバック サーバー アプリケーションをダウンロードするには、https://ngrok.com/download をクリックして、お使いのオペレーティング システム用の ngrok ファイルをダウンロードしてインストールします。ターミナル ウィンドウで ngrok を起動し、以下のコマンドでポート 8003 を監視します。 ngrok http 8003 前図で示されるように、https 転送 URL をコピーします。例: https://1b47f1d2.ngrok.ioターミナル ウィンドウを開いたまま、ngrok を起動します。

Node.js のインストール

BotKit SDK は、SDK がインストールされているサーバー上で Node.js が動作している必要があります。https://nodejs.org/en/download/ にアクセスし、お使いの OS に応じて、Mac の場合は .pkg、Windows の場合は .msi のファイル タイプを選びます。ターミナルウィンドウで node -v コマンドを実行して、インストールとバージョンを確認します。たとえば次図 v6.10.2

ボットのインストールと設定

必要条件をインストールして実行すると、旅行計画サンプル ボットをインストールし、 エージェント転送 ダイアログ タスクをボットにインポートする準備が整います。このセクションでは、以下を実行します:

  1. 旅行計画サンプルボットのインストール
  2. エージェント転送ダイアログ タスクのインポート
  3. アプリ登録の作成
  4. セキュリティ資格情報の生成
  5. BotKit SDKのインストールと設定 ー config.json、LiveChat.js、および LiveChatAPI.js ファイル

旅行計画サンプル ボットのインストール

Kore.ai にはすぐに使えるサンプル ボットが用意されており、ボットビルダーのインスタンスにインストールすることができます。このチュートリアルでは、旅行計画サンプル ボットをインストールする必要があります。 旅行計画サンプルボットをインストールするには

  1. ボットビルダーにログオンして、[新規ボット] > [サンプル ボットのインストール] をクリックします。
  2. [旅行計画サンプル] をポイントして、 [インストール]をクリックします。「旅行計画サンプル_KORE NAME_Instance# は正常にインストールされました」のメッセージが表示され、ボットの左のナビゲーション メニューにサンプル ボットが追加されます。

詳しくは「旅行計画サンプル ボット」をご覧ください。

エージェント転送ダイアログ タスクのインポート

このチュートリアルの一部では、ボットビルダーのエージェント転送コンポーネントを使用して、ボットユーザーをボットの会話からライブ エージェントに移行させる方法を紹介します。このセクションでは、エクスポートしたダイアログ タスクをダウンロードして、そのダイアログタスクを 旅行計画サンプル ボット のインスタンスにインポートします。エージェント転送ダイアログ タスクのダウンロードはこちら: エージェント転送  ダイアログ タスクをインポートするには

  1. ボットビルダーで、このチュートリアルのためにインストールした旅行計画サンプルのボットを選びます。
  2. 「ボット タスク」 ページで [ダイアログ タスク] タブにカーソルを合わせ、プラス記号をクリックします。
  3. インテント名フィールドに エージェント転送を入力して、[作成]をクリックします
  4. タスク エディターの右上にある 省略記号アイコンをクリックして、 [インポート] をクリックします。
  5. ダイアログのインポートダイアログで、[ファイルの選択] をクリックし、ダウンロードしたエージェント転送 ダイアログ ファイルに移動して、[インポート]をクリックします。

"インポート成功" ダイアログが表示され、インポートの結果が表示されます。

アプリの登録とクライアント資格情報の生成

BotKit SDK を Kore.ai ボット プラットフォームに登録するには、アプリの登録を行い、サーバー プラットフォームにインストールされた SDK と Kore.ai ボット プラットフォームとの間で安全に通信するためのセキュリティ資格情報を生成する必要があります。アプリ登録の作成

  1. ボットのサイド ナビゲーション パネルにカーソルを合わせ、「アプリとエージェント」をクリックします。
  2. 「アプリとエージェント」ページで、「BotKit SDK」 タブをクリックします。
  3. アプリ名」ドロップダウンリストの隣にある [追加] をクリックします。
  4. アプリ名を入力して、[次へ] をクリックします。
  5. クライアント ID とクライアント シークレットの詳細が表示されます。。[完了] をクリックします。
  6. "コールバック URL" フィールドには、必要条件の一部としてインストールして実行した ngrok アプリケーションの「転送 URL 」からコピーしたアプリケーションの URL を入力します。例:  :https://1bXXXXd2.ngrok.io
    メモ: ngrok の各実行インスタンスは、セッション固有の URL を生成します。ngrok を停止して再起動した場合は、"コールバック URL" フィールドを更新する必要があります。
  7. [イベント] セクションにおいて、以下を選びます:
    1. OnMessage ー ユーザーからのメッセージを受信すると、イベントがトリガーされます。
    2. OnAgentTransferNode ー ダイアログのタスク フローでエージェント転送ノードが検出されると、イベントがトリガーされます。
  8. [資格情報の作成] をクリックします。"アプリの作成"  ダイアログが閉じられ、新しいアプリの登録とクライアントの資格情報が [SDK 設定] セクションに表示されます。
  9. [保存] をクリックします。「サブスクライブが正常に登録されました」と表示されます。

BotKit SDK の設定には、以下が必要です:

  • クライアント ID」をコピーします。例: cs-6e5eb411-XXXX-XXXX-9ba2-ccc748d4f719.
  • クライアント シークレット」を表示して、コピーします。例: dTTmuTOgs8SOXXXXXXXXouE0EPy28fXojOJWedOEF6s=.

ボットの公開

開発者は、インストールされたボットをすぐにテストに使用できます。ボットは、所有者が保存すると利用できるようになります。このチュートリアルのためにこのボットを実行してテストする場合は、次のセクション [BotKit SDK のインストールと設定] にスキップできます。他のユーザーがボットを使用できるようにするには、他のユーザーのエンタープライズ管理者がエンタープライズ内のユーザーにボットを承認してデプロイできるように、ボットを公開する必要があります。詳しくは、「タスクの公開」をご覧ください。Bot Builder でボットを公開した後、そのボットの企業管理者は、ボットの 対象オーディエンスエンタープライズユーザー または 一般ユーザー に設定されているかに応じて、ボット管理コンソールで以下のいずれか 1 つのボットのデプロイメントを行う必要があります。

  • エンタープライズ ユーザー向け
    1. ボット管理者コンソールのボット管理モジュールで、エンタープライズ ボットページでデプロイしたいエージェント転送ボットの省略記号アイコンをクリックし、さらにボット タスクの管理をクリックします。"ボット タスクの管理" ダイアログが表示されます。
    2. "ボット タスク" フィールドを展開すると、デプロイされた使用可能なタスクが表示されます
    3. ボットのタスクをすべて選択して、[確認] をクリックします。
    4. "ボット タスクの管理" ダイアログで [確認] をクリックします。「ボットのステータスは正常に変更されました」というメッセージが表示されます。
    5. エンタープライズボット」 ページで、エンタープライズ ユーザーを割り当てたいエージェント転送ボットの 省略記号 のアイコンをクリックし、「ボットとタスクの割り当て」をクリックします。「ボットとタスクの割り当て" ダイアログが表示されます。
    6. エンタープライズ内の選択されたユーザーにボットを割り当てます。

 ー または ー

  • 一般パブリック ユーザー向け
    1. ボット管理者コンソールで、ボット管理 モジュールで、消費者ボットページでデプロイしたいエージェント転送ボットの省略記号アイコンをクリックし、さらにボット タスクの管理をクリックします。"ボット タスクの管理" ダイアログが表示されます。
    2. "ボット タスク" フィールドを展開すると、デプロイされた使用可能なタスクが表示されます。
    3. ボットのすべてのタスクを選択して、[確認] をクリックします。「ボットのステータスは正常に変更されました」というメッセージが表示されます。

BotKit SDK のインストールと設定

https://github.com/Koredotcom/BotKit から Kore.ai BotKit SDK をダウンロードして解凍する必要があります。必ず LiveChat.js ファイルを含む最新版をダウンロードしてください。

メモ: このチュートリアルでは、BotSDK ファイルの新しいバージョンが必要になる場合があります。ダウンロードした BotKit SDK ファイルに LiveChat.jsLiveChatAPI.js ファイルが含まれていない場合は、Kore サポートまでお問い合わせください。

Config.json ー BotKit SDK フォルダ内で、コールバック サーバーへの接続情報を含む config.json ファイルを編集する必要があります。このチュートリアルでは、ngrokと、旅行計画サンプル ボットのアプリ登録を行った際に生成されたセキュリティ資格情報を使用し、LiveChat エージェント アプリケーションのライセンス キーを含む新しい行を config.json ファイルに追加します。デフォルトの config.json ファイルのパラメータを以下のように変更します:

  • urlngrok転送
    URL
     の値を使用して、このパラメータを追加します
  • apikeyクライアント シークレットを使用してパラメータを更新します
  • appIdクライアント IDを使用してパラメータを更新します
  • liveagentlicense — 以下のサンプルに示すように、LiveChat のチャット URL のライセンス キーの値を使用してこのパラメータを追加します。
{ "server": { "port": 8003 }, "app": { "apiPrefix" : "", "url": "< ngrok Forwarding URL >" }, "credentials": { "apikey": "< Client Secret from Bot Builder >", "appId": "< Client ID from Bot Builder >" }, "redis": { "options": { "host": "localhost", "port": 6379 }, "available": false }, "examples" : { "mockServicesHost" : "http://localhost:8004" }, "liveagentlicense": "< LiveChat License Key >" }

以下のコードは、完全に定義されたサンプル config.json ファイルの例です:

{ "server": { "port": 8003 }, "app": { "apiPrefix" : "", "url": "https://1b47f1d2.ngrok.io" }, "credentials": { "apikey": "dTTmuTOgs8SOCwXXXXXXXXE0EPy28fXojOJWedOEF6s=", "appId": "cs-6e5eb411-XXXX-XXXX-9ba2-ccc748d4f719" }, "redis": { "options": { "host": "localhost", "port": 6379 }, "available": false }, "examples" : { "mockServicesHost" : "http://localhost:8004" }, "liveagentlicense": "89XXX15" }

LiveChat.js と LiveChatAPI.js

BotKit SDK の LiveChat.jsLiveChatAPI.js ファイルには、ボット内の対話タスクからエージェント アプリケーションへのシームレスな移行を制御する JavaScript が含まれています。このチュートリアルでは、以下の情報により、LiveChat を使用したダイアログ転送を設定します: ボットビルダーで、旅行計画サンプルボットを選択し、[設定] タブで、[一般設定] セクションの [展開 ] アイコンをクリックします。[一般設定] セクションが表示されます。以下をコピーします:

  • ボット名 ー ボット プラットフォーム上でのボットの名前です。例: 旅行計画サンプル_KORE ADMIN_10
  • ボット ID ー ボットのボット プラットフォーム システム固有の Id。例: st-26cfae3a-XXXX-XXXX-991a-376b7fe579d5.

LiveChat.jsLiveChatAPI.jsの両方で、以下の大文字と小文字を区別する変数を、ボット インスタンスの設定で更新および保存します。 var botId = "<Bot ID>"; var botName = "<Bot Name >"; 例: var botId = "st-26cfae3a-XXXX-XXXX-991a-376b7fe579d5"; var botName = "Travel Planning Sample_KORE ADMIN_10";

BotKit SDK アプリケーションの起動

BotKit SDK を利用したエージェント転送による 旅行計画サンプルボットの使用を開始するには、Node.js がインストールされ、ngrok がポート 8003でリスニングを実行していることが必要です。BotKit SDK を起動するには ターミナル ウィンドウで BotKit SDK のフォルダに移動し、以下のコマンドを入力します: node app.js Node.js が動作していれば、以下のようなレスポンスが得られるはずです。 app listening at http://:::8003

BotKit SDK ボットのテスト

作成したボットをテストするには、以下が必要です:

  • ngrok running – Command = ngrok http 8003
  • node.js running – Command = node app.js
  • LiveChat ー ログイン後、Web のチャット ページが開いている状態
  • ボットビルダー ー ボットビルダー ページの右下隅にある以下のアイコンをクリックして、ボットとの対話を開始します。

エージェント転送ダイアログが開始されると、LiveChat と BotKit SDK の間でメッセージが交換されます。

次のステップ

Kore.ai ボットをアプリケーションで使用するには、BotKit SDK を設定し、コールバック URLngrokではなく自社のアプリケーション サーバーを指すように、アプリケーションを設定する必要があります。もちろん、他のユーザーとボットを共有するには、所属する会社のエンタープライズ管理者がボットを承認し、ボットを公開した後、それらのユーザーにボットをデプロイする必要があります。

This tutorial is an end-to-end walkthrough for setting up and running an instance of the Kore.ai BotKit SDK which is a collection of libraries that you can use for more control of the messages and webhook events for Kore.ai bots for your web service. For this tutorial, you will use the sample bot called Travel Planning Sample that you can install as a new bot, import a dialog task for agent transfer, generate authentication tokens, test the bot using ngrok as a test callback server, and access the agent transfer to a live agent using LiveChat.

Note: This tutorial may require a newer version of BotSDK files. If the downloaded BotKit SDK files do not contain LiveChat.js and LiveChatAPI.js files, contact Kore Support.

Prerequisites

To complete this tutorial, you will have to set up and configure the following prerequisites:

  • LiveChat account – Subscribe to or set up a free 30-day trial. You will need the license number from the LiveChat account to configure the BotKit SDK settings for this tutorial.
  • Install and run ngrok as your test callback server. The test callback server application, ngrok, is used to simulate your callback server application.
  • Install node.js on your computer – The BotKit SDK requires node.js to communicate between your server and the Kore.ai Bots Platform.

Setup a LiveChat Trial Account

You can use your own LiveChat subscription or set up a free 30-day trial account at LiveChatInc.com by entering your business email in the Start using LiveChat now! field as shown below:

To configure a LiveChat trial account

  1. On the Let’s get started page, enter your name and create a logon password.
  2. On the Your website page, enter your company URL, for example, www.koremessenger.com, click Support, and then click Continue.
  3. On the following Your company page, enter your industry, number of employees, mobile number, audience, and then click Create Account.
  4. On bottom of the Install LiveChat page, click Go to the application.
  5. On the Add agents page, add additional agents if needed or click skip this step.
  6. On the Customize your LiveChat page, customize the settings for LiveChat look and feel or click skip this step.
  7. Click Maybe Later on the Desktop Install dialog, and then click Welcome to LiveChat on the Let’s Start dialog, and then click skip the tutorial. The Chats page is displayed where incoming chats open for the LiveChat agent.

To get your free license LiveChat code for your BotKit SDK configuration, click the Settings  icon on the top navigation bar, expand the Installation menu on the left navigation bar, and then click Chat link as shown in the following illustration.
LiveChat License
Copy the LiveChat license code from the chat link displayed, for example, 89XXXX5, and then click the CHATS link on the top navigation bar and leave the window open to display your chats from the BotKit SDK bot with agent transfer that you will create in this tutorial.
Note: Make sure url-template and node-schedule modules (and any other modules as referenced in js file related to LiveChat) are installed on your computer.

Installing and running ngrok

To download the test callback server application, click https://ngrok.com/download, and then download and install the ngrok file for your operating system.
In a Terminal Window, start ngrok to monitor port 8003 using the following command:
ngrok http 8003

Copy the https Forwarding URL as shown in the previous illustration, for example, https://1b47f1d2.ngrok.io. Leave the terminal window open and ngrok running.

Installing node.js

The BotKit SDK requires node.js to run on the same server where the SDK is installed. Go to https://nodejs.org/en/download/, and then select your OS as a .pkg file type for Mac and .msi file type for Windows.
In a Terminal window, run the node -v command to verify installation and version, for example, v6.10.2as shown in the following illustration.

Installing and Configuring Your Bot

With the prerequisites installed and running, you are ready to install the Travel Planning Sample bot and then import the Agent Transfer dialog task into that bot. In this section, you will:

  1. Install the Travel Planning Sample Bot
  2. Import the Agent Transfer dialog Task
  3. Create an App Registration
  4. Generate Security Credentials
  5. Install and Configure the BotKit SDK – config.json, LiveChat.js, and LiveChatAPI.js files

Installing the Travel Planning Sample Bot

Kore.ai provides ready to use sample bots that you can install into your instance of Bot Builder. For this tutorial, you will need to install the Travel Planning Sample bot.
To install the Travel Planning Sample bot

  1. Log on to Bot Builder, and then click New Bot > Install Sample Bot.
  2. Point to Travel Planning Sample, and then click Install. The Travel Planning Sample_KORE NAME_Instance# installed successfully message is displayed and the sample bot is added to your Bots left-hand navigation menu.

For more information, see Travel Planning Sample Bot.

Importing the Agent Transfer Dialog Task

Part of this tutorial is to show how you can use the agent transfer component in Bot Builder to transition the bot user from a bot conversation to a live agent. In this section, you will download an exported dialog task, and then import that dialog task into your instance of the Travel Planning Sample bot.
Download the agent transfer dialog task here: Agent Transfer 
To import a dialog task

  1. In Bot Builder, select the Travel Planning Sample bot that you installed for this tutorial.
  2. On the Bot Tasks page, hover over the Dialog Tasks tab, and then click the plus sign.
  3. In the Intent Name field, enter Agent Transfer, and then click Create.
  4. On the top right corner of the task editor, click the Ellipses icon, and then click Import.
  5. In the Import a Dialog dialog, click Choose File, navigate to your downloaded Agent Transfer dialog file, and then click Import.

The Import Successful dialog and the results of the import are displayed.

Registering Your App and Generating Client Credentials

To register your BotKit SDK with the Kore.ai Bots platform, you will need to create an app registration, and then generate security credentials used to securely communicate between the SDK installed on your server platform and the Kore.ai Bots Platform.
Creating an App Registration

  1. Hover over the side-navigation panel of the bot and click Apps & Agents.
  2. On the Apps & Agents page, click the BotKit SDK tab.
  3. Next to the App name drop-down list, click Add.
  4. Enter a name for the app and then click Next.
  5. The Client ID and Client Secret details appear. Click Done.
  6. In the Callback URL field, enter the URL for your application that you copied from the Forwarding URL from the ngrok application that you installed and ran as part of the prerequisites, for example,  https://1bXXXXd2.ngrok.io.
    Note: Each running instance of ngrok will generate a session unique URL. You need to update the Callback URL field if you stop and restart ngrok.
  7. In the Events section, select:
    1. OnMessage – An event is triggered when a message from a user is received.
    2. OnAgentTransferNode – An event is triggered when an Agent Transfer node is encountered in the dialog task flow.
  8. Click Create Credentials. The Create App dialog is closed, and the new app registration along with client credentials are displayed in the SDK Configuration section.
  9. Click Save. The Successfully subscribed message is displayed.

To configure the BotKit SDK settings, you will need to:

  • Copy the Client ID, for example, cs-6e5eb411-XXXX-XXXX-9ba2-ccc748d4f719.
  • View, and then copy the Client Secret, for example, dTTmuTOgs8SOXXXXXXXXouE0EPy28fXojOJWedOEF6s=.

Publishing the Bot

A developer can use any installed bot immediately for testing as bots are available to the owner on save. If you only want to run and test this bot for this tutorial, you can skip to the next section, Installing and Configuring the BotKit SDK.
To enable the bot for other users, you must publish the bot so the Enterprise Admin for other users can approve and deploy the bot for users in their enterprise. For more information, see Publishing Tasks.
After you publish a bot in Bot Builder, an Enterprise Admin for your bot must complete one of the following bot deployments in the Bots Admin Console depending if your bot Target Audience is set to Enterprise Users or General Public:

  • For Enterprise Users
    1. In the Bots Admin Console, in the Bots Management module, on the Enterprise Bots page, click the Ellipses icon for the Agent Transfer bot that you want to deploy, and then click Manage bot tasks. The Manage Bot Tasks dialog is displayed.
    2. Expand the Bot Tasks field to view the available and deployed tasks.
    3. Select all tasks of the bot and then click Confirm.
    4. In the Manage bots tasks dialog, click Confirm. The Bot status changed successfully message is displayed.
    5. On the Enterprise Bots page, click the Ellipses icon for the Agent Transfer bot that you want to assign enterprise users to, and then click Bot & task assignments. The Bot & task assignments dialog is displayed.
    6. Assign the bot to the selected users in the enterprise.

 – or –

  • For General Public Users
    1. In the Bots Admin Console, in the Bots Management module, on the Consumer Bots page, click the Ellipses icon for the Agent Transfer bot that you want to deploy, and then click Manage bot tasks. The Manage Bot Tasks dialog is displayed.
    2. Expand the Bot Tasks field to view the available and deployed tasks.
    3. Select all tasks of the bot and then click Confirm. The Bot status changed successfully message is displayed.

Installing and Configuring the BotKit SDK

You need to download and then uncompress the Kore.ai BotKit SDK from https://github.com/Koredotcom/BotKit. Be sure to download the latest version that contains the LiveChat.js files.

Note: This tutorial may require a newer version of BotSDK files. If the downloaded BotKit SDK files do not contain LiveChat.js and LiveChatAPI.js files, contact Kore Support.

config.json

In your BotKit SDK folder, you will need to edit the config.json file that contains the connection information to your callback server. For this tutorial, you are using ngrok, along with the security credentials generated when you created the app registration for the Travel Planning Sample bot, and adding a new line to config.json file that contains the license key for your LiveChat agent application.
Modify the default config.json file for the following parameters as follows:

  • url – Add this parameter with the Forwarding URL from ngrok
  • apikey – Update parameter using Client Secret
  • appId – Update parameter using Client ID
  • liveagentlicense – Add this parameter with license key from LiveChat Chat URL as shown in the following example.
{
    "server": {
        "port": 8003
    },
    "app": {
        "apiPrefix" : "",
        "url": "< ngrok Forwarding URL >"
    },
    "credentials": {
        "apikey": "< Client Secret from Bot Builder >",
        "appId": "< Client ID from Bot Builder >"
    },
    "redis": {
        "options": {
            "host": "localhost",
            "port": 6379
        },
        "available": false
    },
    "examples" : {
        "mockServicesHost"  : "http://localhost:8004"
    },
     "liveagentlicense": "< LiveChat License Key >"
}

The following code is an example of a fully defined sample config.json file:

{
    "server": {
        "port": 8003
    },
    "app": {
        "apiPrefix" : "",
        "url": "https://1b47f1d2.ngrok.io"
    },
    "credentials": {
        "apikey": "dTTmuTOgs8SOCwXXXXXXXXE0EPy28fXojOJWedOEF6s=",
        "appId": "cs-6e5eb411-XXXX-XXXX-9ba2-ccc748d4f719"
    },
    "redis": {
        "options": {
            "host": "localhost",
            "port": 6379
        },
        "available": false
    },
    "examples" : {
        "mockServicesHost"  : "http://localhost:8004"
    },
     "liveagentlicense": "89XXX15"
}

LiveChat.js and LiveChatAPI.js

The LiveChat.js and LiveChatAPI.js files in the BotKit SDK contain the JavaScript that controls the seamless transfer from the dialog task in the bot to an agent application. For this tutorial, you will configure the dialog transfer using LiveChat with the following information:
In Bot Builder, select the Travel Planning Sample bot, and then on the Settings tab, click the Expand  icon for the General Settings section. The General Settings section is displayed. Copy the:

  • Bot Name – The name of the bot on the Bots Platform, for example, Travel Planning Sample_KORE ADMIN_10.
  • Bot ID – The Bots Platform system unique ID for the Bot, for example, st-26cfae3a-XXXX-XXXX-991a-376b7fe579d5.

In both the LiveChat.js and LiveChatAPI.js, update and save the following case-sensitive variables with the settings from your bot instance:
var botId = "< Bot ID >";
var botName = "< Bot Name >";

For example:
var botId = "st-26cfae3a-XXXX-XXXX-991a-376b7fe579d5";
var botName = "Travel Planning Sample_KORE ADMIN_10";

Starting the BotKit SDK Application

To start using the Travel Planning Sample bot with Agent Transfer using the BotKit SDK, node.js must be installed and ngrok running listening on port 8003.
To start BotKit SDK
In a Terminal window, navigate to your BotKit SDK folder, and then enter the following command:
node app.js
When node.js is running, you should get the following response:
app listening at http://:::8003

Testing the BotKit SDK Bot

To test your bot, you need the following:

  • ngrok running – Command = ngrok http 8003
  • node.js running – Command = node app.js
  • LiveChat – Logged in and web Chat page open
  • Bot Builder – Start Talk to the Bot by clicking the following icon on the bottom right corner of any Bot Builder page:

After the Agent Transfer dialog is started, messages are exchanged between LiveChat and the BotKit SDK.

Next Steps

To use the Kore.ai bot in your application, you would need to configure the BotKit SDK and register you application with CallBack URL to point to your company application server instead of ngrok. And of course, to share the bot with other users, the Enterprise Admin for your company would need to approve the bot, and deploy the bot to those users after you publish the bot.