Note: This message is enabled by default.
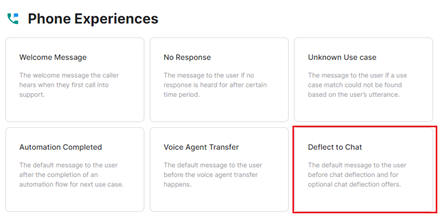
Automation Completed
Once an automated call with a user is completed for the given use case, the messages for the next steps or to close the conversation can be configured using Automation Completed.
It includes the What Next message that encourages the caller to continue with additional follow up use cases, and the Goodbye message which is played before ending the call.
These messages can be played sequentially, and multiple messages can be added to each category.
To access these two messaging options, follow these steps:
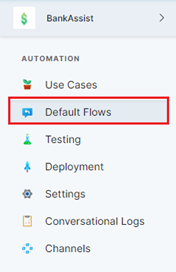
1. On the left pane, click Default Flows under the AUTOMATION section.
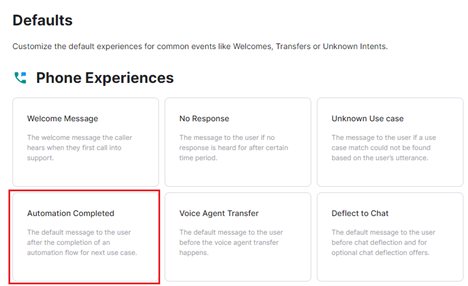
2. Click the Automation Completed tile under Defaults > Phone Experiences.
Then, follow these steps:
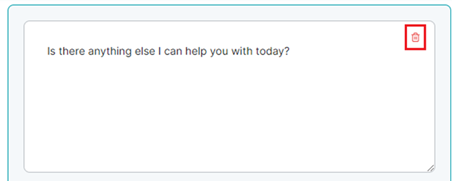
1. In the Automation Completed window, click the edit icon of the respective message textboxes.


2. To make the required configuration(s), follow these steps:
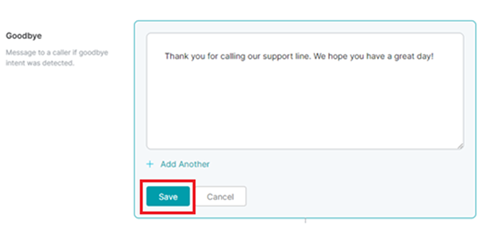
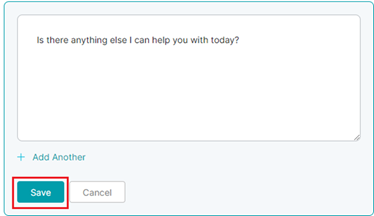
- Set a custom message by modifying the default text and clicking Save.
- Click the + Add Another button to add a new message in the additional textbox.
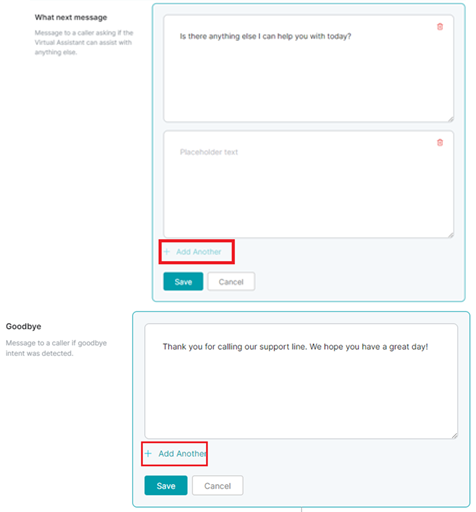
- Click the delete icon to delete a message.
3. After making the changes, click Save.
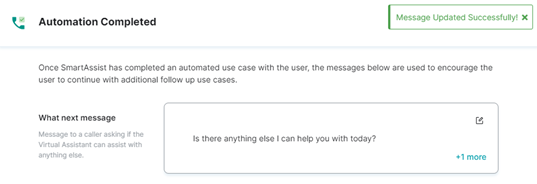
4. A success confirmation message is displayed when the message is updated.
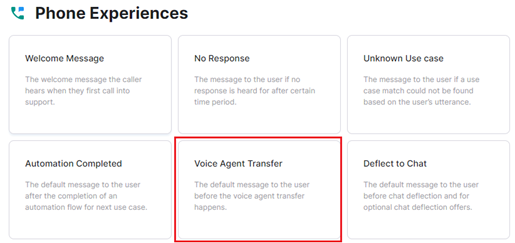
Voice Agent Transfer
This feature lets you define the experience for a customer put on hold before transferring to a voice agent.
To configure voice transfer agent, follow these steps:
1. On the left pane, click Default Flows under the AUTOMATION section.
2. Click the Voice Agent tile under Defaults > Phone Experiences.
3. In the Voice Agent Transfer window, click the edit icon of the Pre-Agent Transfer Message tile.
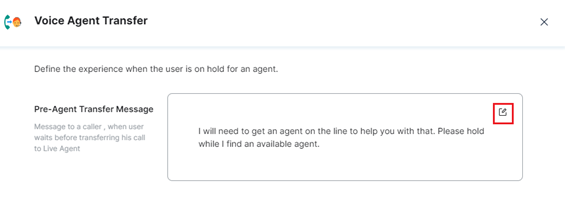
4. In the Pre-Agent Transfer Message textbox, the default message is displayed.
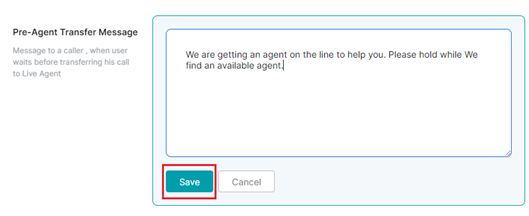
- To set a custom message, modify the text, and click Save.
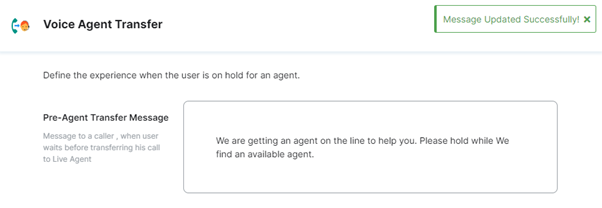
5. A success confirmation message is displayed when the message is updated.
Deflect to Chat
This feature helps define the experience when the customer is deflected to a chat conversation with an agent from a phone call.
To configure Deflect to chat, follow these steps:
1. On the left pane, click Default Flows under the AUTOMATION section.
2. Click the Deflect to Chat tile under Defaults > Phone Experiences.
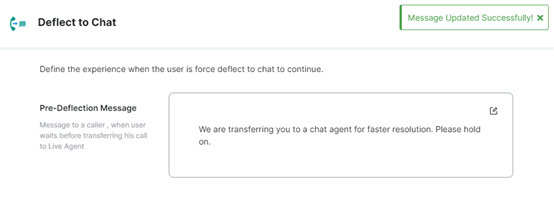
3. In the Deflect to Chat window, click the edit icon of the Pre-Deflection Message textbox.
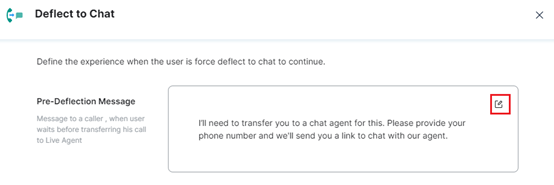
4. In the Pre-Deflection Message textbox, the default message is displayed.
-
- To set a custom message, modify the text and click Save.
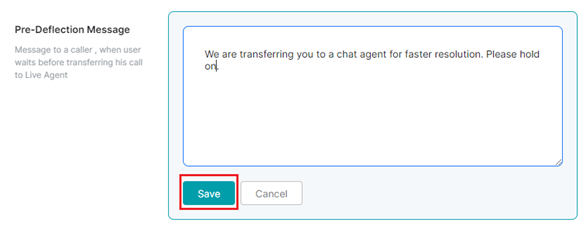
5. A success confirmation message is displayed when the message is updated.
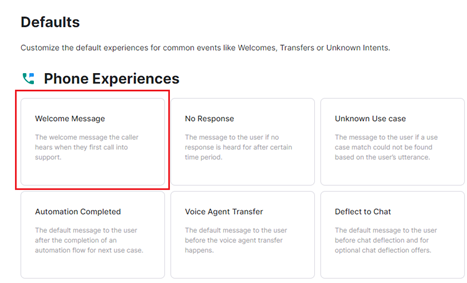
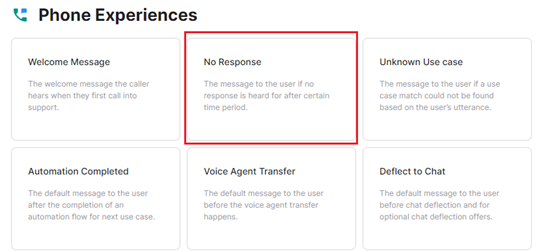
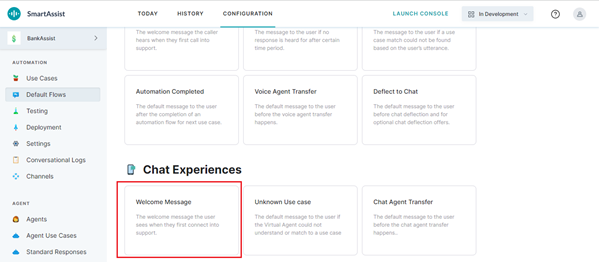
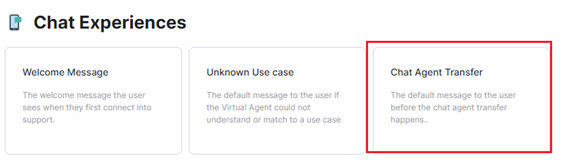
Chat Experiences
This feature helps configure default flows for common events and custom agent interactions over chat conversations.
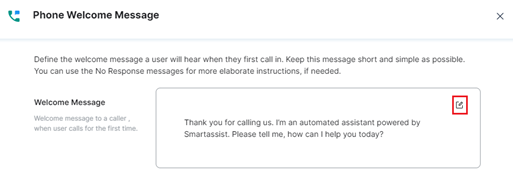
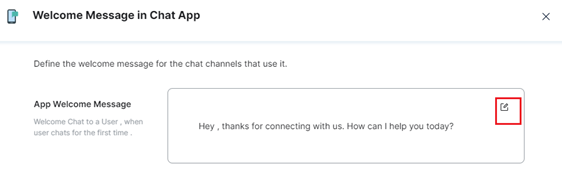
Welcome Message
This message is what the contact sees when they first connect on a SmartAssist application for support.
To configure the welcome message, follow these steps:
1. On the left pane, click Default Flows under the AUTOMATION section.
2. Click the Welcome Message tile under Defaults > Chat Experiences.
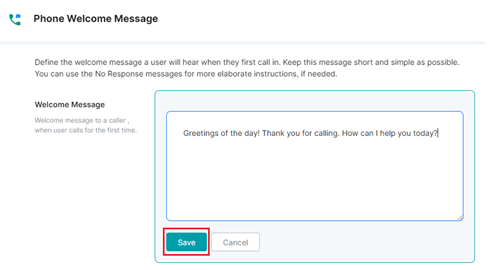
3. In the Welcome Message in Chat App window, click the edit icon of the App Welcome Message textbox.
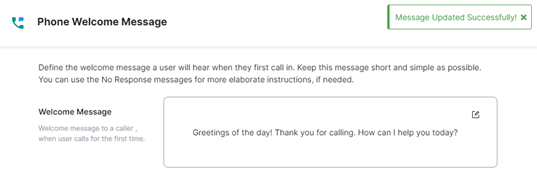
4. Type your welcome message, and click Save.
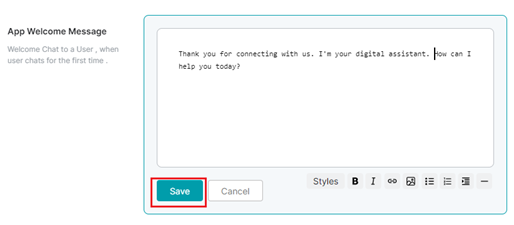
5. A success confirmation message appears when the welcome message is updated.

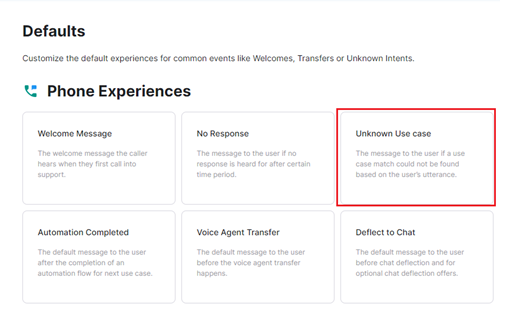
Unknown Use Case
This option helps configure the message to be displayed if a use case utterance from the customer cannot be found.
To configure the Unknown Use case message, follow these steps:
1. On the left pane, click Default Flows under the AUTOMATION section.
2. Click the Unknown Use Case tile under Defaults > Chat Experiences.

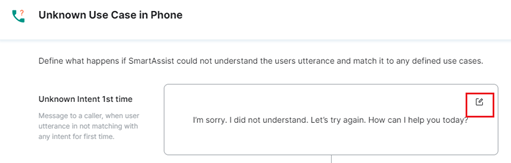
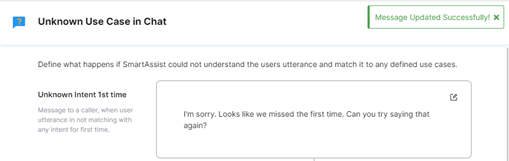
3. In the Unknown Use Case in Chat window, to configure the Unknown Intent 1st time message for the contact when their utterance does not match, follow these steps:
- Click the edit icon of the Unknown Intent 1st time textbox.

Note: This message is enabled by default.
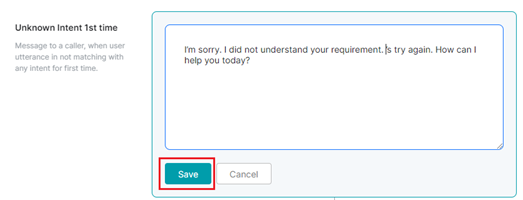
- Type the message and click Save.
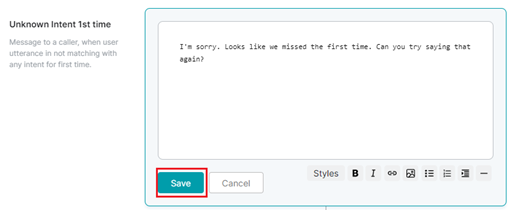
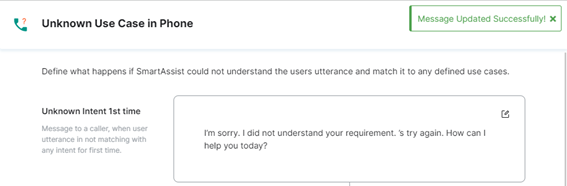
- A success confirmation message appears when the message is updated.
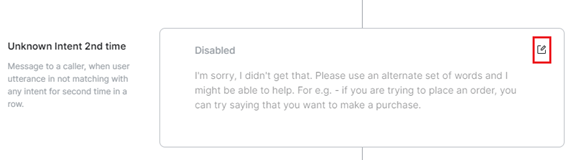
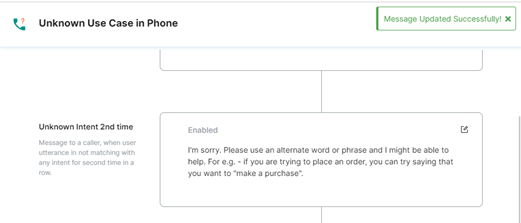
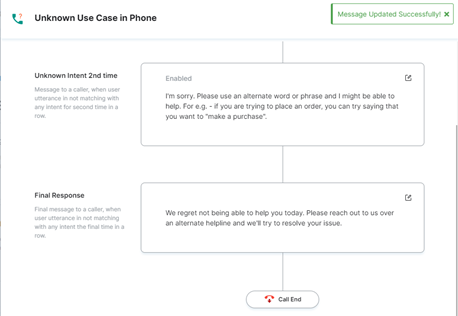
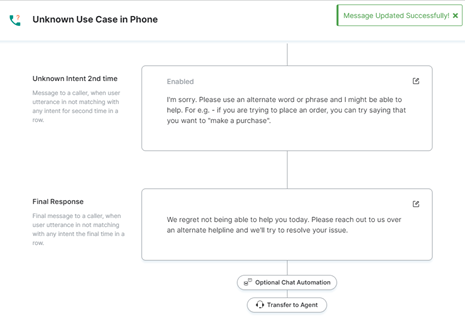
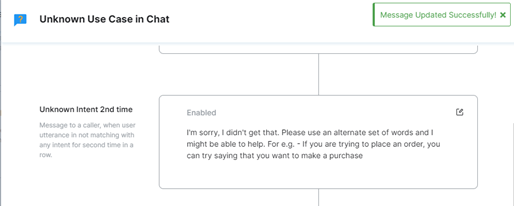
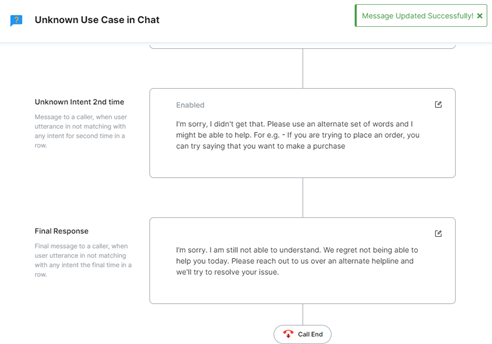
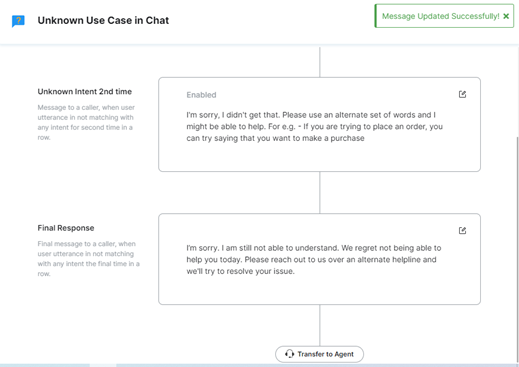
4. In the Unknown Use Case in Chat window, configure the Unknown Intent 2nd time message for the contact with the following steps:
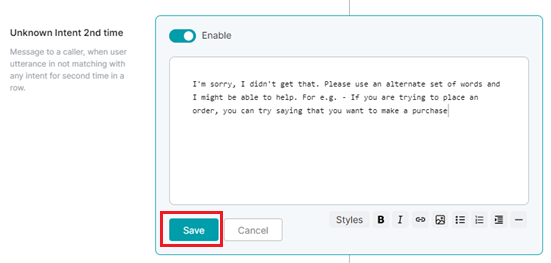
- Click the edit icon of the Unknown Intent 2nd time textbox.
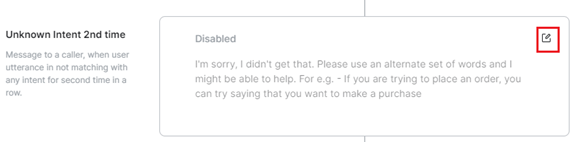
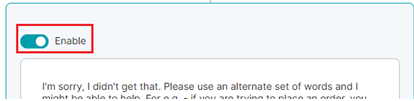
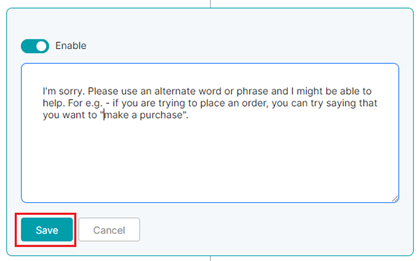
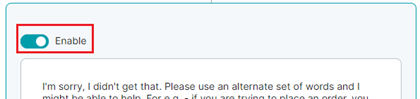
- Enable this message option if you want to display it to the customer.
- Type the message and click Save.
- A success confirmation message appears when the message is updated.
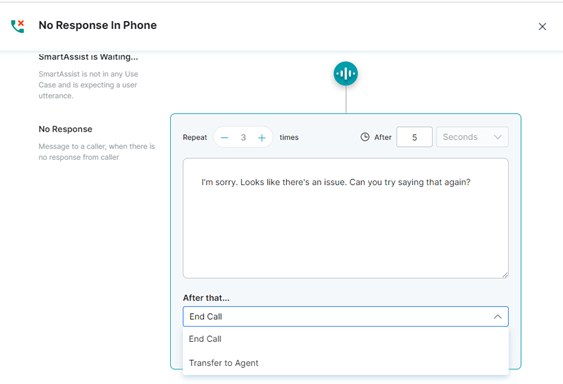
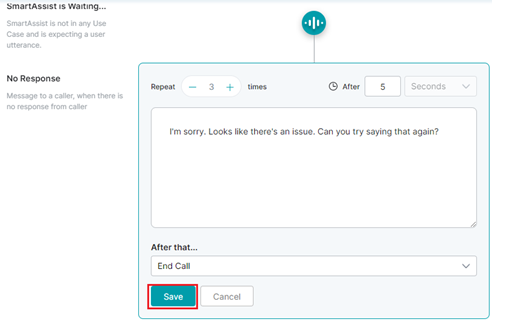
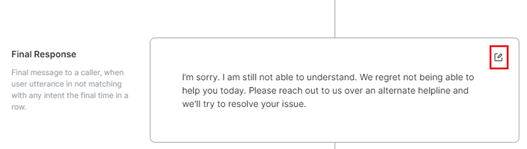
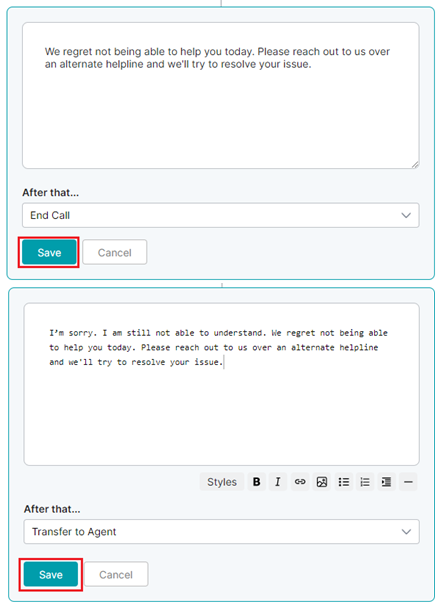
5. In the Unknown Use Case in Chat window, configure the Final Response message displayed to the caller with the following steps:
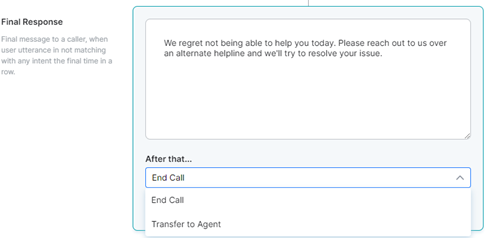
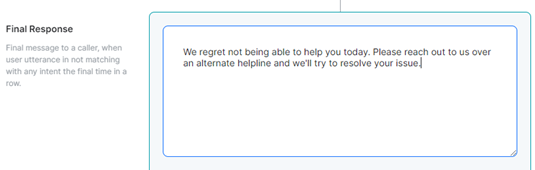
- Click the edit icon of the Final Response textbox.
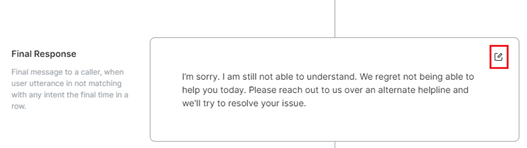
- Type the message in the textbox.
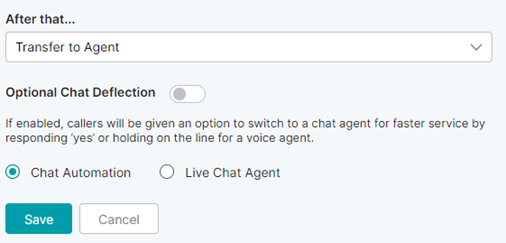
- Select one of the following options for After that… from the dropdown list:
- End Call: To end the conversation automatically after the final response to the contact.
- Transfer to Agent: To transfer the chat to a human agent after the final response to the contact.
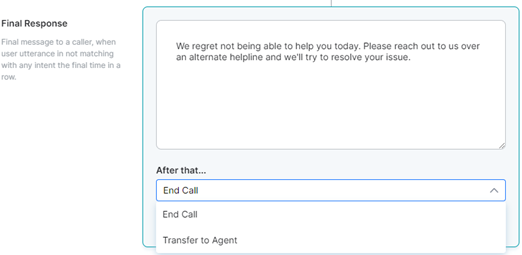
- Select End Call or Transfer to Agent, and click Save.
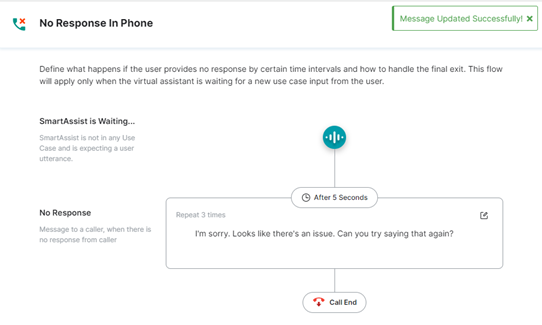
- The following success confirmation message and final response flow will appear based on your selection.
Final Flow for call end
Final Flow for Transfer to Agent
Chat Agent Transfer
This feature lets you define the experience for a customer put on hold before transferring to a chat agent.
To configure chat transfer agent, follow these steps:
1. On the left pane, click Default Flows under the AUTOMATION section.
2. Click the Chat Agent Transfer tile under Defaults > Chat Experiences.
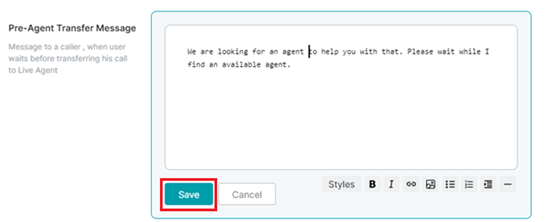
3. In the Chat Agent Transfer window, click the edit icon of the Pre-Agent Transfer Message textbox.
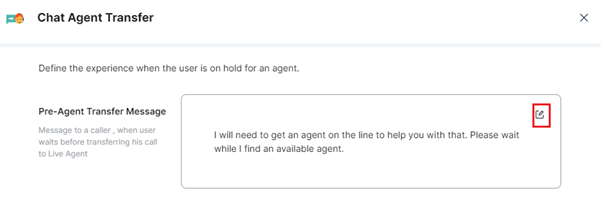
4. In the Pre-Agent Transfer Message textbox, the default message is displayed.
- To set a custom message, modify the text and click Save.
5. A success confirmation message is displayed when the message is updated.