SmartAssist uses the Kore.ai Virtual Assistant platform to build the smart assistant. This implies that a bot is built and configured by default using the Kore.ai Virtual Assistant platform. You need not be aware of the implementation details. But in case, you are well-versed with the virtual assistant platform and have a bot ready catering to your business needs, you can utilize that bot to build the SmartAssist application.
After you log in, on the Welcome dialog box, select an option:
- Create New Bot
- Select Existing Bot
- Choose Pre-trained Bot

Create New Bot
To create a new bot, follow the below steps:
- Click Create New Bot.
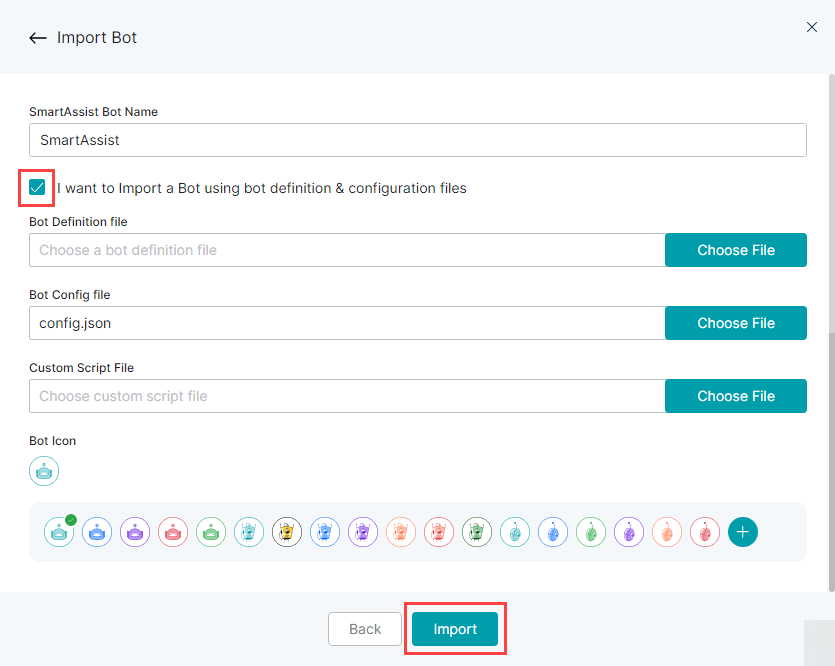
- On the Create a New Bot dialog box, enter a name in the SmartAssist Bot Name field.
- You can also import a bot using the bot definition and configuration files. To import, select the I want to Import a Bot using bot definition & configuration files checkbox.
- In the Bot Definition File field, click Choose File to locate and choose a file.
- In the Bot Config File field, click Choose File to locate and choose a configuration file.
- In the Custom Script File field, click Choose File to locate and choose a custom script file.
- Under the Bot Icon section, select a bot icon.
- Click Import.
Select Existing Bot
To select an existing bot, follow the below steps:
- Click Select Existing Bot.
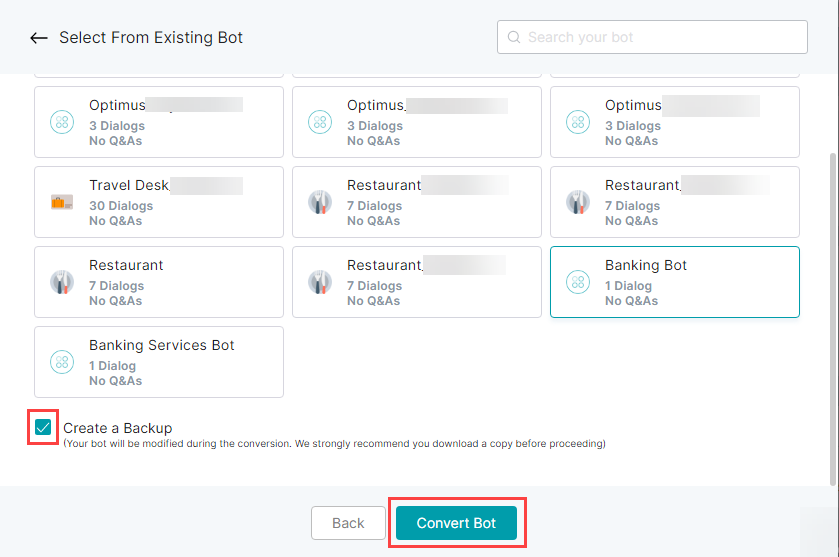
- On the Select from Existing Bot dialog box, select a bot.
- By default, Create a Backup checkbox is selected. During the bot conversion process, your bot will be modified. So it is recommended to create a backup.
- Click Convert Bot. A backup of your bot is created and downloaded as a zip file.
- On the Convert Bot dialog box, you can find the status of the bot conversion.
- You can also download the log file. Click Download Log File.
- Click Done and you can access the application.
Choose Pre-trained Bot
To select a pre-trained bot, follow the below steps:
- Click Choose Pre-trained Bot.
- On the Templates from Bot Store page, you can find the list of template bots offered and explore them based on various categories as listed below:
- You can filter the bots based on the following criteria:
- Domains like customer service, HR, Healthcare, Retail, Telecom, and more.
- Features like NLU concepts Digital Views, IVR integration, Omnichannel experience, and more.
- Integrations like Salesforce, etc.
- Channels for deployment like Email, Facebook Messenger, Twilio, etc.
- You can sort the template bots based on:
- Number of installations
- Recency
- Alphabetically
- Hover over a template bot to preview its features like:
- Name, icon, and summary of the bot.
- Associated features, complexity, the channels of deployment, and the number of downloads.
- On the preview display, click Explore for more details. On the corresponding dialog box, you can find:
- A video that explains the bot’s features.
- Two sections that give:
- Overview – This section gives a summary of the template bot and the features available in this bot.
- Technical Specifications – This section gives a detailed overview of the technical aspects of the bot like data source, etc.
- On the right column, you can find:
- Category and complexity of the bot.
- The number of times the bot was downloaded.
- The list of channels, languages, and integrations (if any) supported.
- The Related Bots section for bots similar to the selected template bot.
- After exploring the bot, click Install to install the bot.
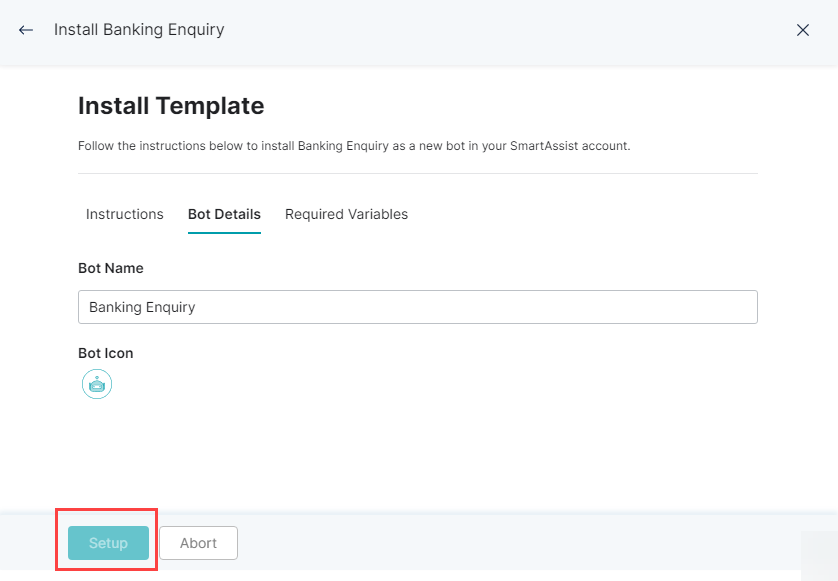
- On the Install Template dialog box, by default, the Instructions tab is selected. You can find the installation guide for the selected template bot at the given link.
- Click the Bot Details tab. Enter the Bot Name and select the Bot Icon.
- Click the Required Variables tab and enter the details. Details vary depending on the template bot selected.
- Click Setup to install the template bot or click Abort to cancel the installation.