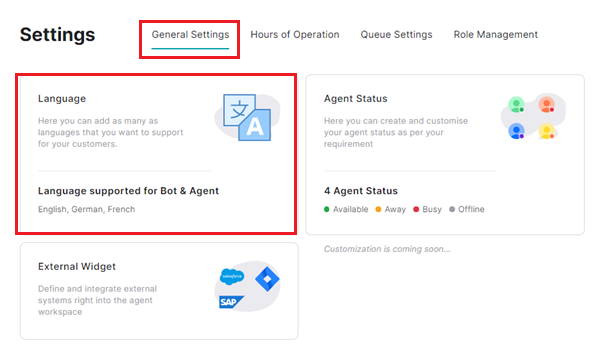
The General Settings sub-module lets you configure changes for agent language, status, and external widgets.
- Language: Configure the customer support language for the agent.
- Agent Status: Create and custom set an agent’s availability status to Available, Away, Busy, or Offline.
- External Widgets: Support additional functionality by configuring and integrating external widgets into the agent workspace.
Add a Language
This feature helps add a language to the agent workspace for customer support.
To access Language, follow these steps:
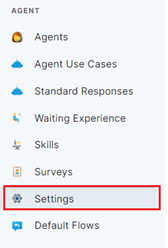
1. On the left pane, click General Settings under Settings of the AGENT section. Then, click the Language tab.
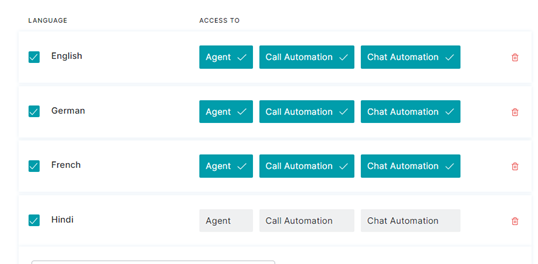
2. In the Language window, select the options for LANGUAGE and the corresponding ACCESS TO field.
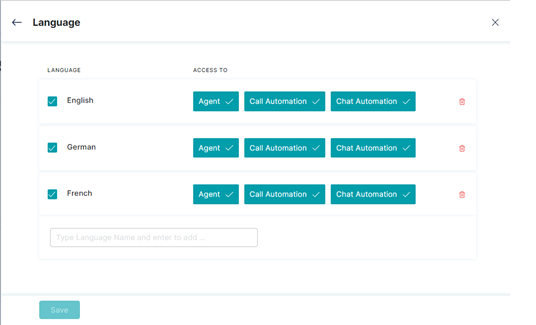
The following ACCESS TO options will be available:
- Agent: This depicts a specific agent that will use the selected language for customer interactions.
- Call Automation: This refers to the call automation flow in the selected language.
- Chat Automation: This refers to the chat automation flow in the selected language.
3. Under ACCESS TO, click the tab to select/unselect one of the following options.
- Agent: To assign the selected language to an agent.
- Call Automation: To assign the selected language to a call automation flow.
- Chat Automation: To assign the selected language to a chat automation flow.
4. Click Save.
Select a Language
To select a language for customer support, follow these steps:
1 On the left pane, click General Settings under Settings of the AGENT section.
2. Tap the Language tile.
3. To search the desired language, type the name in the search box.
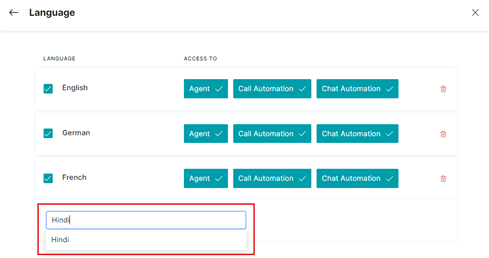
4. To set the agent and automation permissions, tap the language search result and the desired ACCESS TO selection from the following options.
- Agent: To map the language to the agent.
- Call Automation: To map the language to call automation.
- Chat Automation: To map the language to chat automation.
5. Click Save.
Unselect a Language
To unselect a language and its access flows, follow these steps.
1. On the left pane, click General Settings under Settings of the AGENT section.
2. Tap the Language tile.
3. To search the desired language, type the name in the search box.
4. Click the selected checkbox to unselect the language (which also disables the ACCESS TO options).

5. Click Save.
Delete a Language
This feature helps delete a language in the agent workspace.
To access Language, follow these steps:
1. On the left pane, click General Settings under Settings of the AGENT section. Then, click the Language tab.
2. In the Language window, click the delete icon of the desired language entry.
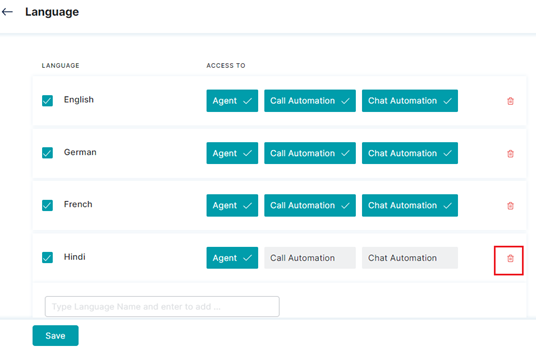
3. This will remove the language entry from the list.
