The SmartAssist Console combines the workflows of Agents, Supervisors (and Contact Center operations managers) to talk to customers, run real-time monitoring and check historical performance reports.

The SmartAssist desktop also allows agents to access AgentAssist and execute conversational tasks by working side-by-side with your contact center agent. AgentAssist can

  • Guide agents through conversations by providing the best response suggestions.
  • Find the right information from an external system or knowledge base
  • Provide structured training and coaching to Agents.

Key Agent Features

  • Intent Detection and call resolution support.
  • Multi-modal engagement that includes queries from human agents to a virtual assistant or automated conversational support.
  • Enterprise system and backend integration to seamlessly update and display information.
  • Agent training and empowerment through tools support, sentiment analysis, and response suggestions.
  • Agent conversation personalization to deliver the best CX, and identify upsell opportunities.
  • Proactive agent suggestions for next-best actions to a customer.
  • Helps an agent set the conversation status and close a conversation.

Key Supervisor Features

The SmartAssist console also helps call center supervisors monitor their agent activity with the following features:

  • Activity view by Agent: View all agent activities, load %, queues, average times, and other efficiency metrics.
  • Activity view by Skill: View agent skill-wise points, overdue, ongoing, idle, expired, completed, transferred, dropped-off, and total conversations, average handle time, active and queued customers.
  • Agent Console View: Access the agent view on their console and perform actions.
  • Context Chat: Chat with a peer supervisor for a customer context, and provide quick assistance.
  • Conference: Join a conference or group chat to have multiple agents assist a customer in real-time.
  • Take Over: Take over an agent conversation with a customer at any time to improve response.

Accessing the Console

To access the console from the SmartAssist configuration interface, follow these steps:

1. Click Launch Console on the SmartAssist interface.


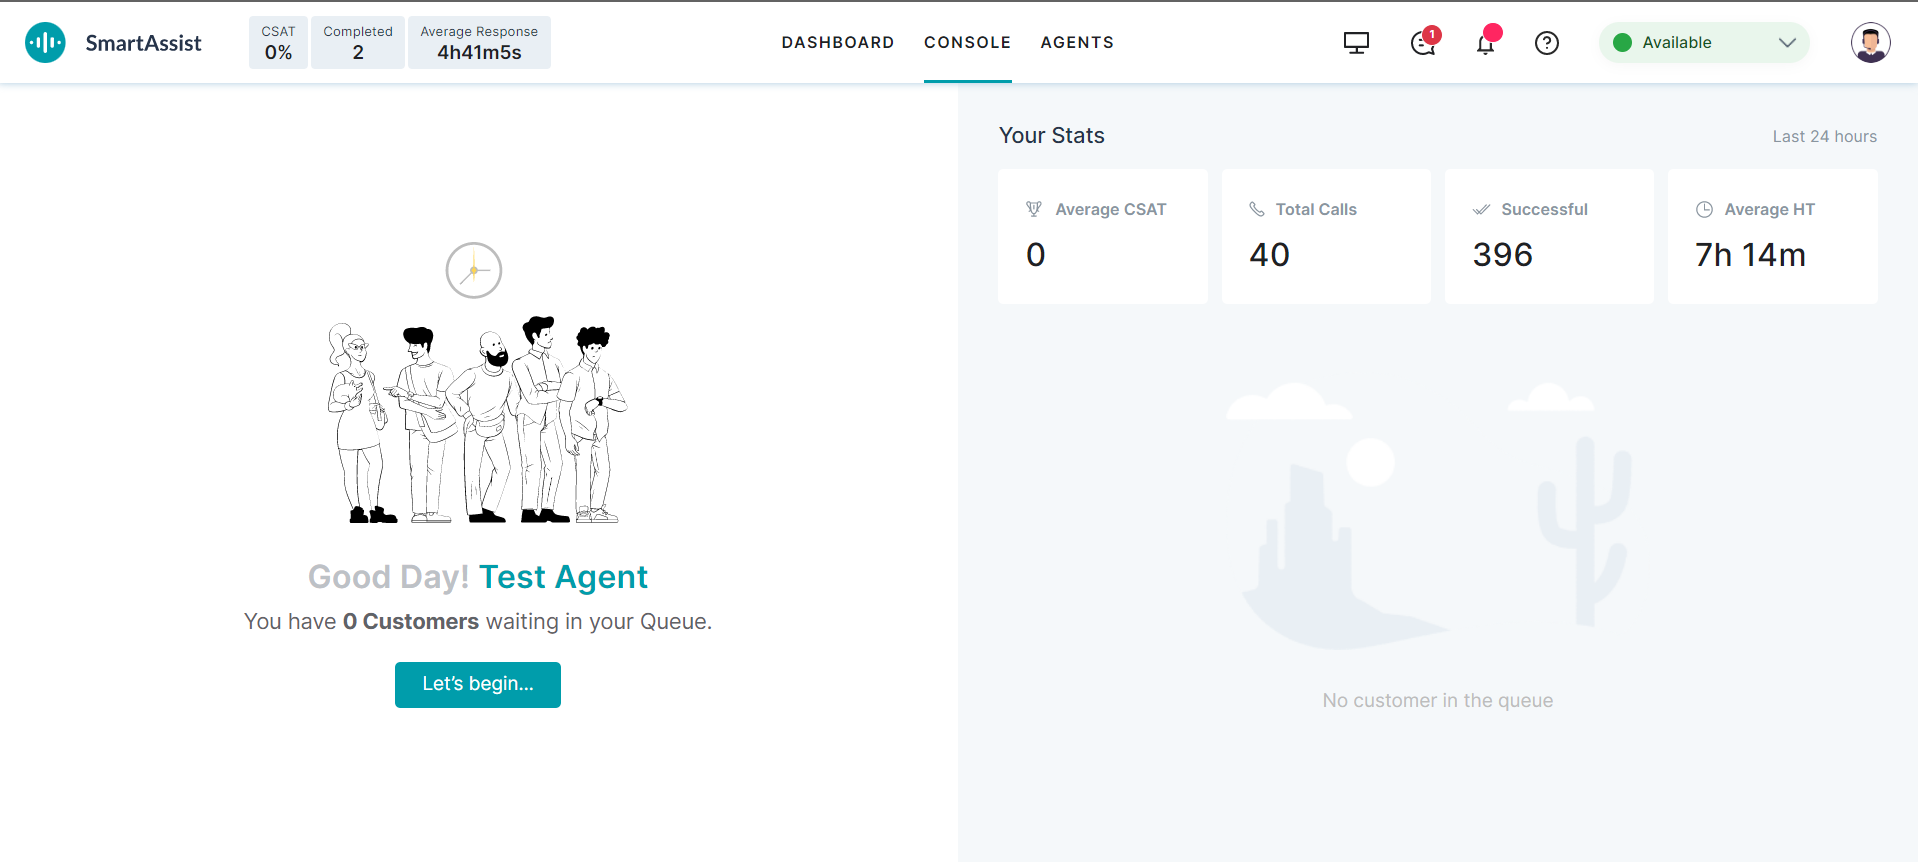
2. You will be redirected to the Console landing page as shown below.


Last 24 Hours Stats

This default summary data for the last 24 hours gives an overview of the agent’s performance.

  • Average CSAT: Depicts an agent’s average customer satisfaction score.
  • Total Calls: Displays the total number of calls handled by the agent.
  • Successful: Displays the total number of successful conversations where the customer query was resolved by the agent.
  • AVG HT: The average handle time is the time a customer spends on a call or the time an agent takes to handle the customer request on call.


Queue

In addition to the default summary analytics data, agents also get to peek into their queue before beginning work. This includes:

  • Channel: The email, chat, or call channel where the customer is coming from
  • Skills: The skills that were mapped to the conversation.
  • Sentiments: The customer sentiment analyzed by the AI-enabled system while waiting in the queue.
  • Points: The points that been assigned to the conversation. A higher number of points indicates a more important conversation.
  • Wait time: The time that a customer has waited in the queue to be serviced by the agent.
  • Language: The language detected for the conversation.

Agent Console

The Agent Console is the agent’s primary working area and is split up into a conversation tray, and the conversation space. The conversation space is completely customizable and can be modified to suit agent preferences.

Let’s begin by looking at the individual parts of the agent console.

Agent Performance Summary

This summary panel appears at the title panel of the AgentAssist interface. It displays real-time data for the following metrics:

1. CSAT: Represents the customer satisfaction score in % to indicate the consolidated service performance of the logged in agent on the current day.

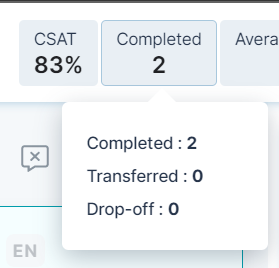
2. Completed: This indicates the number of conversations completed and closed by an agent for the channel and duration selected.

Hover over this option to view the completed, transferred, and dropped-off call and chat conversations.


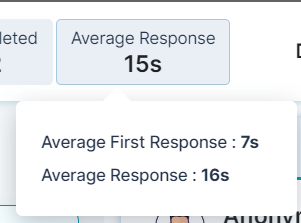
3. Avg Response: Depicts the average response time (in seconds) per agent to customers for chat or call on the current day.

Hover your mouse over this option to view the Average First Response Time and the Average Response Time.


Conversation Tray

The conversation tray shows all the conversations currently being handled by the agent and can be used by the agent to keep a track of their existing workload.

Conversation Status

Let’s start by looking at how conversations are divided by status. This section appears in the left panel of the Console section and displays the counts for conversational metrics.


Conversations can be in any of the following 4 statuses:

  • Expired Conversations: These are conversations where the agent’s response SLA has not been met. These are also commonly known as overdue conversations.
  • Active Conversations: These are conversations where the last sent or received message was less than 5 minutes ago.
  • Idle Conversations: Conversations where the last sent or received message was more than 5 minutes ago.
  • Expired Conversations :Conversations where it has been detected that the user has left the conversation and it has been over 5 minutes. These conversations are also known as dropped-off conversations.

Conversation Information

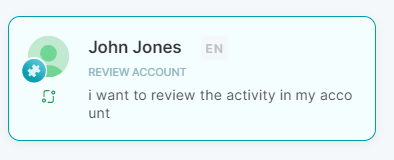
This section displays the data about a conversation that is being handled by an agent.


An entry in this tray typically includes the following information:

  • Customer Name (if available)
  • Language of interaction
  • Skills that have been identified based on the intent of the customer
  • The last exchange in the conversation
  • Customer profile picture
  • Interaction channel icon.
  • Conversation status icon and duration.

Queue Status

This section displays the number of customers currently waiting in the queue and the “Next Customer” button. Agents can click on the “Next Customer” button to receive the next conversation that has been queued up for them. When the agent clicks this button, the conversation panel for the next customer is displayed.


Conversation Area

The conversation area is where the agent can actually interact with a customer. In this area, agents can respond to customers, get access to any external information as well as perform their regular conversational functions like managing conversation status, transferring it to another agent, accessing Agent Assist etc.

The Conversation Area is split up into widgets. Widgets are individual windows that serve a specific purpose. Since the agent’s conversation area is completely flexible, agents can move individual widgets around.

Agents can also combine different widgets to view them as widget groups. An External Widget on SmartAssist allows the user to integrate utility or other external applications (calendar, search, etc.) relating to a specific functionality on the agent console. To know more about Agent Widgets, see External Widgets.

SmartAssist Console comes loaded with the following widgets:

Live Chat

The Live Chat window displays a quick summary on the current agent interaction with the following information:

  • Customer Name: The name of the customer interacting with the agent.
  • Agent Notes on the interaction (customer feedback, key points, next action, suggestions given, and more). This includes any previous notes added by agents while interacting with the same customer. Agents can view and add new notes by clicking on the notes icon.
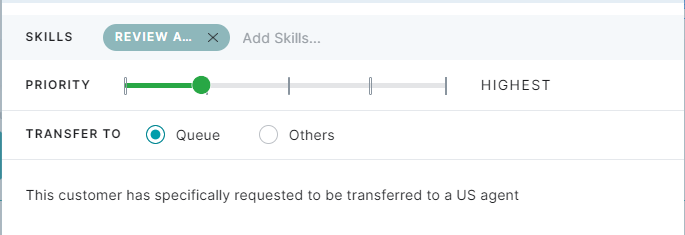
  • Transfer: Click to view the Transfer window where you can add the following information:

    • Skills: Select a skill or multiple skills from the list displayed. This skill will be appended to the existing skill combination of the conversation and will be used in finding a suitable agent.
    • Conversation Priority: Lets the transferring agent mark the priority of the conversation being transferred to keep the recipient informed.
      • When a conversation is transferred, the routing logic changes the scoring for routing logic based on the following rules:
        • Score is increased by 0% if agent transfers user into queue/agent with very low priority
        • Score is increased by 10% if agent transfers user into queue/agent with low priority
        • Score is increased by 25% if agent transfers user into queue/agent with medium priority
        • Score is increased by 40% if agent transfers user into queue/agent with high priority
        • Score is increased by 50% if agent transfers user into queue/ a agent with max priority
    • Transfer destination (queue and others): Lets the transferring agent select if the conversation should be transferred to a queue or another agent/agent group.
    • Transfer notes input section for the receiving agent to view when the transfer happens.
  • End button: Click the button to end the live chat. This displays the following end chat section window.

To set the disposition and close the conversation, follow these steps:

    1. Select a status from the following options for disposition.
      1. Resolved: Select when the customer query is resolved.
      2. Requires follow up: Select if the customer query is not resolved or partially resolved by the agent and needs a follow-up.
      3. Requires Supervisor Attention: Select if the customer query requires the agent supervisor’s attention.
    2. Type a detailed description of your remark for selecting the disposition. Click Close Later if you want to close the conversation later, else, click Close Now.

In addition to this, agents also have access to the following in the Live Chat window:

  • Language: Select the language you prefer for the live conversation. This can be used by agents to specify the language of a conversation, especially when the auto-detected language in the conversation may not be accurate.
  • Skills: Agents can add/remove the skills that have been auto-detected in a conversation. This can be used to better route the conversation to another agent as a part of the transfer as well.
  • Customer quick summary: This section displays the summary of the live chat conversation with the following details:
    • Agent Name: The agent who handled the live chat.
    • Wait Time: Displays the wait time for this chat for a given agent.
    • Sentiment: The customer sentiment captured by SmartAssist based on the customer responses.
    • Key intent & Utterance: Shows the key intent provided by the customer when they initiate the live chat.
  • Contact Flow icon: Click this icon to view the graphical representation of conversation flow.

Live chat features

Smart Assist’s live chat helps agents and customers to start conversations and communicate with each other online. Smart Assist has five features in the live chat window. Agents can use the live chat features when interacting with customers. Agents can use emojis and attachments, make audio and video calls, and join co-browsing sessions with customers. 
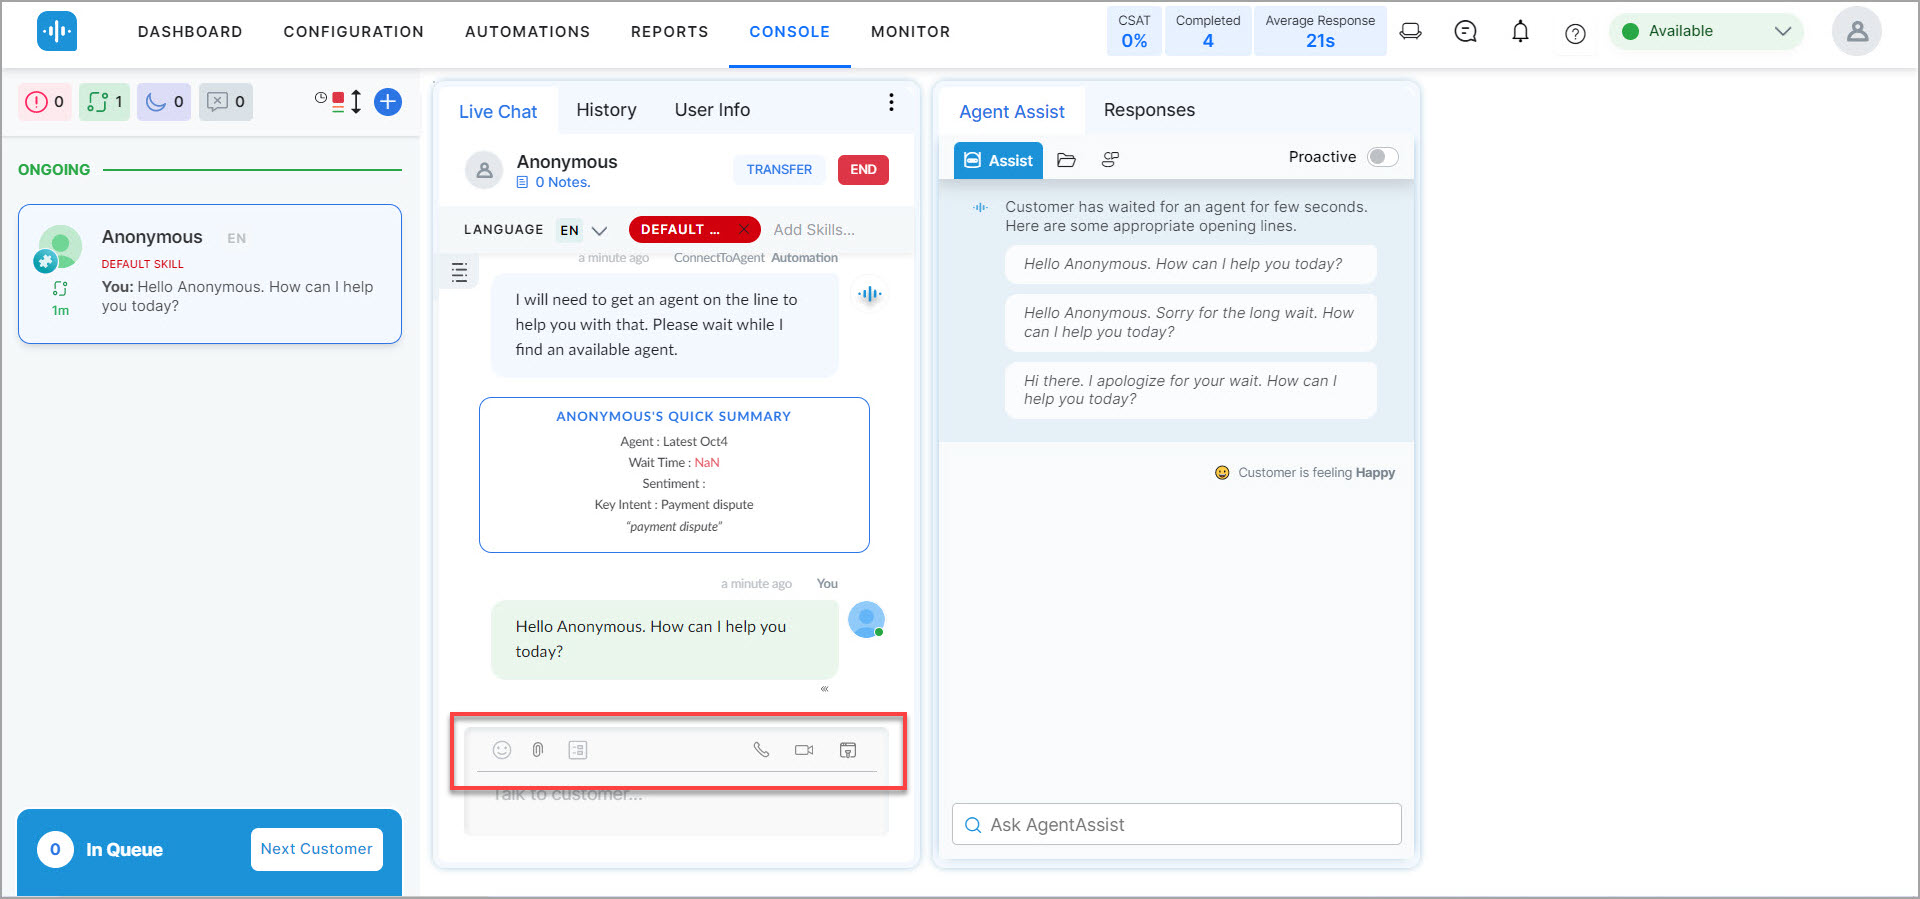
  • Emoji: During a chat session, an agent can access a wide range of emojis that can be used during the chat.
  • Attachments: During a chat session, an agent can attach files to send to the customer.
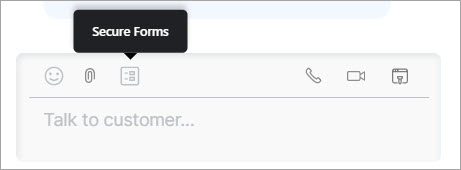
  • Secure Forms: In the SmartAssist app, secure forms provide a range of input fields that allow capturing required details from end-users. After the users complete the form, the inputs are used by SmartAssist agents. 
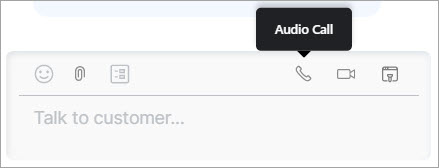
  • Audio call: During a chat session, the agent has an option to make an audio call with the customer.
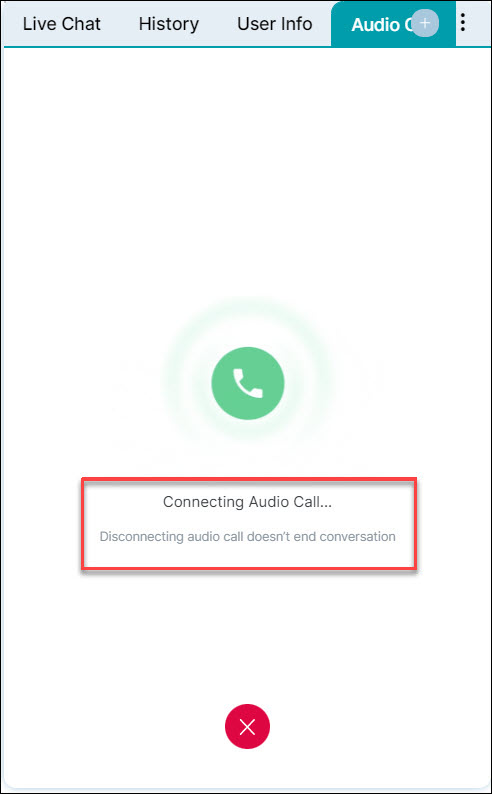
Customer accepts/rejects audio call: 

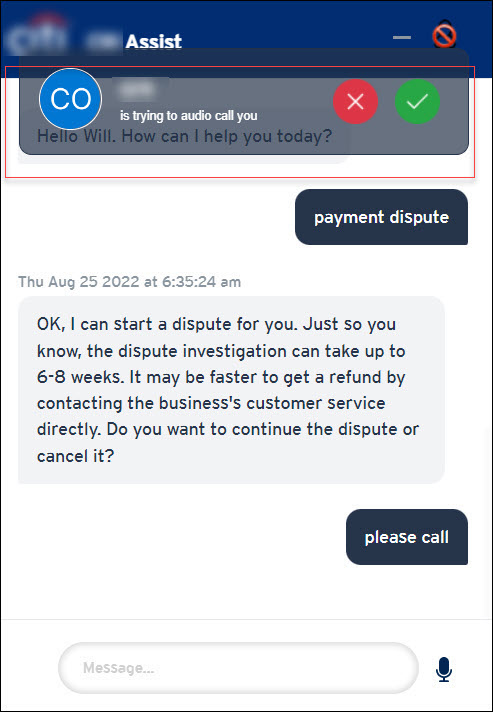
An agent can make an audio call to the customer, and the customer can accept it.

As shown below, the customer can disconnect/cancel the audio call. 
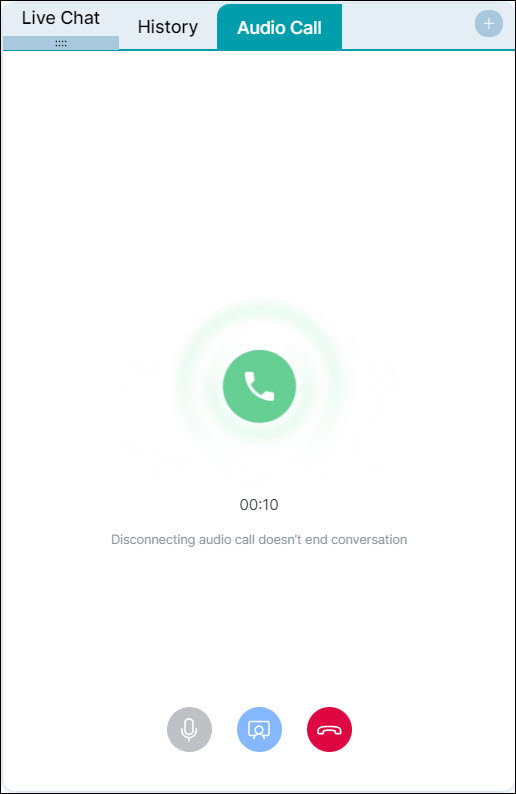
The agent screen appears as follows when the customer accepts the audio call: 
Screen sharing during an audio call:

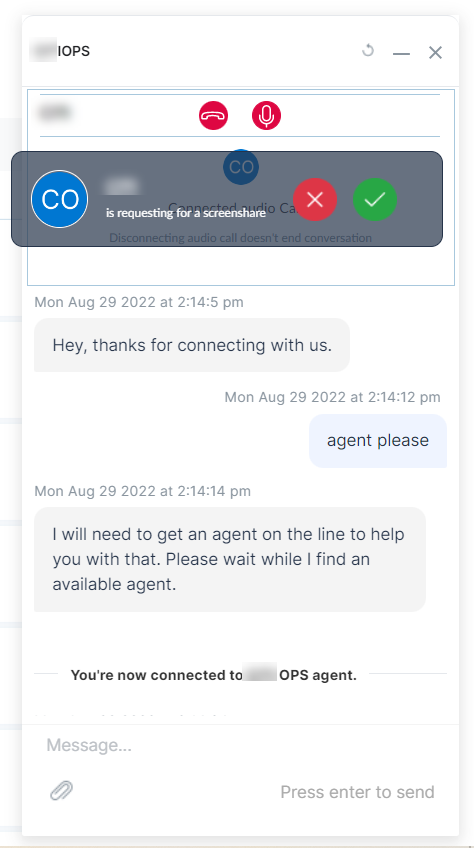
After the call is connected between the agent and the customer, the agent can send a request to the customer to share their screen. 

Screen sharing is used so that agents can see the customer screen and dynamically collaborate with them in real-time to resolve issues or help them fill forms, or guide them. 

The agent sends a screen share request to the customer, and the customer sees it on their screen, as shown below. 
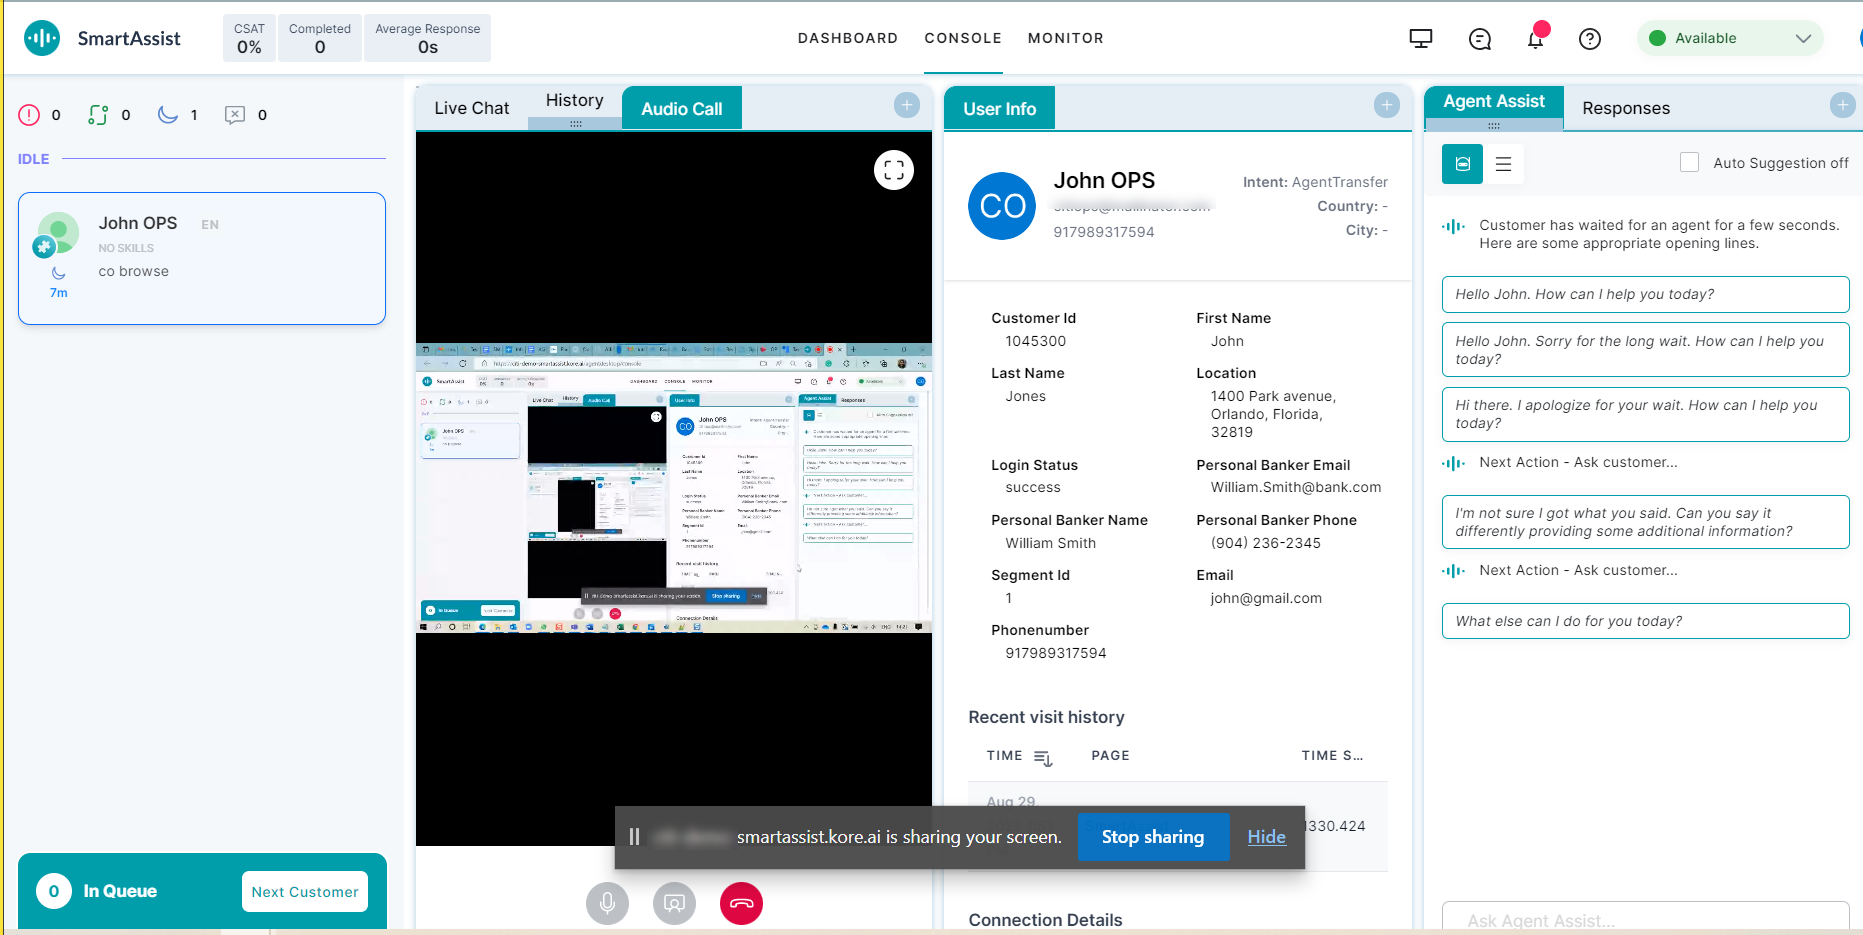
The agent can see the customer’s screen after the customer accepts the request, as shown below:
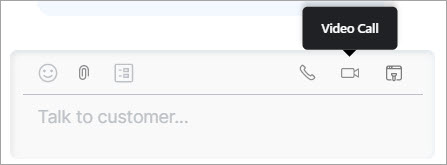
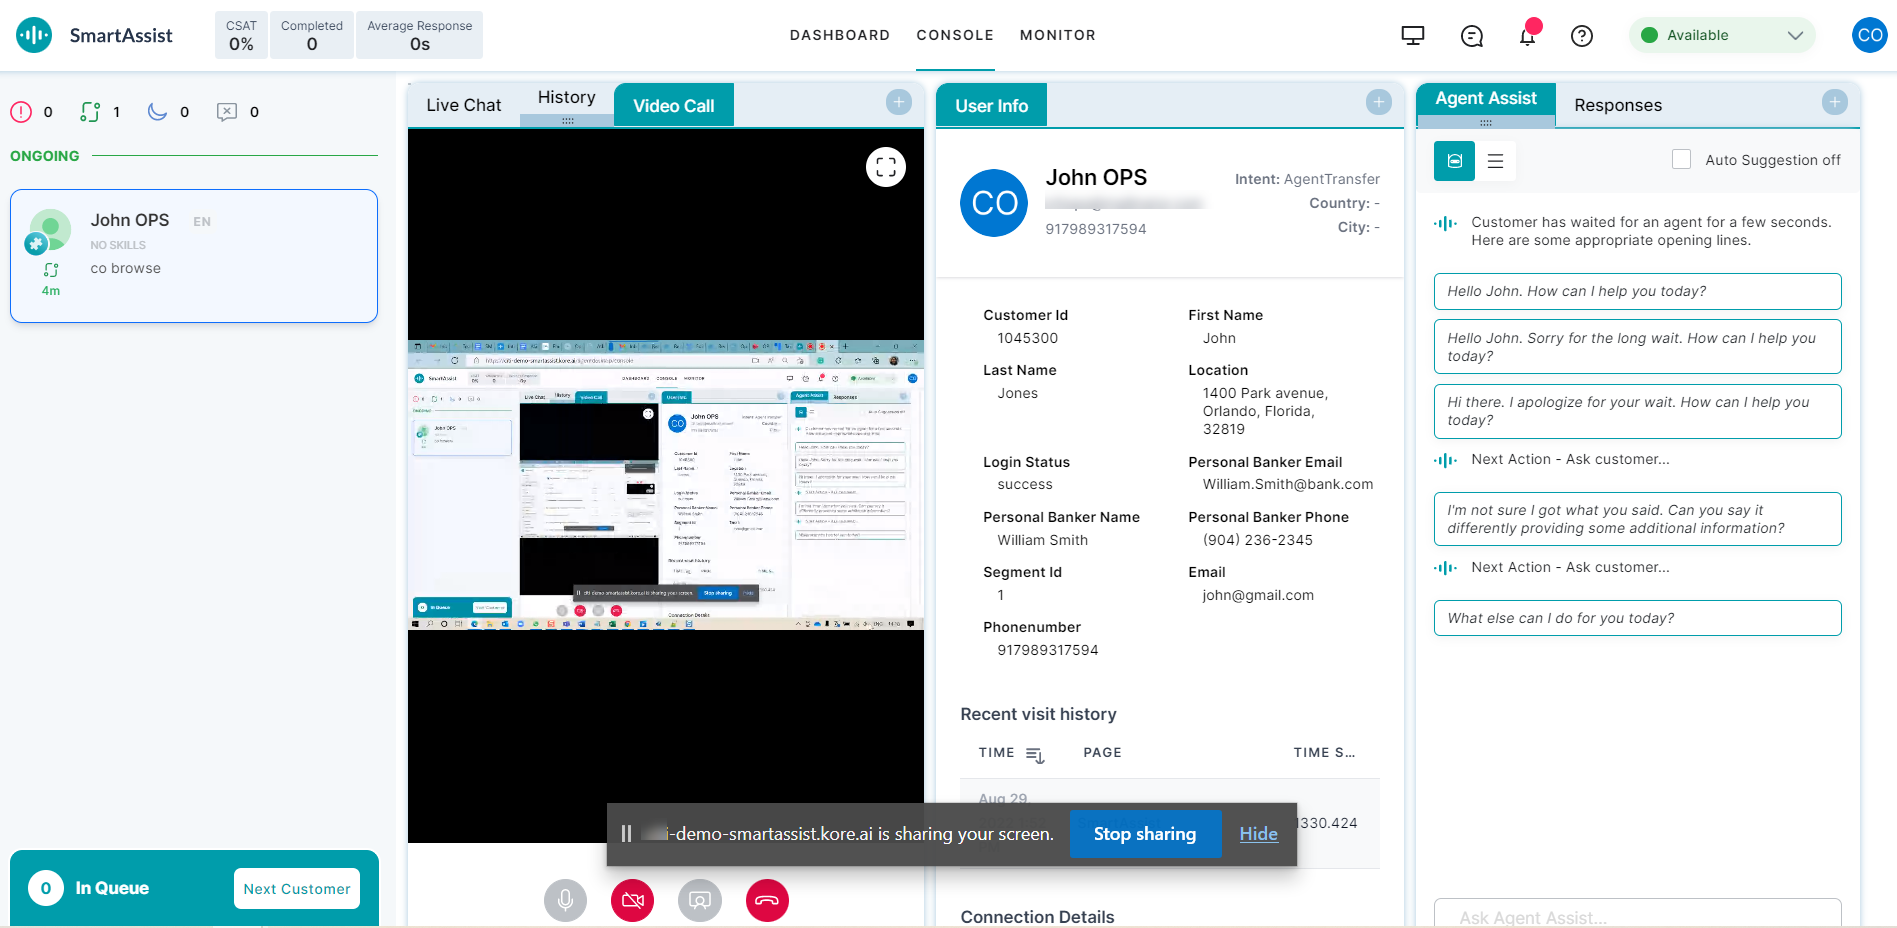
  • Video call: During a chat session, the agent has the option to make a video call with the customer.
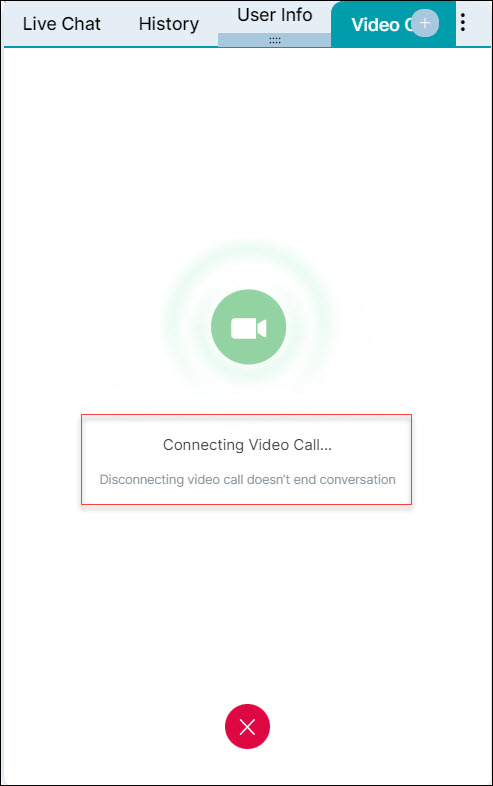
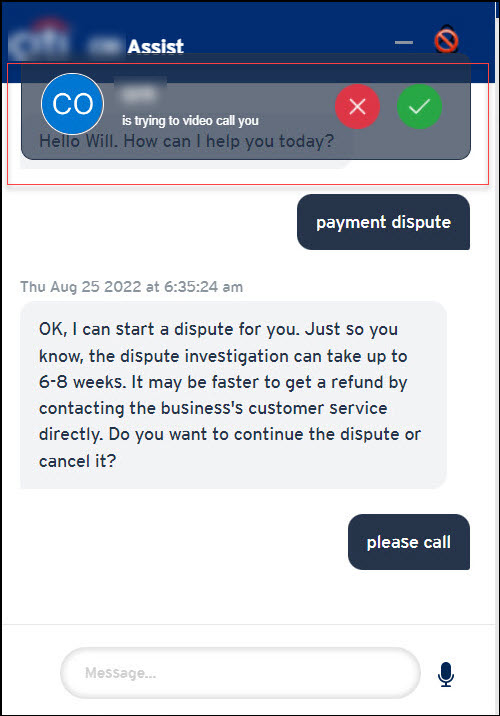
Customer accepts/rejects video call: 

When an agent makes a video call to the customer, and the customer can accept or reject the call.
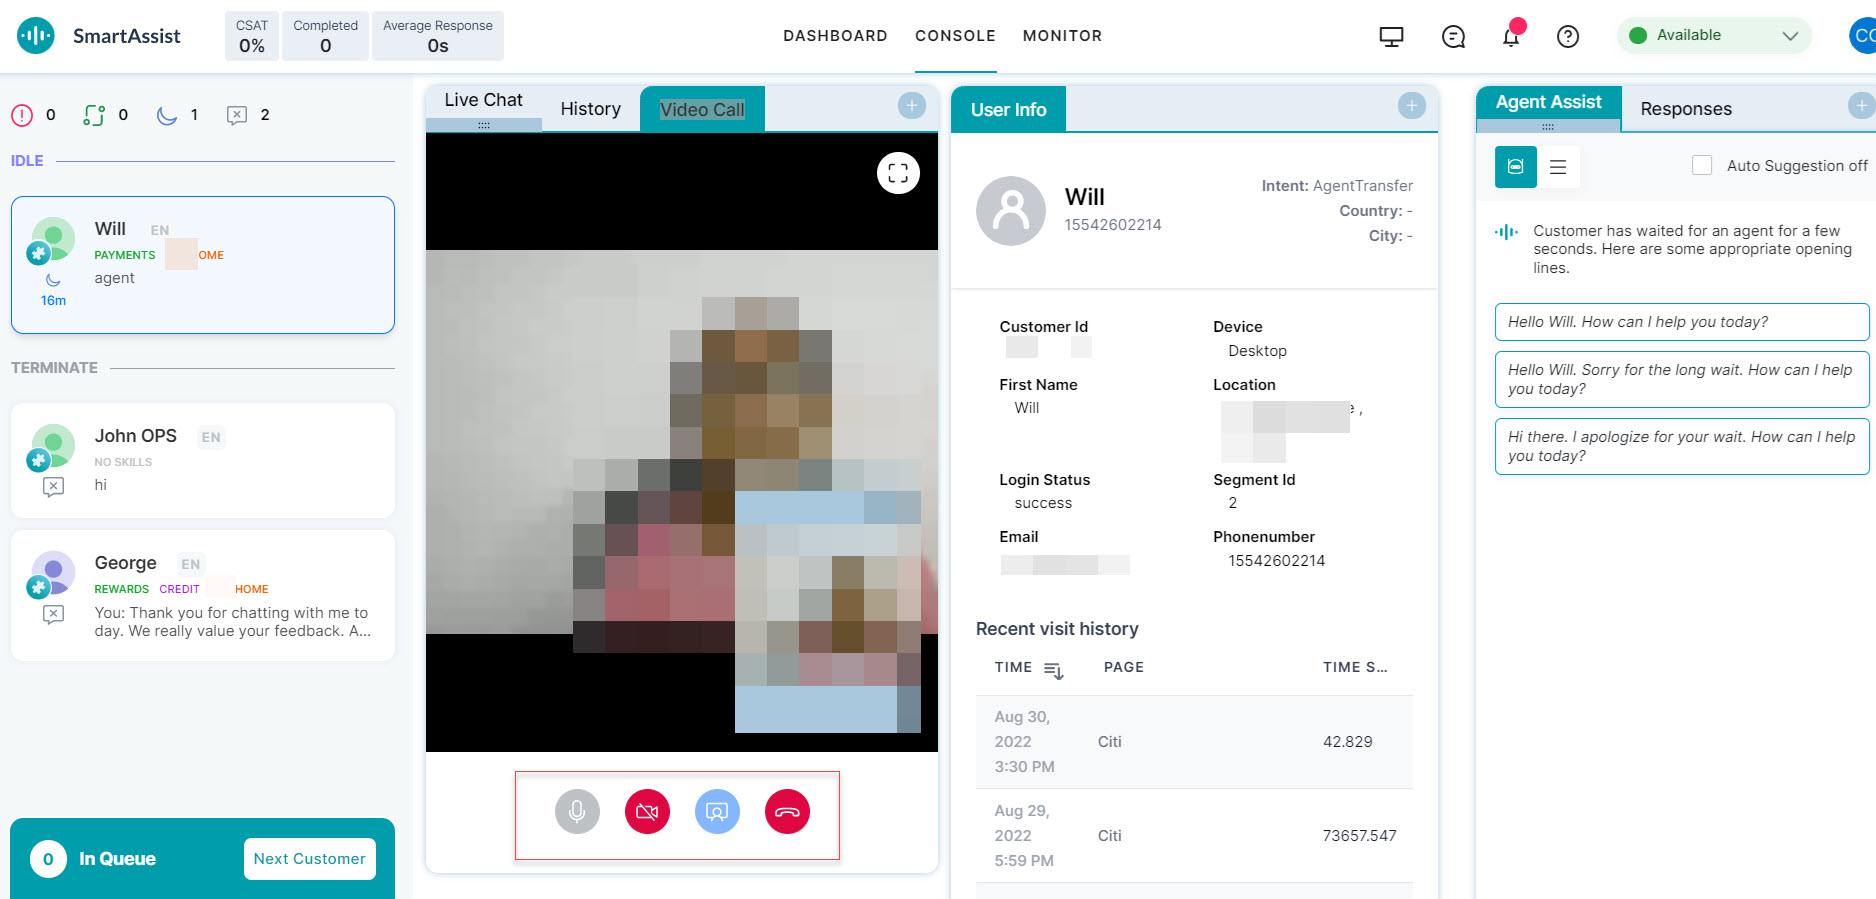
The agent screen appears as shown below when the customer accepts the video call: 
Screen sharing during a video call:

During a video call, the agent can request the customer to share their screen. 
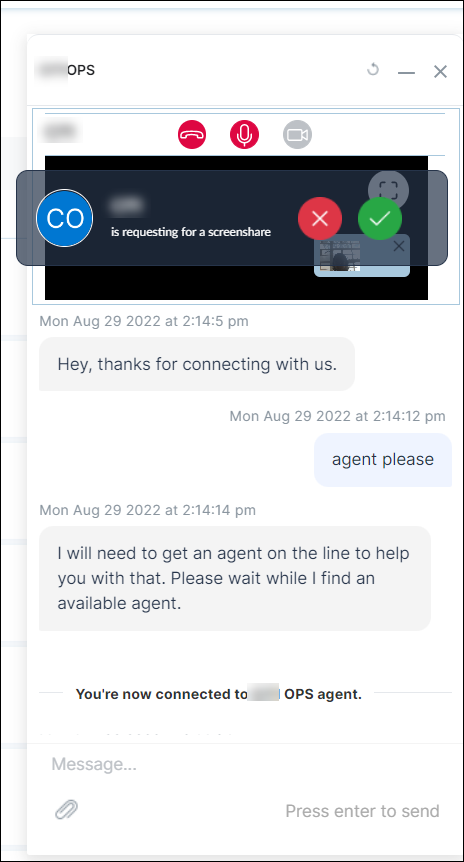
The agent can see the customer screen after the customer accepts the screen sharing request. 
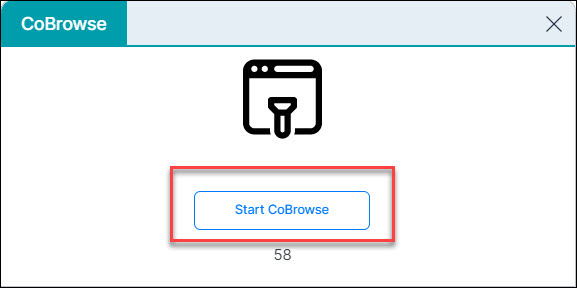
  • Co-Browse: Using the co-browse functionality, the agent and the customer can browse screens together. 

In co-browsing:

  • Customers are engaged interactively throughout the entire process and have an in-person experience. 
  • Agents can guide customers step-by-step through various tasks.
  • Agents can advise customers on complex transactions, procedures, forms, and demos in real-time.
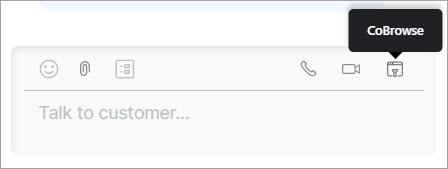
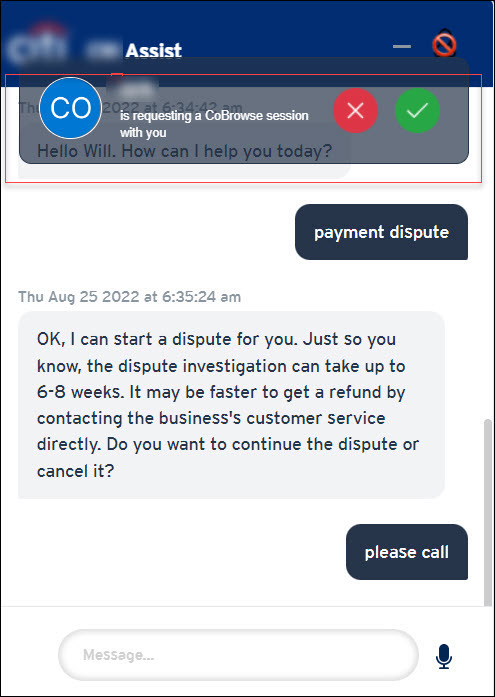
The agent sends a co-browse request to the customer as shown below: 
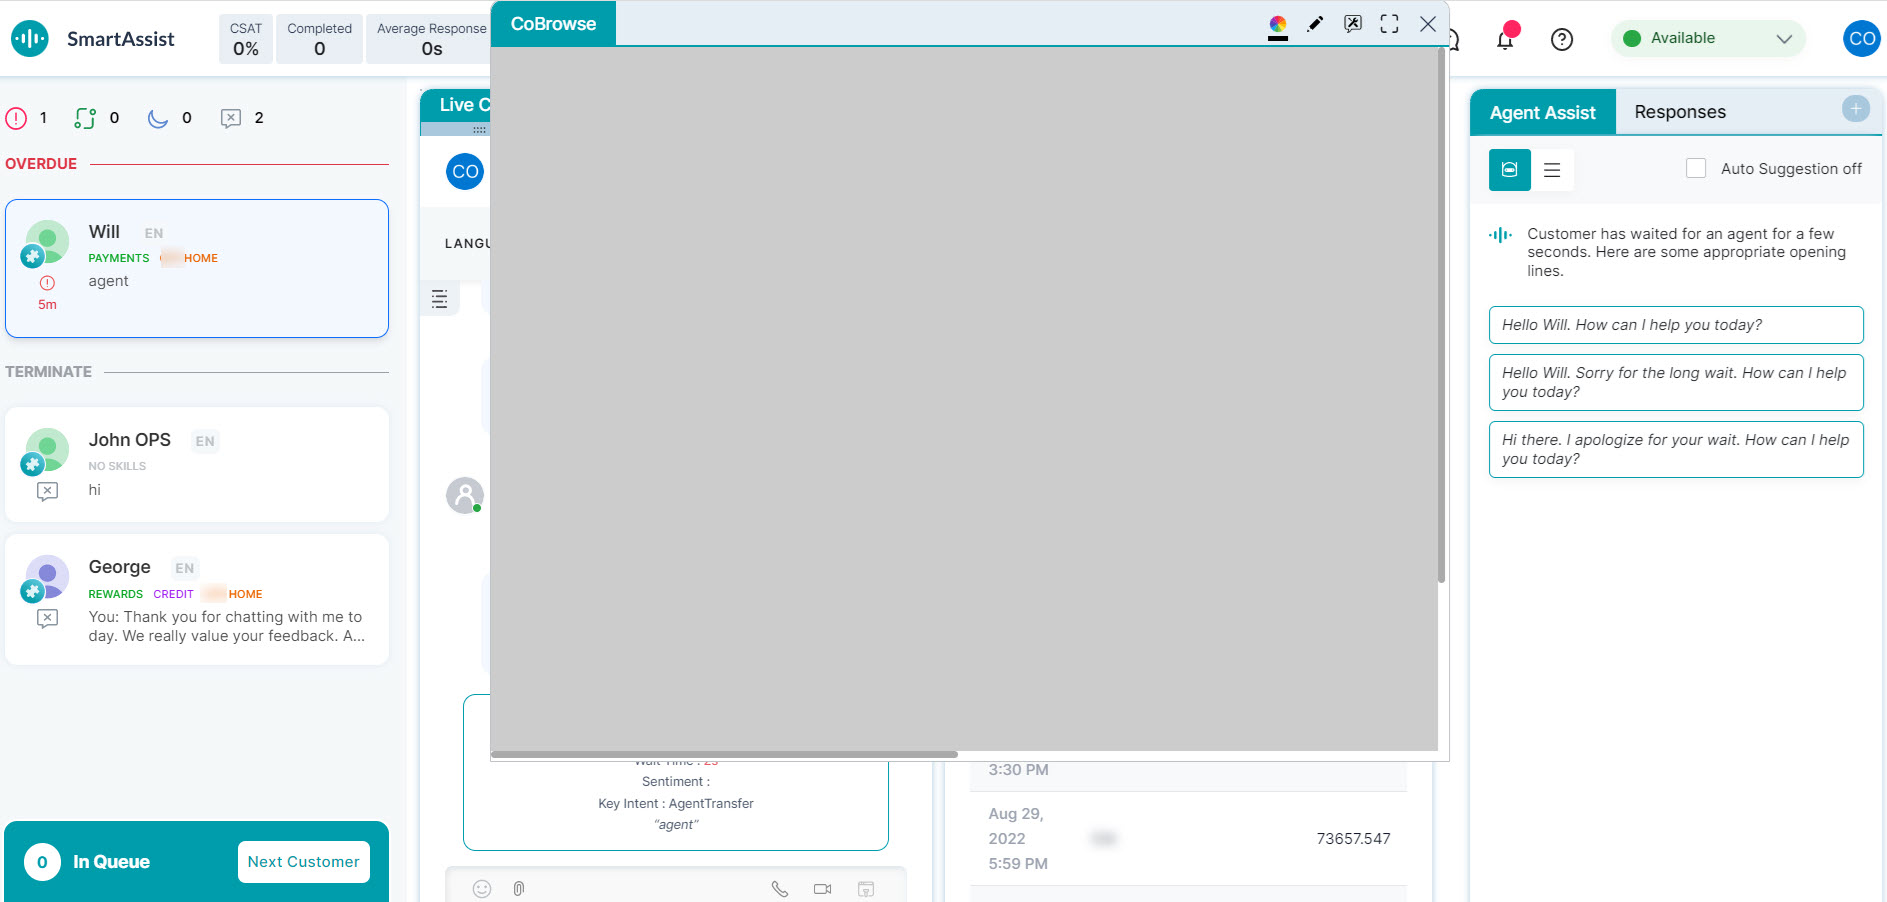
The agent sees the following screen while co-browsing:
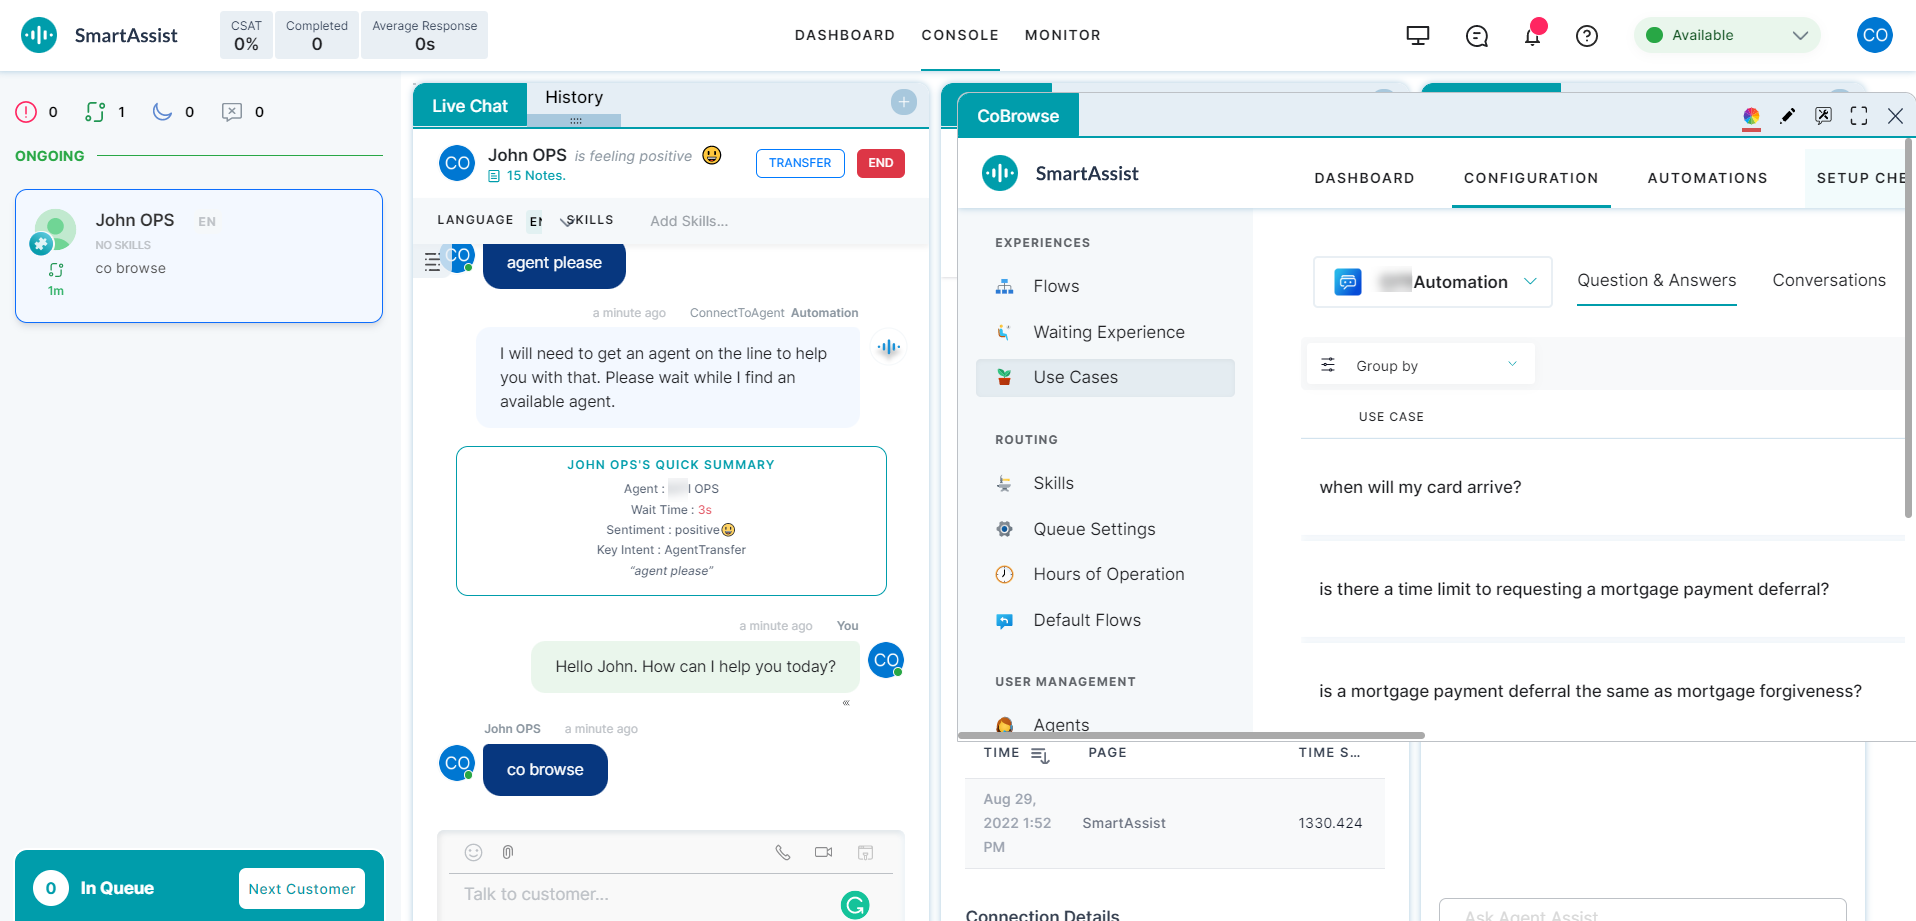
Agent co-browsing functions

During co-browsing, the agent can perform the following functions:

  • Eraser/Undo changes: Erase what has been marked or undo changes.
  • Select pen color: Change the marker’s color.
  • Start drawing:  Mark text/images on the browser.
  • Request/Release control: Request or release the control of the customer screen. 

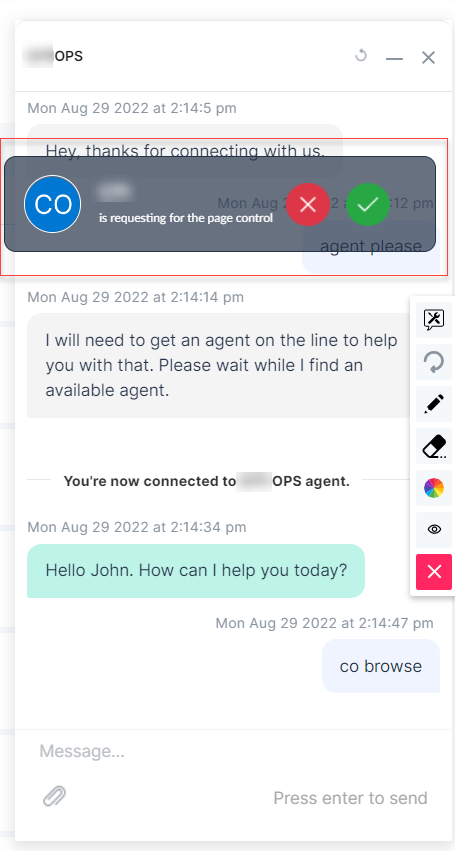
The agent sends a page control request to the customer. 
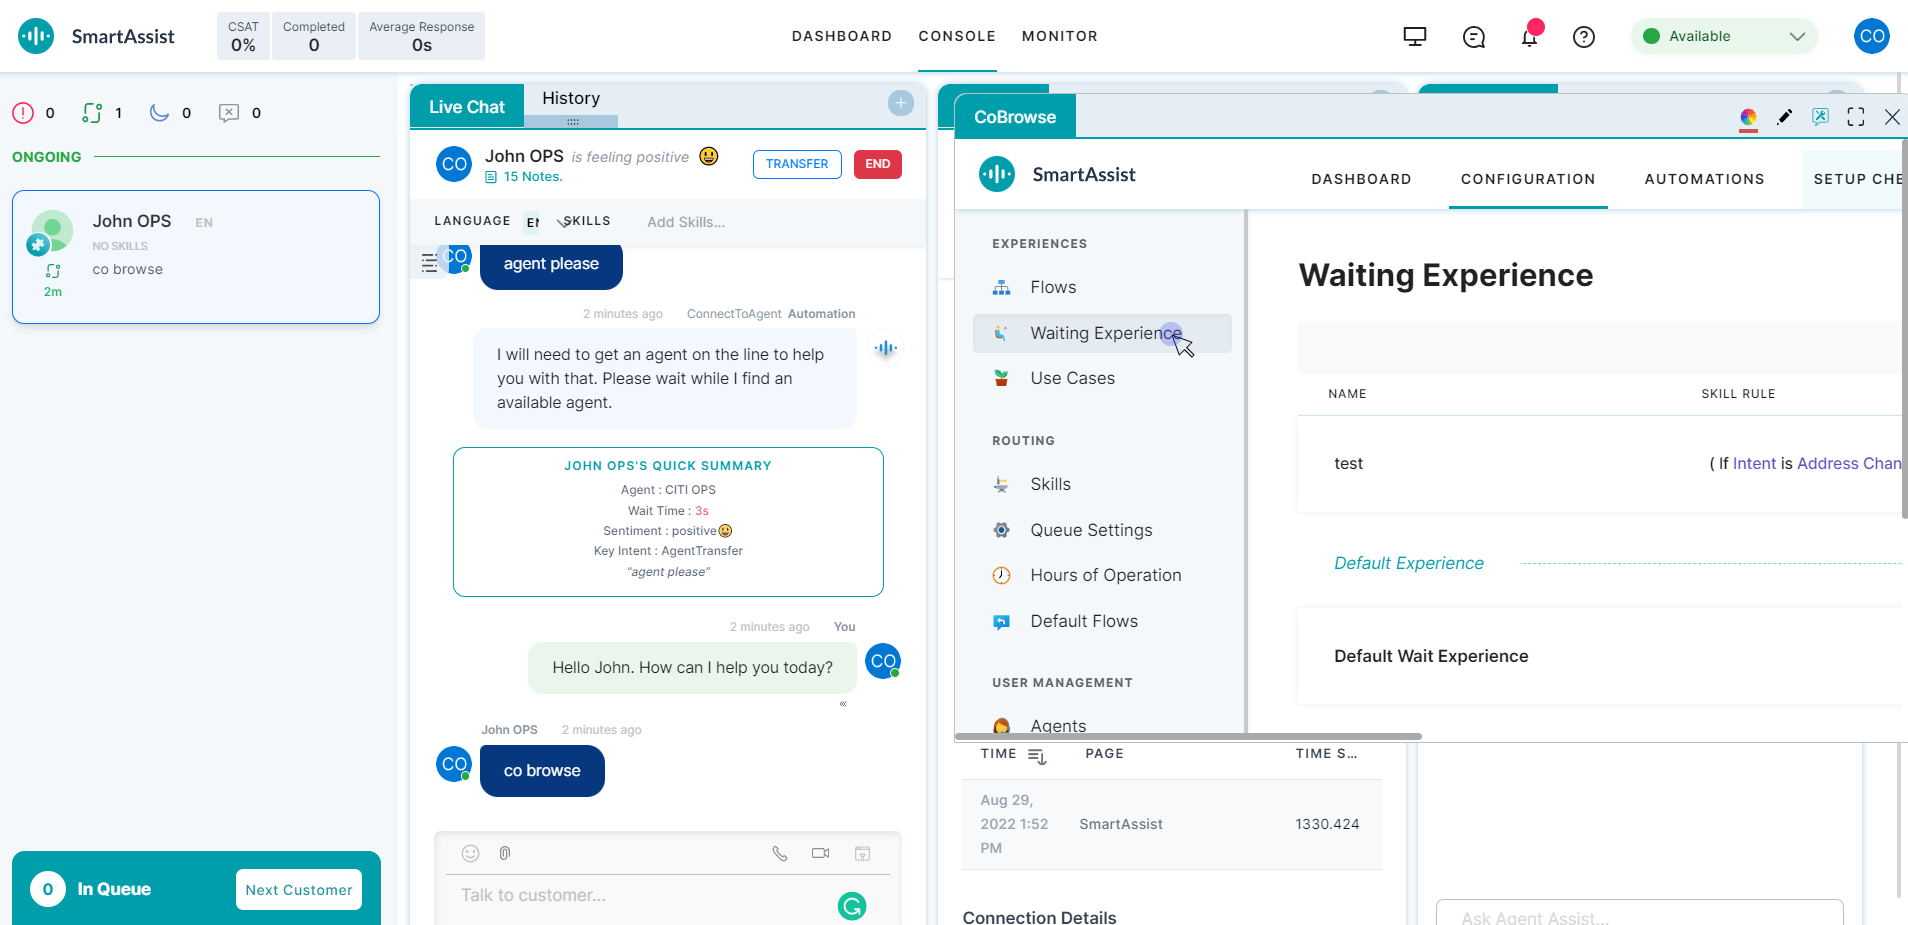
The screen below shows the agent controlling the customer screen through ‘request control’ after the customer accepts the page control request.  
  • Full-screen view: View the full-screen co-browsing session.  
  • Close window: Close the co-browsing session. 

Co-browsing functions

The agent and the customer can browse screens together. 
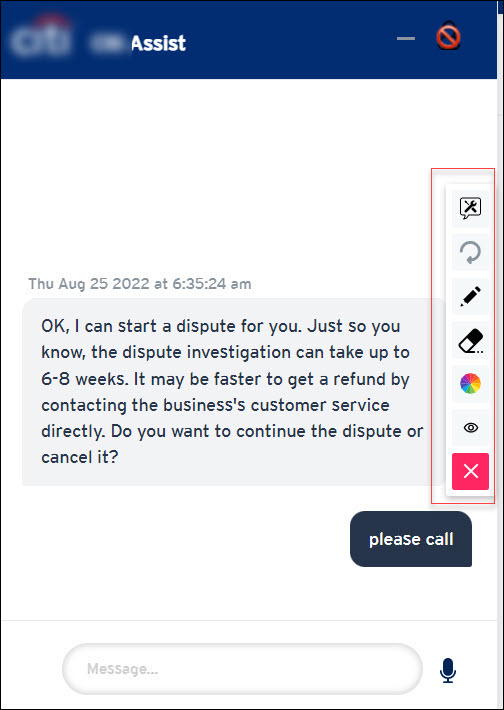
During co-browsing, the customer can perform the following functions: 

  • Control Off: Release screen control from the agent.
  • Re-connect: Re-connect if the co-browsing session gets disconnected.
  • Draw Mode On/off: Mark text/images on the browser. 
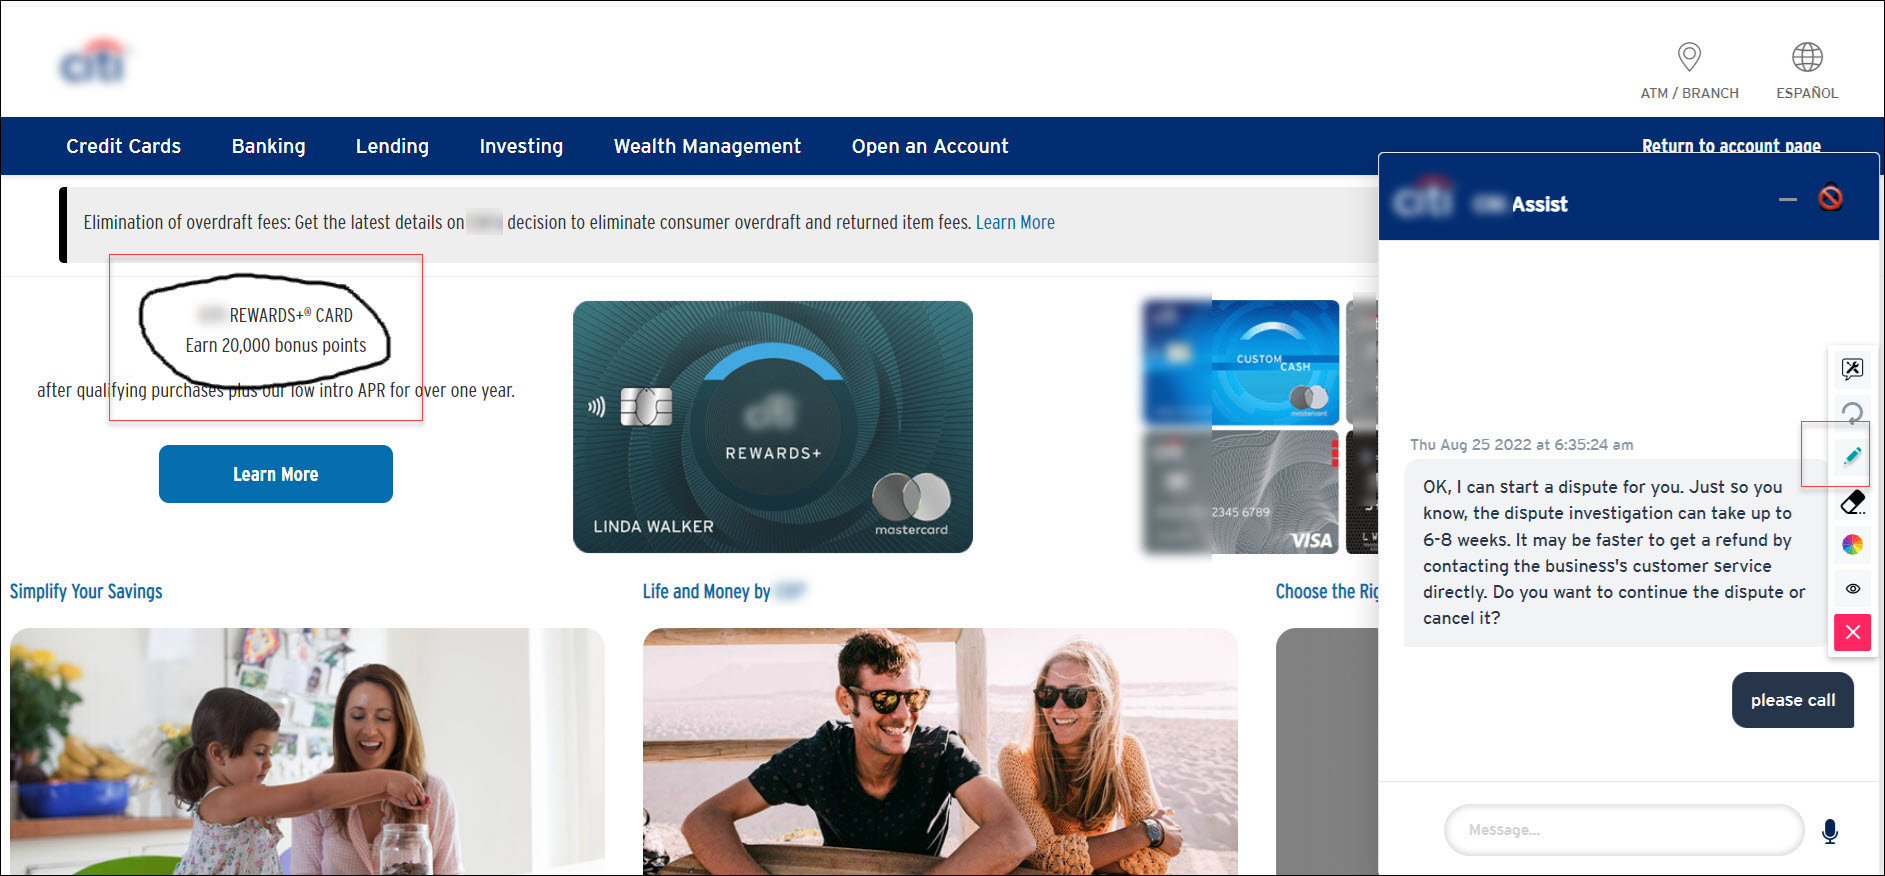
  • Eraser/Undo changes: Erase what has been marked or undo changes.
  • Pick Color: Choose the color to mark text/images on the browser.
  • Block Input: Hide information from the agent if needed. 

                 The following screen appears when the customer uses the block input function: 
  • Stop Co-browse: Close the co-browsing session. 

History

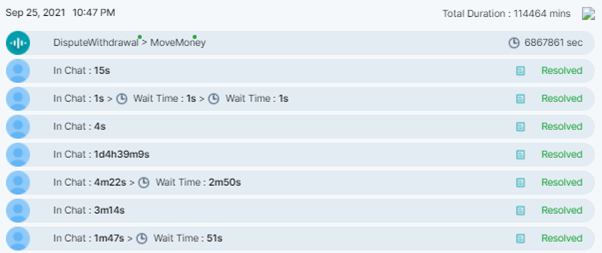
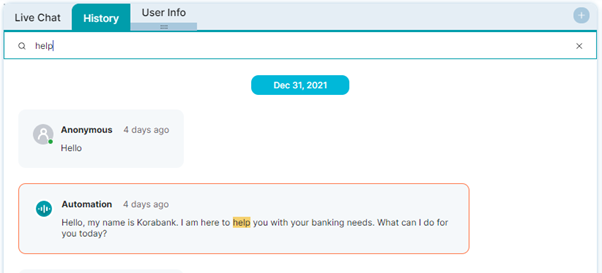
This widget displays the customer’s conversation history for all their prior conversations.
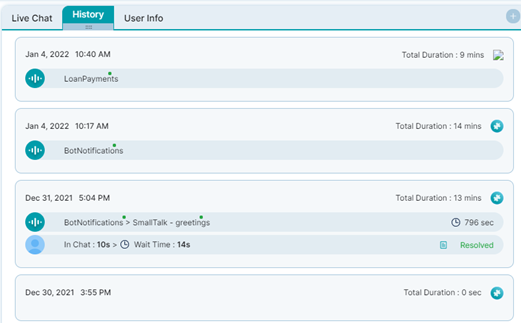

The following details are displayed:

    • Conversation date, year, and time.
    • Total duration of the conversation in minutes.
    • The conversation channel icon.
    • The automation use case name and total wait time in seconds specific to this use case.
    • The following information for a specific conversation are displayed:
      • Duration
      • Wait time
      • Final Status


User Info

This section displays some  additional information on the end customer. This widget is customizable and more information can be added here if needed.

For steps on how to customize the user info widget, please reach out to Kore support.


Agent Assist

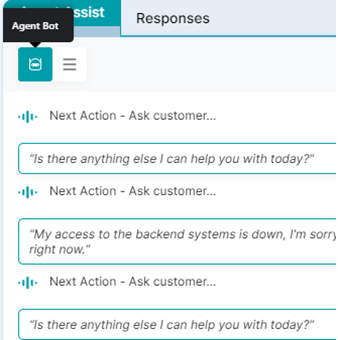
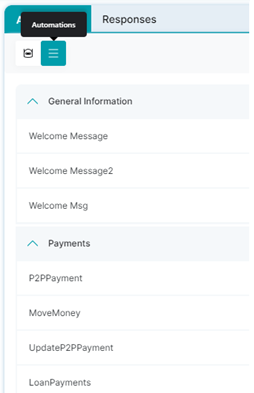
The Agent Assist widget displays the agent bot and automation options that can be used to provide real-time assistance to the agent.

  • Agent Bot: Displays the list of Next Best Action suggestions for the agent based on the current conversation status and other interaction parameters.
  • Automations: Displays the list of pre-configured automation messages the agent can trigger to the customer based on their intent. For example, a welcome message under General information, or the bill payment status under payments, etc.
  • Auto-Suggestion Off: Check this option if you want to disable auto-suggestion for the next action by AgentAssist.

Responses

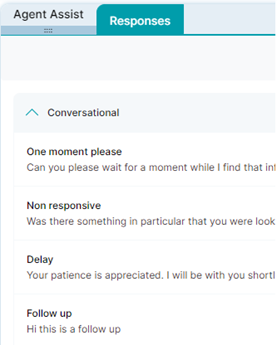
The responses widget can be used by agents to send canned responses to customers based on the scenario.


The default standard responses in SmartAssist are as follows:

  • Conversational: General conversation like welcome message, follow up, delay, etc.
  • Closing: Closing statements, feedback, request to fill up a survey, thank you and chat again, closing the chat because of no response from the customer.
  • Transfer: Interaction transfer to a manager or alternative chat group.
  • Abuse: Fair (initial) and final levels of warning when the customer uses abusive language.
  • Privacy: Permission-based service responses that enhance conversational privacy.

Leave a Reply

Your email address will not be published. Required fields are marked *

Fill out this field
Fill out this field
Please enter a valid email address.
You need to agree with the terms to proceed