Kore.aiボットにチャネルとしてAmazon Alexaを追加するには、構成タブからこのボットがサポートされているダイアログタスクを抽出し、Amazon Alexaのスキルに追加する必要があります。さらに、プラットフォームがメッセージを受信するには、ボットの“Webhook URL”をAlexaスキルセットのサービスエンドポイントとして構成する必要があります。

メモ:チャネルとしてのAlexaは、音声ベースのチャネルで動作するように特別に構築されたボットに対して有効にする必要があります。このボットのチャネルとしてAlexaを有効にする前に、次の制約をレビューしてください。

  1. ボットとコミュニケートするためにユーザーの承認を必要とするエンタープライズボットはサポートされていません。
  2. ダイアログタスクで外部システムと通信するためにユーザーの承認が必要な場合、プラットフォームはURL情報を含むカードをAlexaアプリにプッシュします。
  3. 公開されたダイアログタスクのみにあるインテントとエンティティをAmazon Alexaにエクスポートできます。インテントとエンティティがAmazon Alexaのネーミングガイドラインに沿っていることを確認してください。
  4. Kore.aiプラットフォームで利用できるすべてのエンティティタイプが現在Alexaで利用できるわけではありません。最適なユーザーエクスペリエンスを実現するために、タスクにAlexaがサポートするエンティティが含まれていることを確認してください。
  5. ダイアログタスクに1つまたは複数の発話が含まれていることを確認してください。
  6. Echo Showなどのサポートされているデバイスでボットレスポンスをテンプレートとして表示する場合は、チャネル固有のレスポンス/プロンプトを定義する必要があります。
  7. ダイアログタスクにボットメッセージノードが最後のノードとしてのみ含まれていることを確認してください。Alexaは、ユーザーからのインプットを期待せずにボットメッセージが表示された場合、タスクが完了したとマークします。
  8. Webhookノードは非同期で動作し、現在サポートされていません。
  9. Amazon Alexaは一度に1つのタスクを実行するため、一時停止と再開機能はサポートされていません。

ボットにAmazon Alexaチャンネルを追加するには、次のことを行う必要があります:

  1. 新しいスキルの追加―Kore.aiボットにAlexaチャネルを有効にするには、Amazon開発者コンソールで新しいAlexaスキルを作成します。
  2. インタラクションモデルの構成―Alexaスキルは次のいずれかの方法で構築できます。
    • Kore.aiからダイアログタスクを抽出し、Amazon Alexaのスキルにインポートするためのダイアログの移行。これには、ダイアログ定義で進行中の変更を反映するための再インポートが必要になります。インテントの検出と実行は、主にAlexaによって制御されます。
    • 1つのSearchQueryスロットを使用して、スキルに単一のインテントを作成するためのリダイレクトで、ユーザー入力を受け入れてKore.aiボットにリダイレクトします。インテントの検出と実行は、主にKore.aiボットによって制御されます。
  3. アカウントリンクの有効化―エンドユーザーの認証の詳細にアクセスして、外部サービスへのAPI呼び出しを行います。このステップはオプションです。
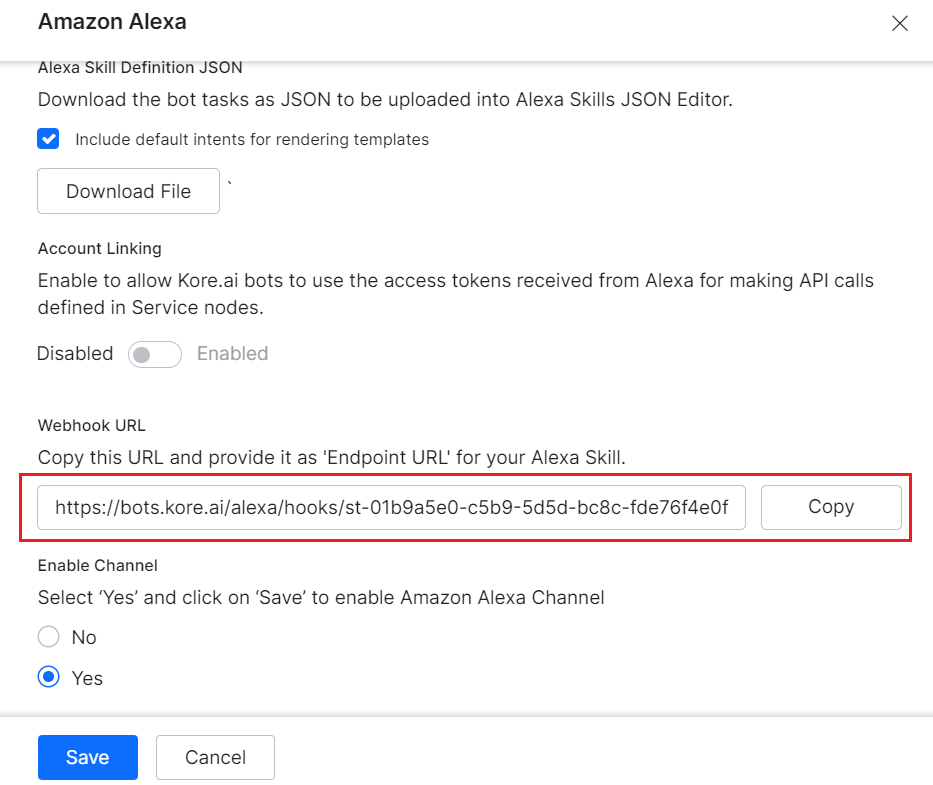
  4. Webhookシステム連携の有効化―Amazon AlexaをKore.aiボットとシステム連携するには、ボットビルダーのAmazon Alexaチャネルページの構成タブにあるWebhook URLをコピーして、Webhookシステム連携を有効にし、サービスエンドポイントタイプとして“HTTPS”を選択します。
  5. チャネルの有効化―システム連携のセットアップが完了したら、チャネルを有効にします。
  6. システム連携のテスト―チャネルが有効になったら、システム連携が成功したことを検証するために、Alexaスキルのテストタブを使用して意図的な発話をテストし、特定のテスト発話に対するレスポンスを確認します。
  7. 情報公開、プライバシーとコンプライアンス、認証―AlexaアプリでAlexaスキルを公開し、プライバシーとコンプライアンスの詳細を提供して、共同開発者をアプリのテストに招待できる“スキルベータテスト”を有効にする必要があります。また、認定後にスキルをAmazon App StoreのAlexaスキルに表示できるようにするには、スキル認定のためにAmazonに送信する必要があります。

Amazon Alexaチャンネルを追加するには、以下のステップに従います:

  1. ボットビルダーのボットセクションで、Amazon Alexaチャネルを追加したいボットをクリックします。
  2. チャンネルタブで、Amazon Alexaアイコンをクリックします。Amazon Alexaチャンネルページが表示されます。
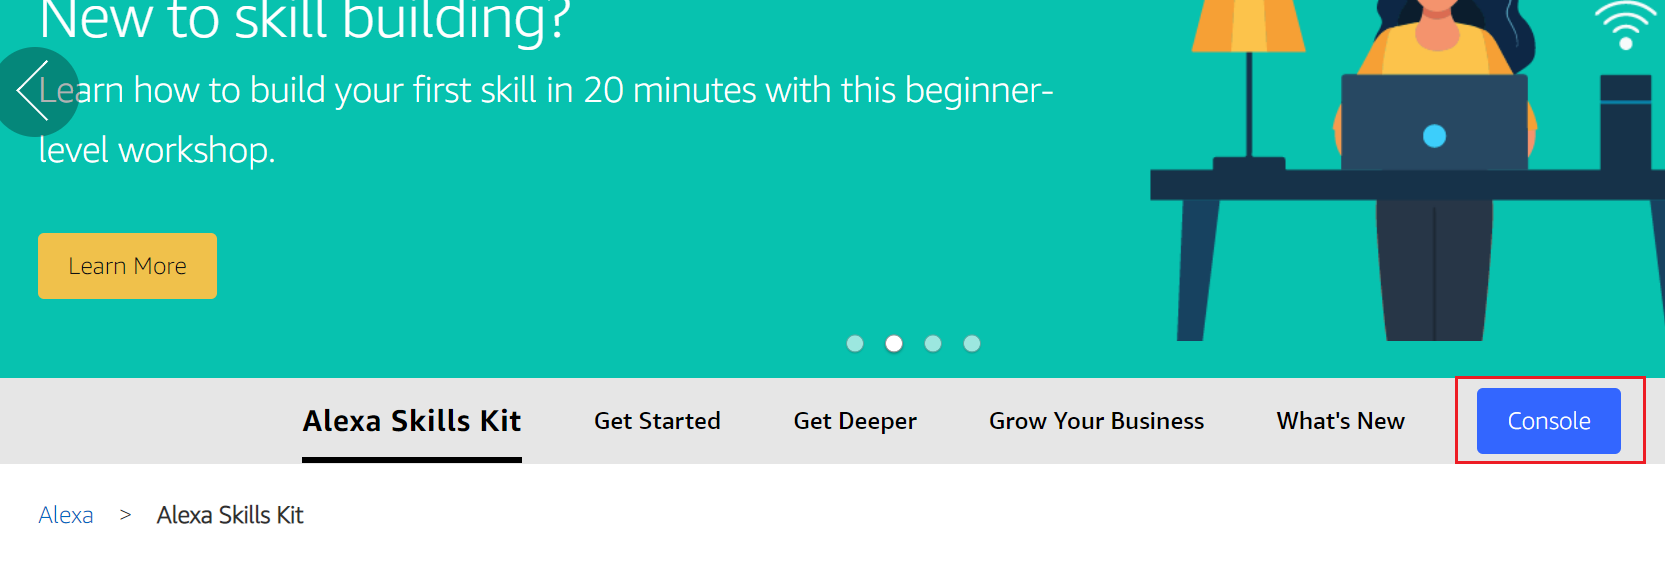
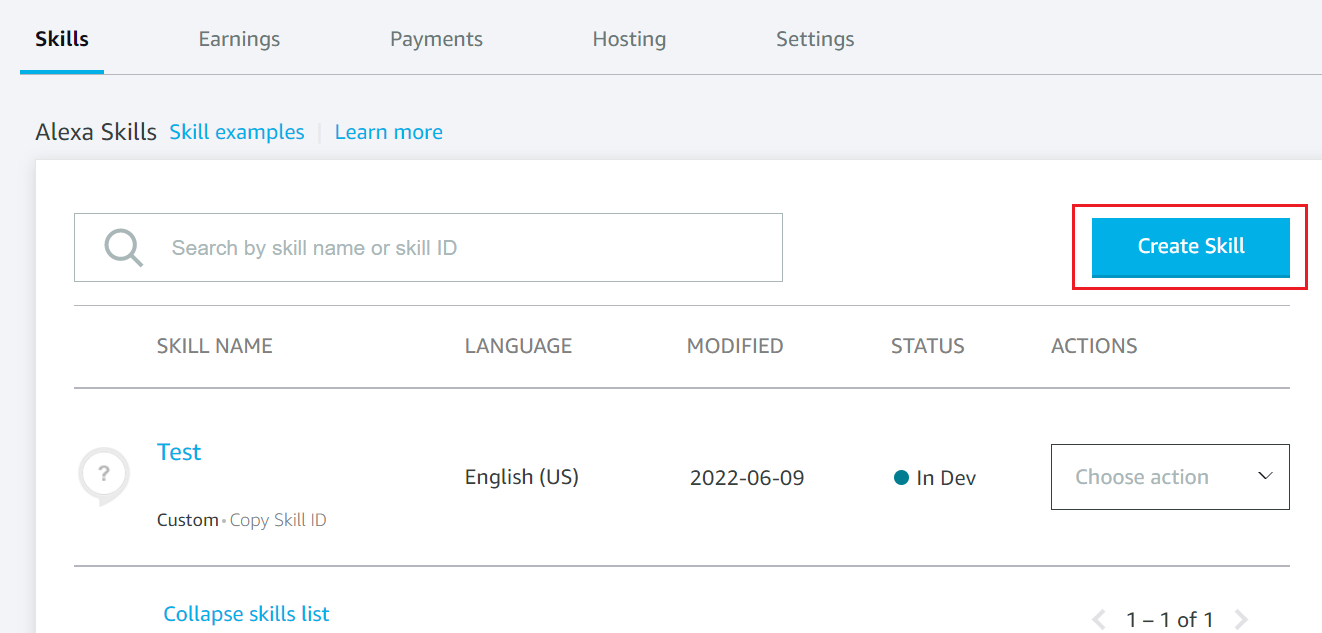
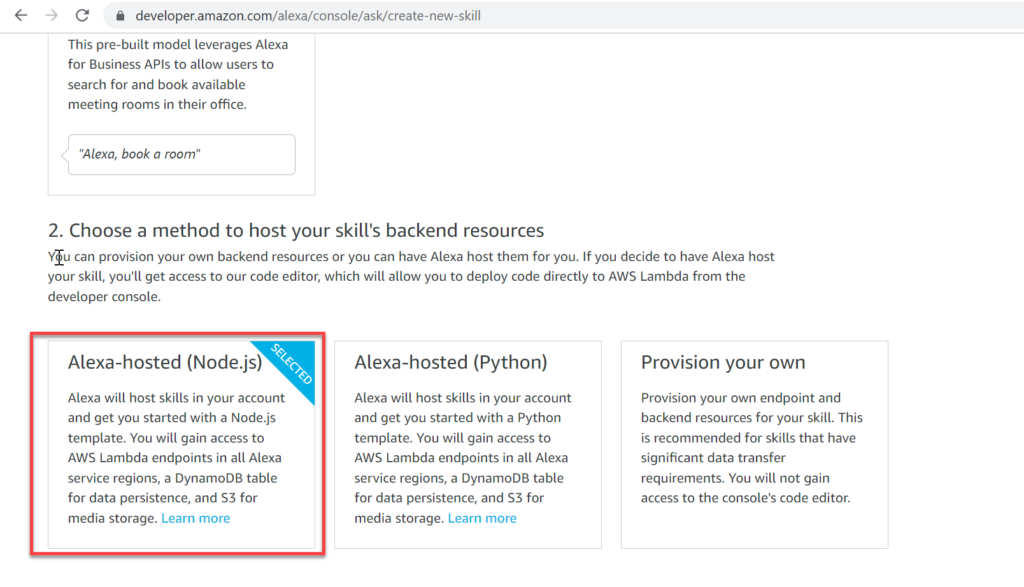
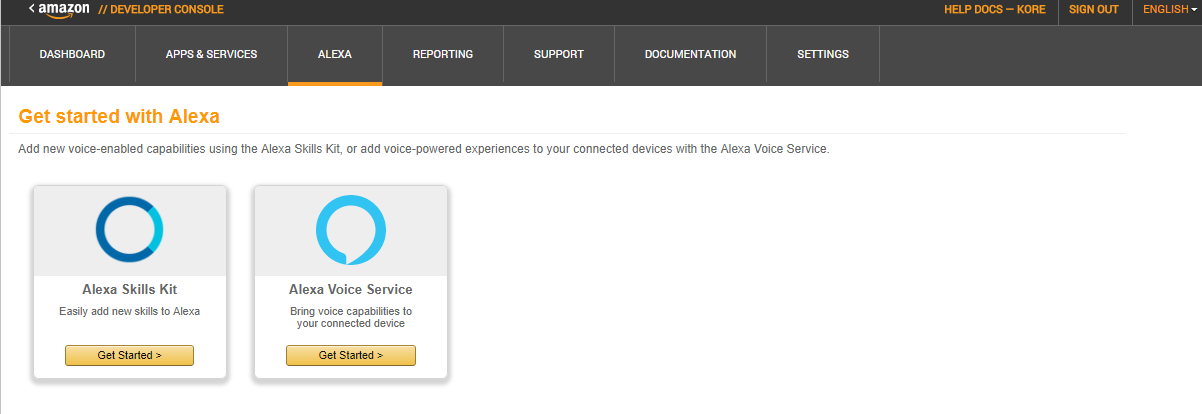
  3. 新しいブラウザタブで、Amazon開発者ポータルにログインし、Alexaタブをクリックします。Alexa Consoleから Skillsを選び、Create Skillをクリックします。Alexaチャネルを有効にするには、Amazon開発者アカウントを持っているか登録する必要があります。
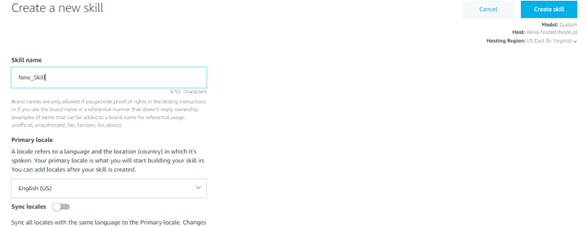
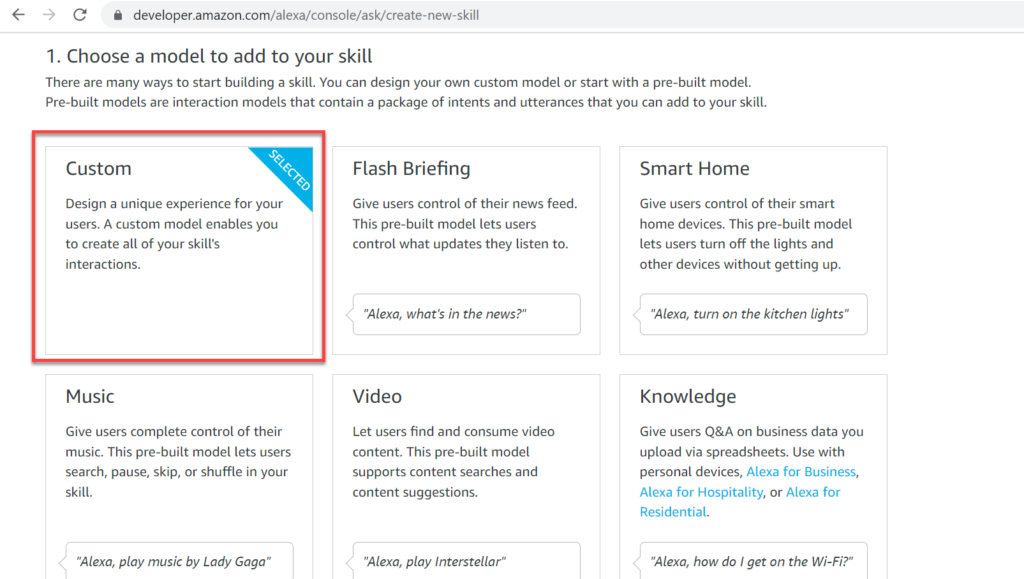
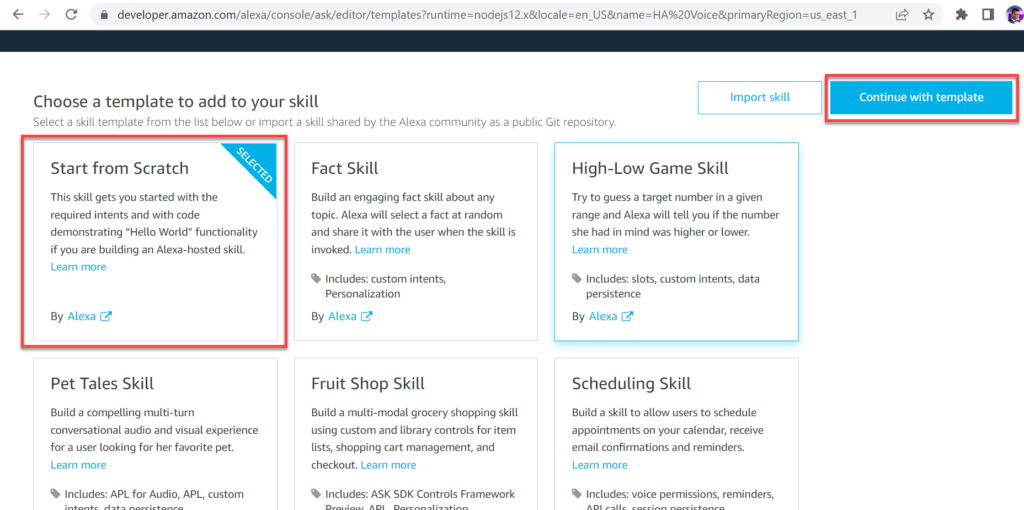
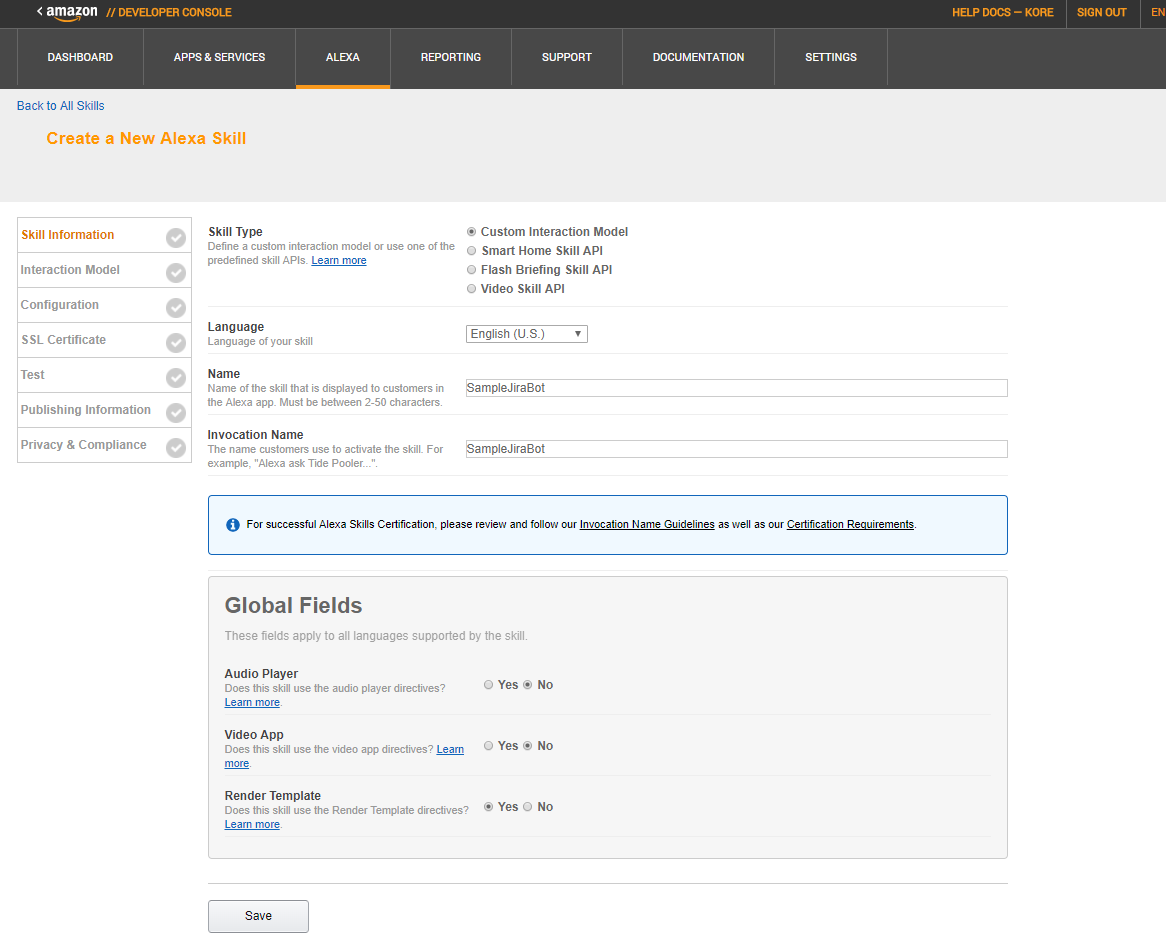
  4. Create a New Alexa Skillセクションで、それぞれのフィールドに必要な情報を入力します。Alexaがサポートされているデバイスでテンプレートを表示する場合は、画像に示すように、Global FieldsセクションでRender TemplateオプションのYes を選択します。
  5. Saveをクリックして新しいスキルを作成し、Nextをクリックして続行します。
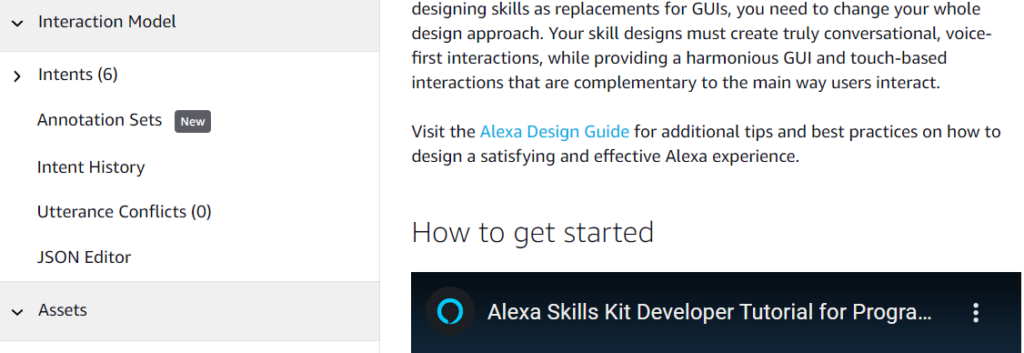
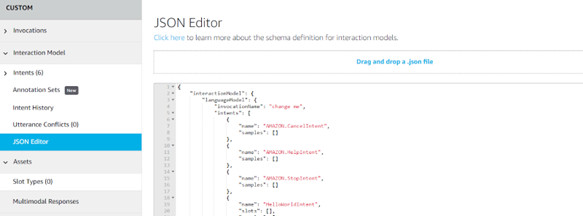
  6. 次に、Interaction Modelタブから、Launch Skill Builderを選択します。スキルビルダーのDashboardセクションにリダイレクトされます。左側のペインからCode Editorタブを選択します。
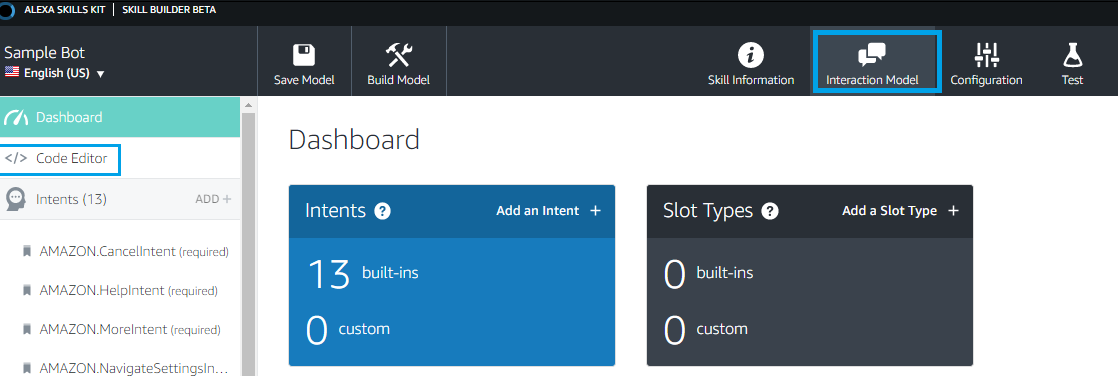
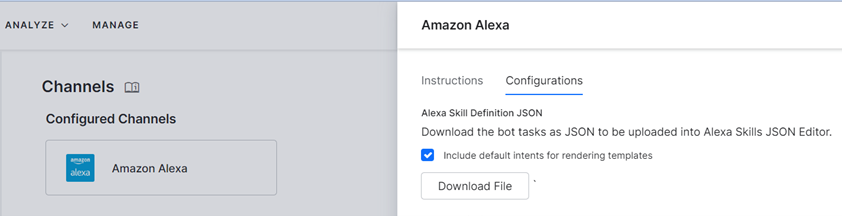
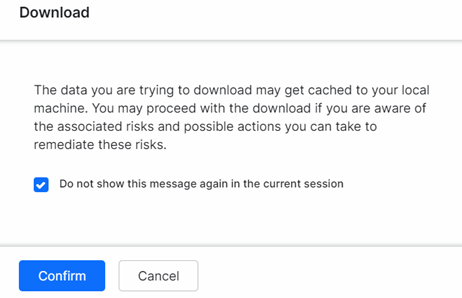
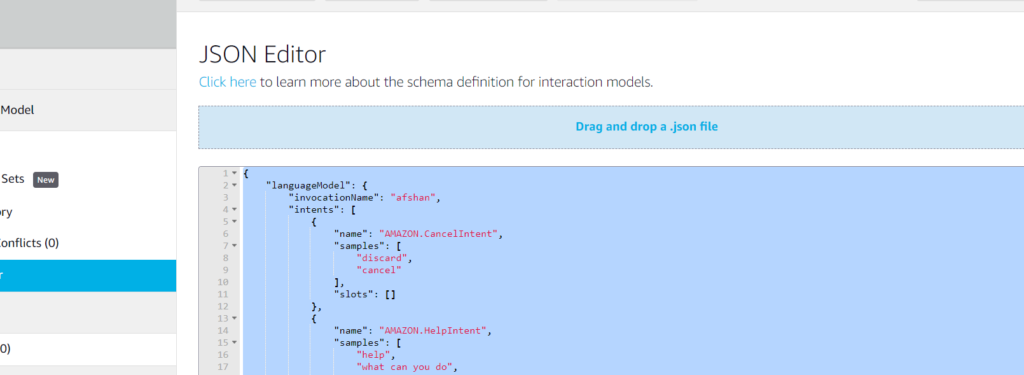
  7. Code Editorでは新しく作成したスキルに関連付けるインテントとエンティティを定義する必要があります。これを行うには、ボットビルダーのAmazon Alexaチャネルページの構成タブをクリックし、このボットでサポートされているすべてのダイアログのインテントとエンティティを含むJSONファイルをダウンロードします。開発者コンソールのコードエディターセクションに戻り、JSONファイルをアップロードして、Apply Changesをクリックします。
  8. コードにエラーがないことを確認し、Save ModelBuild Model をクリックします。
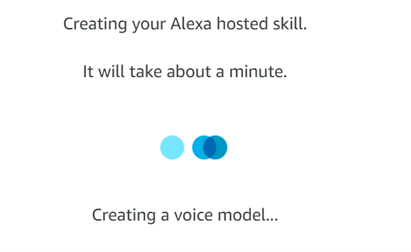
    メモ:モデルの構築には2〜5分かかります。構築されたモデルに変更が発生した場合は、モデルの再構築が必要になります。
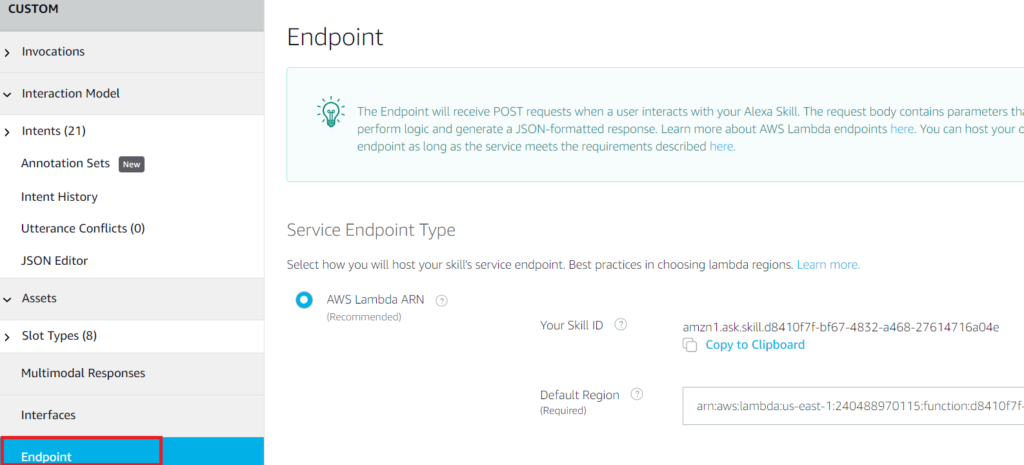
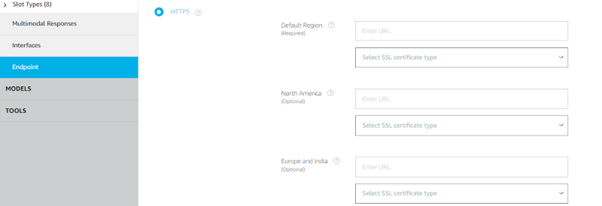
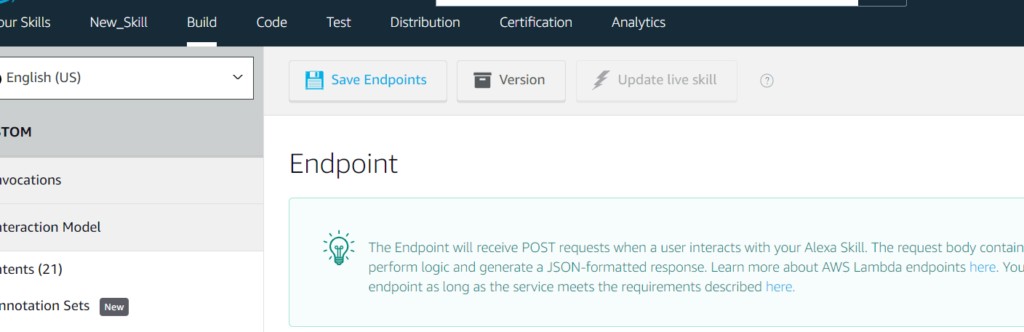
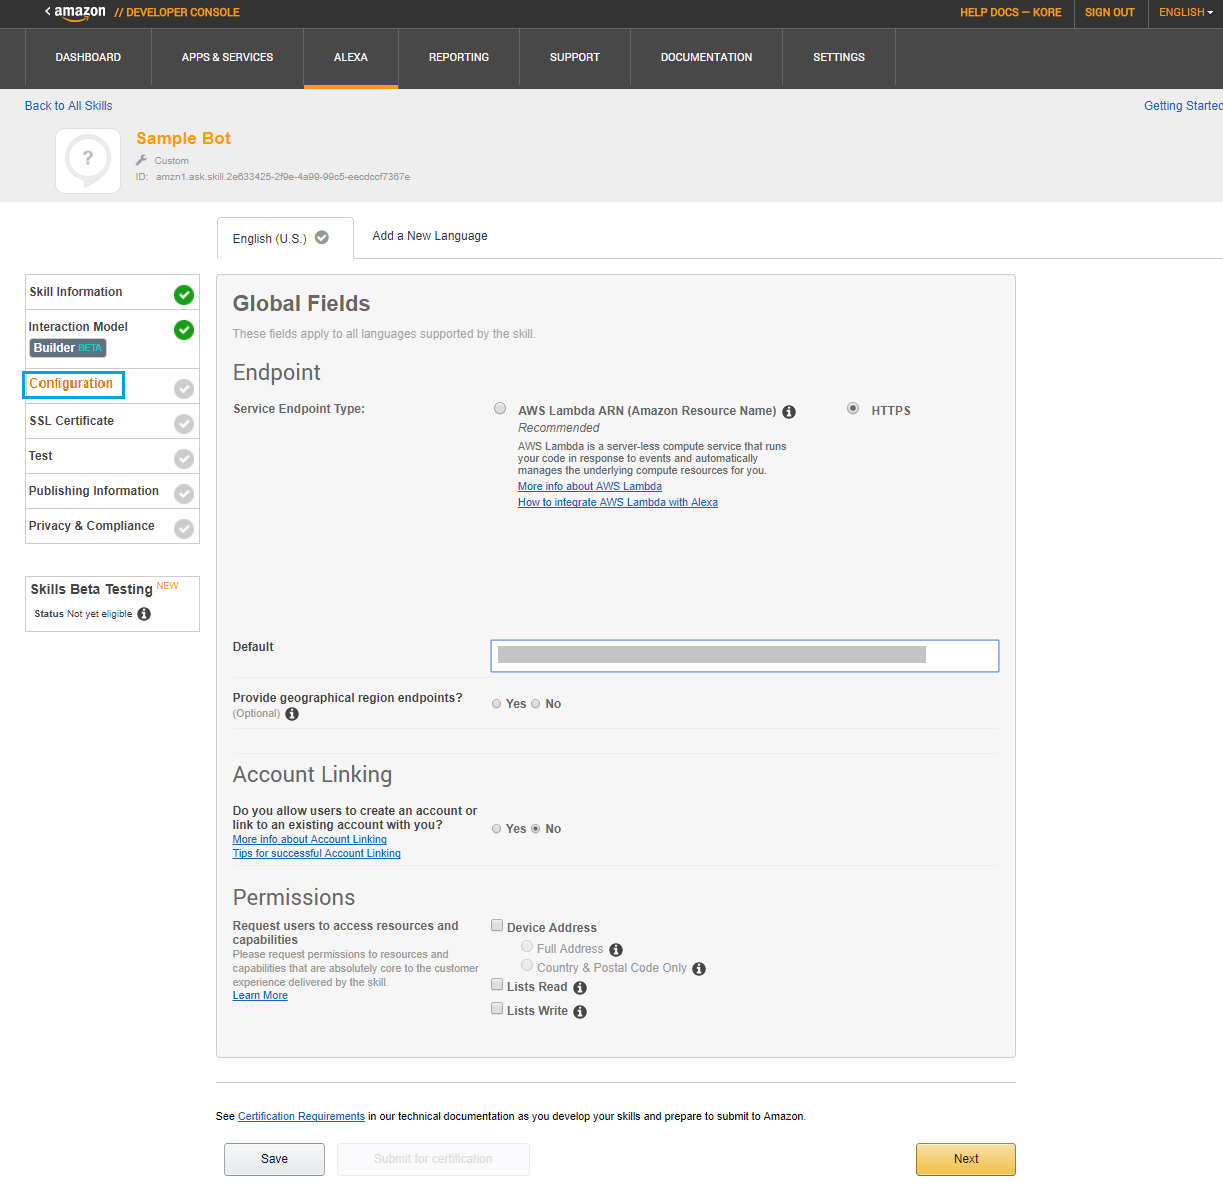
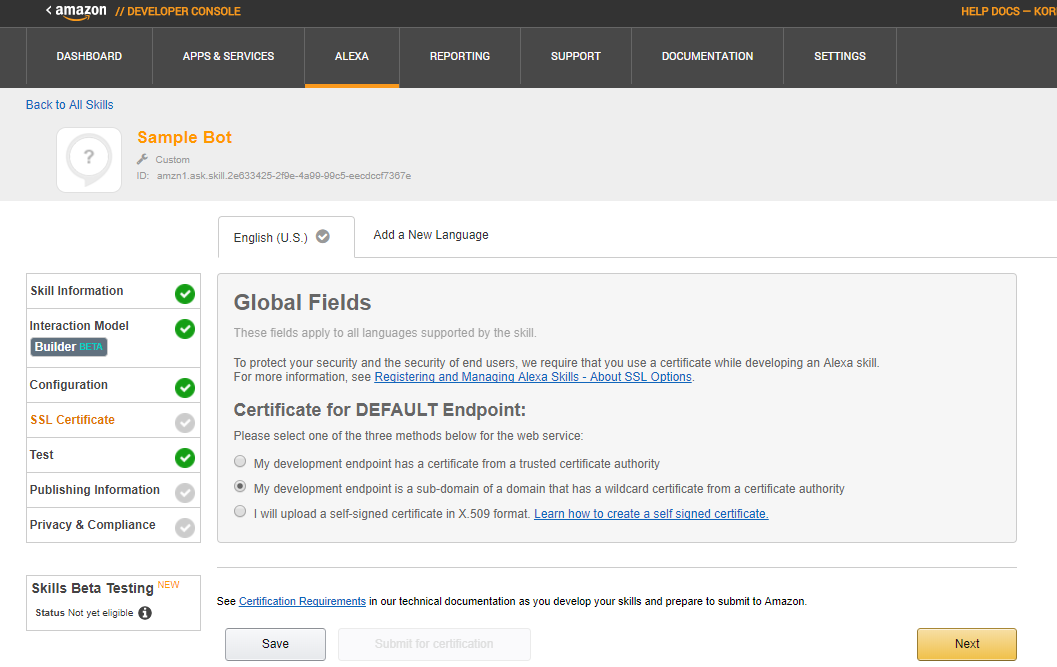
  9. Webhookシステム連携を有効にするには、Configurationタブをクリックして開発者コンソールに戻ります。Global Fields―Endpoint セクションで、サービスエンドポイントタイプとしてHTTPSを選択します。ボットビルダーのAmazon Alexaチャネルページの構成タブに表示されるWebhook URLをコピーして、Defaultテキストボックスに入力します。
  10. Nextをクリックして変更を保存し、SSL Certificate タブに移動します。
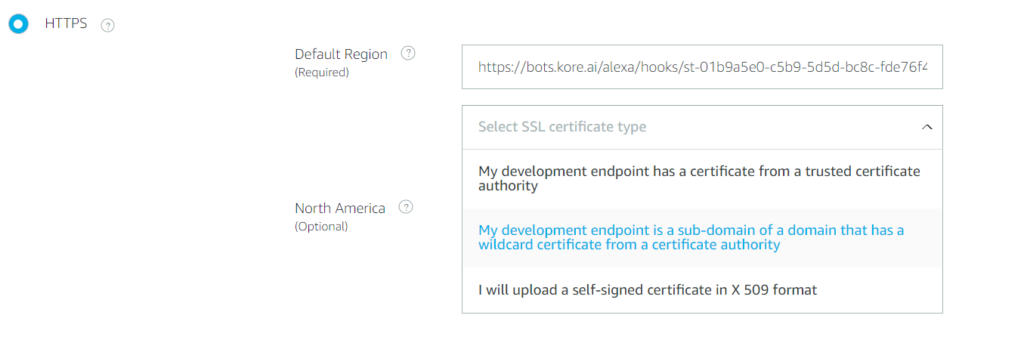
  11. SSL Certificateタブで、My development endpoint is a sub-domain of a domain that has a wildcard certificate from a certificate authority というオプションを選択します。
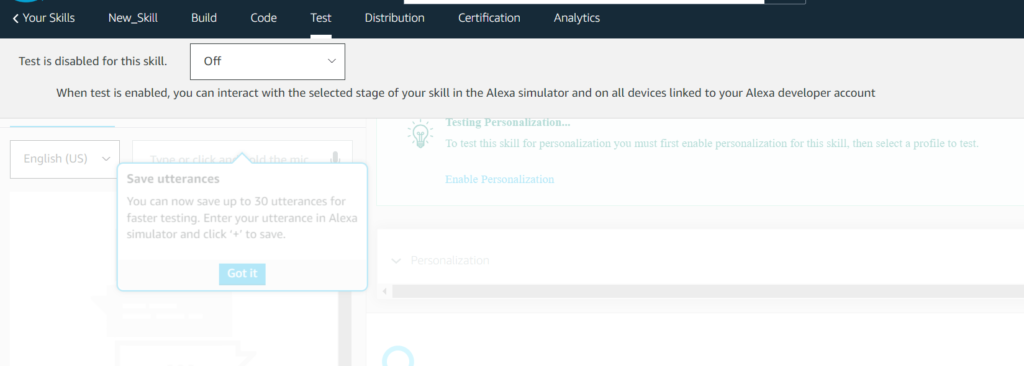
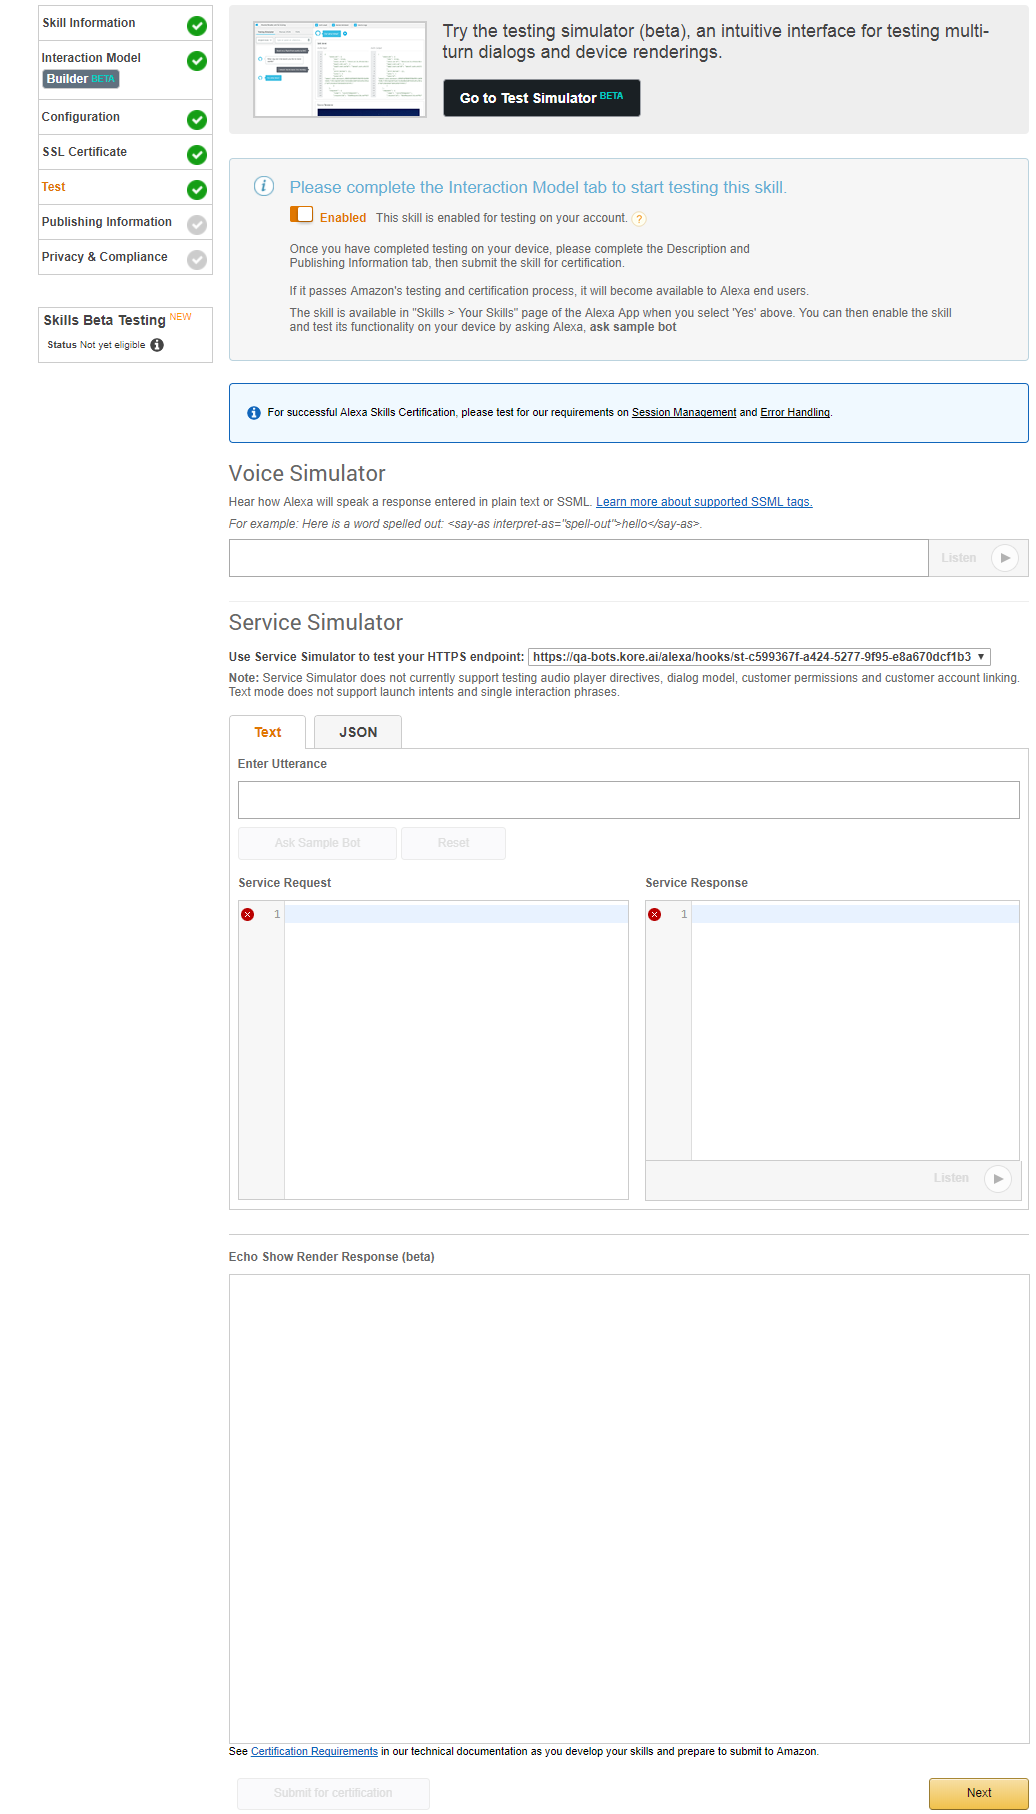
  12. Nextをクリックして変更を保存し、Testタブに移動します。
  13. Alexaでボットのテストを開始する前に、チャネルの設定を完了する必要があります。Amazon Alexaチャンネルページの構成タブに移動し、詳細を確認して、はいを選択します。 保存をクリックして、Amazon Alexa Channelを有効にします。
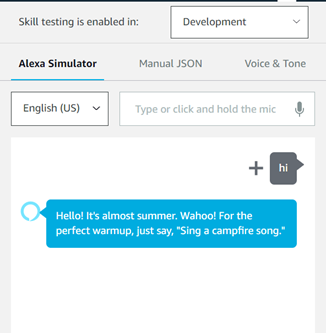
  14. 完了したら、AlexaスキルのTestタブを使用して、システム連携に対して発話テストができます。Testタブで、Service Simulatorセクションに移動し、意図的な発話を入力し、Ask <skill-name>をクリックして発話をテストします。レスポンスが成功した場合、システム連携は成功したと見なされます。
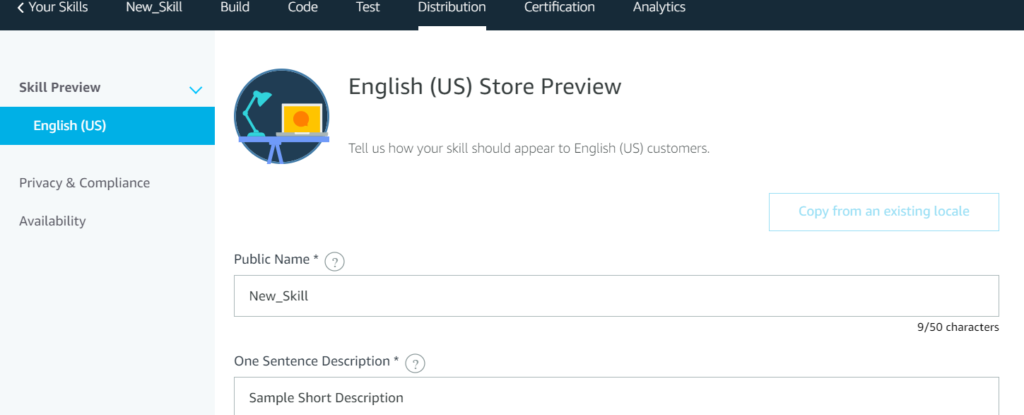
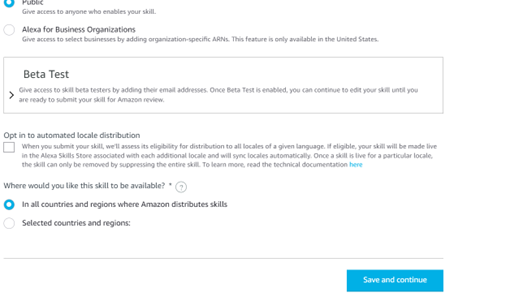
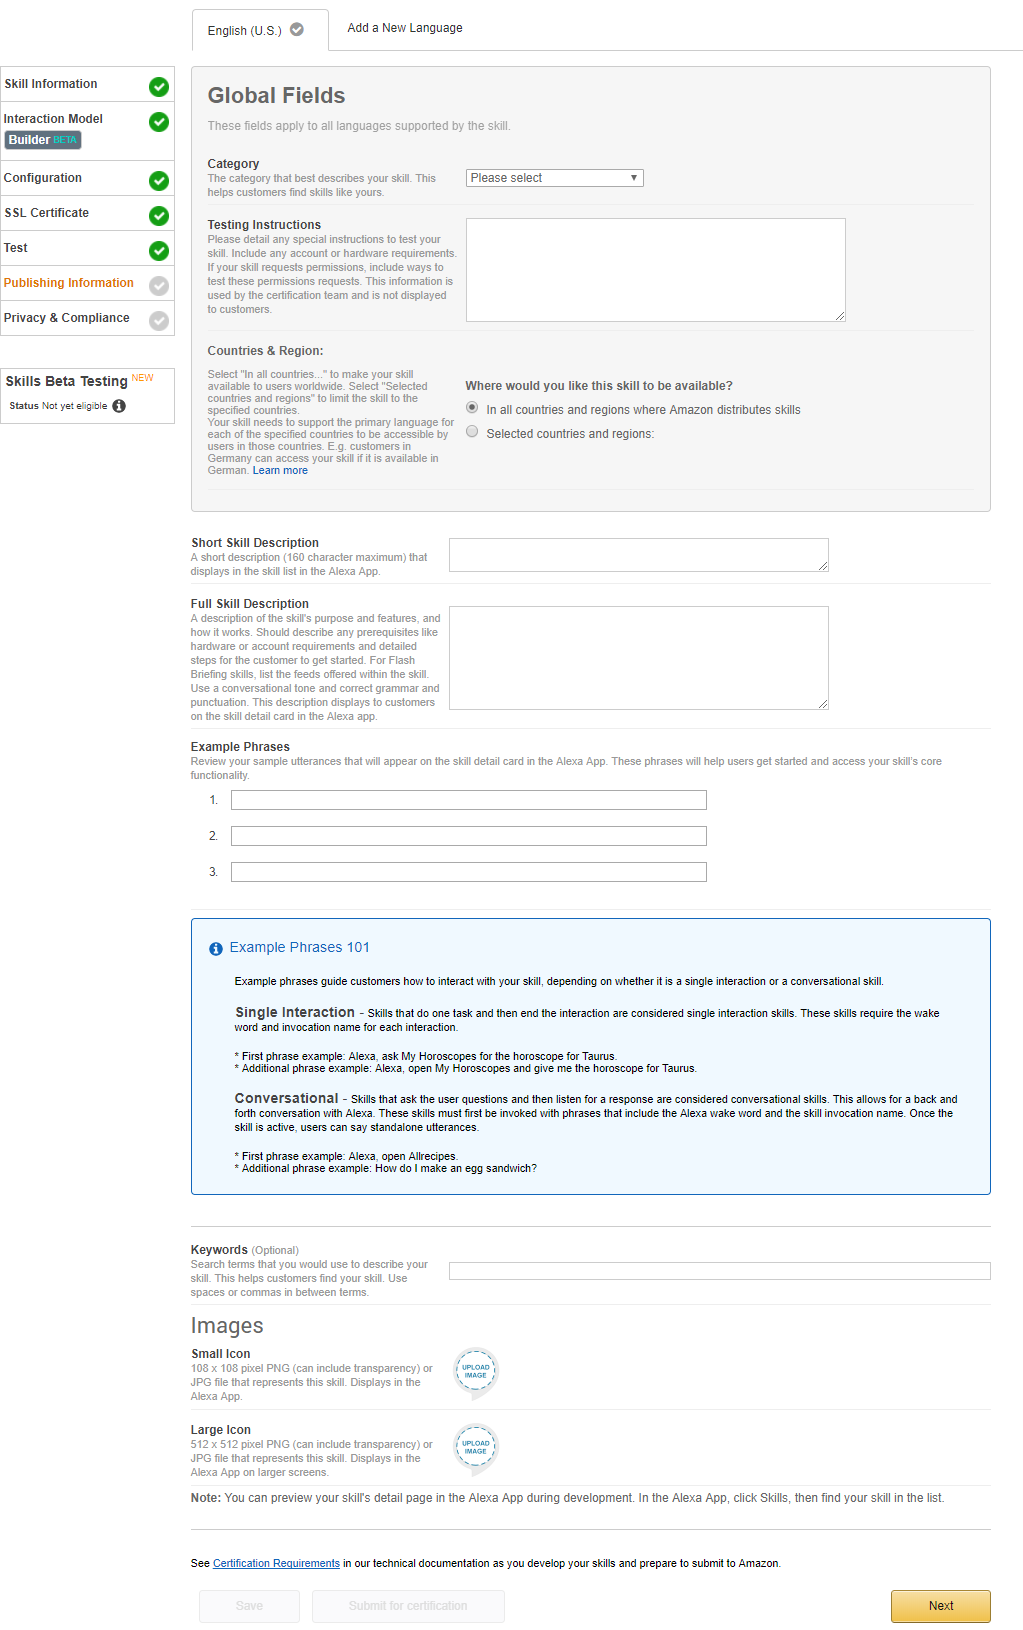
  15. 次に、Publishing Informationタブに移動し、AlexaアプリでAlexaスキルを公開するために必要なすべての詳細を入力して詳細をSaveします。
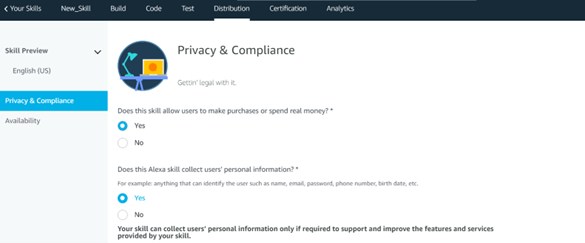
  16. 次に、Privacy & Complianceタブに移動し、必要なすべての詳細を入力して、Saveをクリックします。これらのステップを完了すると、Skills Beta Testing オプションが有効になり、共同開発者をアプリのテストに招待できます。
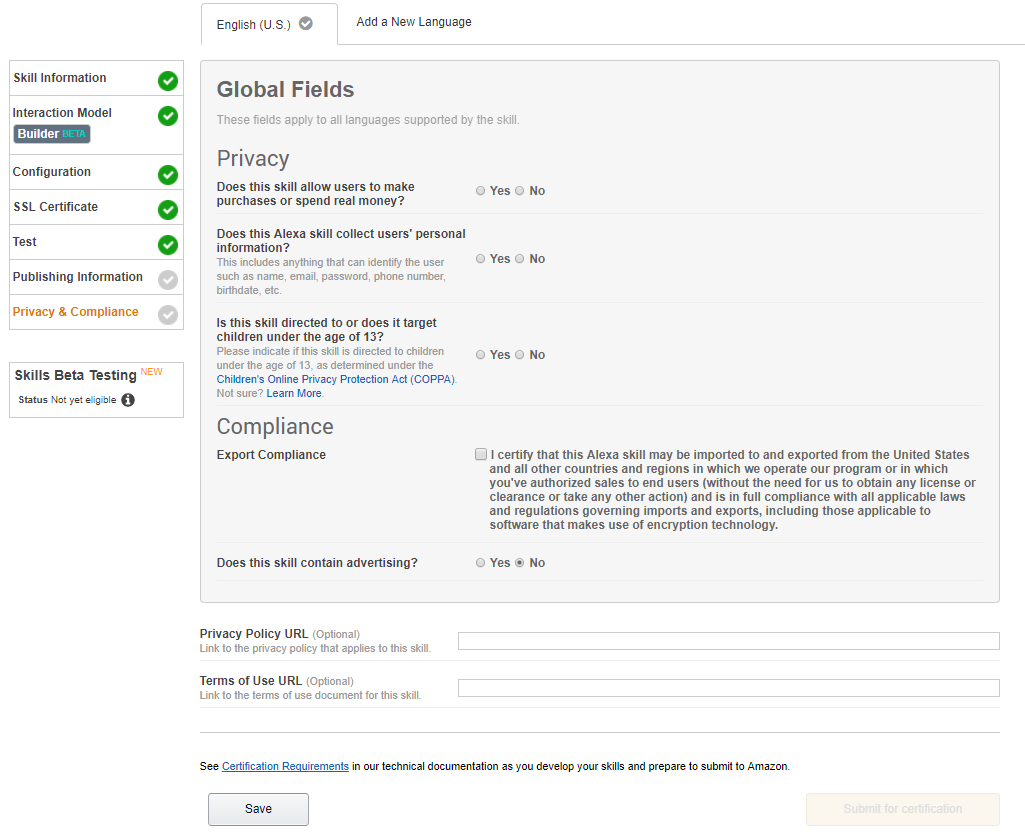
  17. スキルをAmazonに送信する準備ができたら、Submit for Certificationをクリックします。あなたのスキルは認定されるとAmazon App StoreAlexa Skillsに表示されます。

Amazon Alexaチャンネルの編集

Amazon Alexaチャンネルを編集するには、以下のステップに従います:

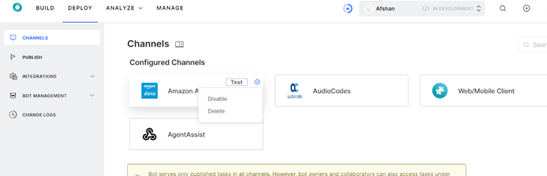
  1. 変更するチャネルにカーソルを合わせ、設定アイコンをクリックして、次の図に示すようなコマンドメニューを表示します。 
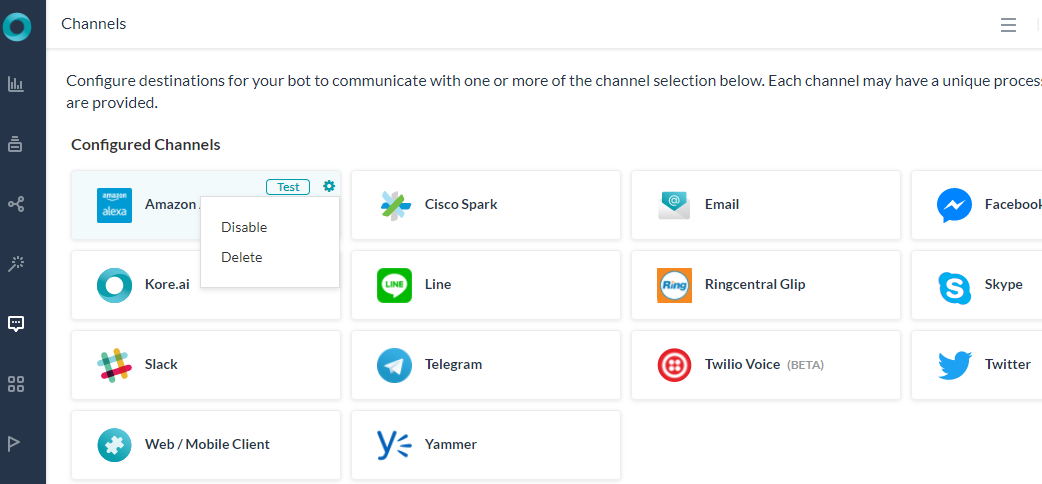
チャネルを変更するには、次のコマンドのいずれかを選択します:
  • 無効化/有効化―ボットでのAmazon Alexaの使用を一時的に無効にするには、無効化をクリックします。Amazon Alexaチャネルの使用を有効にするには、有効化をクリックします。
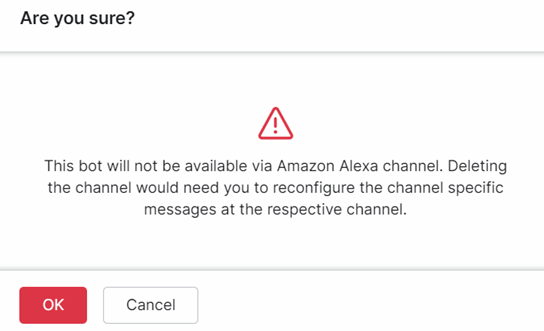
  • 削除削除をクリックします。削除の確認ダイアログボックスで、OKをクリックして、ボットチャネル構成を完全に削除します。
    警告:この操作は永久的で、元に戻すことはできません。

Kore.ai 봇에 채널로 Amazon Alexa를 추가하려면, Configurations 탭에서 이 봇의 지원된 대화 작업을 내보내야 하며 Amazon Alexa의 스킬로 추가해야 합니다. 추가로, 플랫폼이 메시지를 받도록 Alexa Skill 설정의 서비스 엔드포인트로 봇의 Webhook URL을 설정해야 합니다.

참고: Alexa 채널은 음성 기반 채널에서 작동하도록 특별히 제작된 봇에서 이상적으로 사용 할 수 있습니다. Alexa를 봇의 채널로 사용하기 전에 다음 제약 조건을 검토하세요:

  1. 봇과 통신하는 데 사용자 권한이 필요한 엔터프라이즈 봇은 지원되지 않습니다.
  2. 대화 상자 작업에서 외부 시스템과 통신을 위해 사용자 권한이 필요한 경우 플랫폼은 URL 정보가 포함된 카드를 Alexa 앱에 푸시합니다.
  3. 게시된 대화 상자 작업의 인텐트와 엔티티만 Amazon Alexa로 내보낼 수 있습니다. 인텐트와 엔티티가 Amazon Alexa의 명명 지침을 준수하는지 확인하세요.
  4. 현재 Kore.ai 플랫폼에서 사용 할 수 있는 엔티티 유형을 모두 Alexa에서 사용할 수 있는 것은 아닙니다. 최적의 사용자 환경을 위해 Alexa 지원 엔티티가 포함되어 있는지 확인하세요.
  5. 대화 상자 작업에 하나 이상의 발화가 포함되어 있는지 확인하세요.
  6. Echo Show와 같은 지원 장치에서 봇 응답을 템플릿으로 표시하려면 채널별 응답과 프롬프트를 정의해야 합니다.
  7. 대화 상자 작업에 마지막 노드에만 Bot Message 노드가 포함되어 있는지 확인하세요. 봇 메시지가 표시되면 Alexa는 사용자 입력을 예상하지 않고 작업을 완료한 것으로 표시합니다.
  8. Webhook 노드는 비동기식으로 작동하지만 현재 지원되지 않습니다.
  9. Amazon Alexa는 한 번에 하나의 작업을 실행하므로 Hold & Resume 기능을 지원하지 않습니다.

봇에 Amazon Alexa 채널을 추가하려면, 다음을 수행해야 합니다.

  1. Add a New Skill – Kore.ai 봇에 Alexa 채널을 활성화하려면, Amazon 개발자 콘솔에서 새 Alexa 스킬을 생성합니다.
  2. Configure Interaction Model – Alexa 스킬은 다음 방식 중 하나로 구축될 수 있습니다:
    • Kore.ai에서 대화 작업을 내보내고 Amazon Alexa 스킬로 대화 작업을 불러오기 위한 대화 마이그레이션입니다. 대화 정의에서 진행중인 변경 사항을 반영하기 위해 다시 불러오기를 수반합니다. 인텐트 감지 및 실행은 주로 Alexa가 조정합니다.
    • 하나의 SearchQuery 슬롯으로 스킬에 단일 인텐트를 생성하기 위한 리디렉션은 사용자 입력을 수락하며 Kore.ai 봇에 이를 리디렉션합니다. 인텐트 감지 및 실행은 주로 Kore.ai 봇이 조정합니다.
  3. Enable Account Linking – 외부 서비스에 API를 호출하기 위해 최종 사용자의 인증 정보 세부 사항에 액세스합니다. 이 단계는 선택사항입니다.
  4. Enable Webhook Integration – Kore.ai 봇에 Amazon Alexa 통합을 활성화하려면, 봇 빌더의 Amazon Alexa 채널 페이지의 Configurations 탭에 있는 Webhook URL을 복사하여 서비스 엔드포인트 유형으로 HTTPS를 선택합니다.
  5. Enable Channel – 통합 설정을 완료 후, 채널을 활성화합니다.
  6. Test Integration – 채널이 일단 활성화되면, 성공적인 통합을 검증하기 위해, Alexa Skill의 Test 탭을 사용하여 인텐트 발화를 테스트하고 주어진 테스트 발화에 대한 응답을 확인합니다.
  7. Publishing Information, Privacy & Compliance, and Certification – Alexa 앱에서 Alexa Skill을 게시해야 하고 개인 정보 및 준수를 위해 세부 정보를 제공하여 앱을 테스트하기 위해 동료 개발자를 초대할 수 있도록 하는 Skills Beta Testing를 활성화합니다. 스킬이 인증된 후 인증을 위해 Amazon에 스킬을 제출하여 Amazon 앱 스토어의 Alexa Skills에서 스킬이 표시되도록 활성화 합니다.

Amazon Alexa 채널을 추가하려면 다음 단계를 따르세요.

  1. 봇 빌더의 Bots 섹션에서, Amazon Alexa 채널을 추가하려는 봇을 클릭하세요.
  2. Channels 탭에서, Amazon Alexa 아이콘을 클릭하세요. Amazon Alexa Channels 페이지가 표시됩니다.
  3. 새 브라우저 탭에서, Amazon Developer Portal에 로그인하여 Alexa 탭을 클릭합니다. Your Alexa 콘솔에서 Skills를 선택하고 Create Skill을 클릭하세요. Alexa 채널을 활성화 하려면, Amazon 개발자 계정이 있거나 계정을 등록해야 합니다
  4. Create a New Alexa Skill 섹션에서, 각 필드에 필요한 정보를 입력합니다. Alexa가 지원되는 장치에서 템플릿이 표시하길 원하는 경우, 이미지에 보이는 대로 Global Fields 섹션의 Render Template 옵션에서 Yes를 선택합니다.
  5. Save를 클릭하여 새 스킬을 생성하고 Next을 클릭하여 진행합니다.
  6. 이제 Interaction Model 탭에서 Launch Skill Builder을 선택합니다. 스킬 빌더의 Dashboard 섹션으로 리디렉션됩니다. 왼쪽 창에서 Code Editor 탭을 선택합니다.
  7. Code Editor에서, 새로 생성된 스킬과 연결할 인텐트와 엔티티를 정의합니다. 이를 위해 봇 빌더에서 Amazon Alexa 채널 페이지의 Configurations 탭을 클릭하고 이 봇에서 지원되는 모든 대화의 인텐트와 엔티티를 포함하는 JSON file을 다운로드힙니다. 개발자 콘솔의 코드 편집기 섹션으로 되돌아가 JSON 파일을 업로드하고 Apply Changes을 클릭합니다.
  8. 검토 후 코드에 오류가 없는지 확인하고 Save Model > Build Model을 클릭합니다.
    참고: 모델을 구축하는 데 2~5분이 걸립니다. 모델을 구축하기 위해 구현된 변경사항은 모델을 다시 구축한 후에 수행해야 합니다.
  9. Webhook 통합을 활성화하려면 Configuration 탭을 클릭하여 개발자 콘솔로 되돌아갑니다. Global Fields – Endpoint 섹션에서, 서비스 엔드포인트 유형으로 HTTPS를 선택합니다. 봇 빌더의 Amazon Alexa 채널 페이지의 Configurations 탭에 있는 Webhook URL을 복사하여 Default 텍스트 상자에 입력합니다.
  10. Next을 클릭하여 변경 사항을 저장하고 SSL Certificate 탭으로 이동합니다.
  11. SSL 인증서 탭에서 My development endpoint is a sub-domain of a domain that has a wildcard certificate from a certificate authority를 옵션으로 선택합니다.
  12. Next을 클릭하여 변경 사항을 저장하고 Test 탭으로 이동합니다.
  13. Alexa에서 봇 테스트를 시작하기 전에 채널 설정을 완료해야 합니다. Amazon Alexa 채널 페이지의 Configurations 탭으로 이동하여, 세부 정보를 검토, Yes를 선택하고 Save을 클릭하여 Amazon Alexa 채널을 활성화합니다.
  14. 완료되면 Alexa Skill의 Test 탭을 사용하여 통합을 위한 발화를 테스트할 수 있습니다. Test 탭에서, Service Simulator 섹션으로 이동하여 인텐트 발화를 입력하고 Ask <skill-name>을 클릭하여 발화를 테스트합니다. 성공적으로 응답을 받은 경우 통합이 성공한 것으로 간주됩니다.
  15. 이제 Publishing Information 탭으로 이동하여 Alexa 앱에서 Alexa Skill을 게시하는 데 필요한 모든 세부 정보를 입력하고 세부 정보를 Save합니다.
  16. 다음으로 Privacy & Compliance 탭으로 이동하여 요청 받은 모든 필요한 세부 정보를 입력하고 Save를 클릭합니다. 이러한 단계를 마친 후, Skills Beta Testing  옵션이 활성화되고 동료 개발자들을 앱 테스트를 위해 초대할 수 있습니다.
  17. Amazon에 스킬을 제출할 준비가 된 경우, Submit for Certification을 클릭합니다. 인증 후 Amazon App StoreAlexa Skills에서 스킬이 표시됩니다.

Amazon Alexa 채널 편집

Amazon Alexa 채널을 편집하려면 다음 단계를 따르세요.

  1. 수정하려면 채널로 마우스를 이동한 후 Settings 아이콘을 클릭하여 다음 이미지에 보이는 것과 같이 명령 메뉴를 표시합니다. 채널을 수정하려면 다음과 같은 명령 중 하나를 선택하세요.
  • Disable/EnableDisable을 클릭하여 봇의 Amazon Alexa 사용을 일시적으로 비활성화하세요. Amazon Alexa 채널 사용을 활성화하려면, Enable을 클릭하세요.
  • DeleteDelete를 클릭하세요. 삭제 확인 대화 상자에서, OK을 클릭하여 봇 채널 설정을 영구적으로 삭제합니다.
    경고: 이 작업은 영구적이므로 취소할 수 없습니다.

To add Amazon Alexa as a channel to your Kore.ai bot, you must extract supported Dialog Tasks of this bot from the Configurations tab and add to your Amazon Alexa’s Skills. Additionally, you must configure your bot’s Webhook URL as your Alexa Skill Set’s Service Endpoint for the platform to receive messages.

Note: Alexa as a channel must be enabled for bots that are specifically built to work on voice-based channels. Review the following constraints before enabling Alexa as a channel for this bot:

  1. Enterprise bots that require the user’s authorization to communicate with the bot are not supported.
  2. If your dialog tasks require the user’s authorization to communicate with external systems, then the platform will push a card with URL information to the Alexa app.
  3. Intents and entities of only Published Dialog Tasks can be exported to Amazon Alexa. Ensure that your intents and entities adhere to the naming guidelines of Amazon Alexa.
  4. Not all entity types available in the Kore.ai platform are currently available in Alexa. Verify that your tasks contain Alexa-supported entities for optimal user experience.
  5. Ensure that your dialog tasks contain one or more utterances.
  6. If you want to display bot response as templates on supported devices like Echo Show, you must define channel-specific responses/prompts.
  7. Ensure that your dialog tasks contain the Bot Message node as the last node only. Alexa marks a task as completed if a bot message is displayed without expecting any input from the user.
  8. Webhook Nodes work asynchronously and are currently not supported.
  9. Amazon Alexa executes one task at a time and hence Hold & Resume functionality is not supported.

To add the Amazon Alexa channel to your bot, you must:

  1. Add a New Skill – To enable the Alexa channel to your Kore.ai bot, create a new Alexa skill in the Amazon developer console.
  2. Configure Interaction Model – Alexa skill can be built in one of the following ways:
    • Dialog Migration to extract the dialog tasks from Kore.ai and import them into Amazon Alexa’s Skills. This will entail re-import for reflecting ongoing changes in the dialog definition. Intent detection and execution are primarily controlled by Alexa.
    • Redirection to create a single intent in your skill with one SearchQuery slot that accepts user inputs and redirects them to your Kore.ai bot. Intent detection and execution are primarily controlled by the Kore.ai bot.
  3. Enable Account Linking – To access end user’s authentication details to make API calls to external services. This step is optional.
  4. Enable Webhook Integration – To integrate Amazon Alexa with your Kore.ai bot, enable webhook integration by copying the Webhook URL provided on the Configurations tab of the Amazon Alexa Channel page in the bot builder and select HTTPS as Service Endpoint type.
  5. Enable Channel – After completing the integration setup, enable the channel.
  6. Test Integration – Once the channel is enabled, to validate a successful integration, test any intent utterance using the Test tab of your Alexa Skill and check its responses for the given test utterances.
  7. Publishing Information, Privacy & Compliance, and Certification – You must publish your Alexa Skill on Alexa App and provide details for Privacy and Compliance to enable Skills Beta Testing that allows you to invite your co-developers to test your app. You must also submit your Skill to Amazon for certification to enable your skill to become visible on Alexa Skills on Amazon App Store after it is certified.

To add the Amazon Alexa Channel, follow these steps:

    1. In the Bots section of the Bot Builder, click the bot you want to add the Amazon Alexa channel to.
    2. Click on the Deploy tab to go to the Channels page.
    3. In the Channels page, click the Amazon Alexa icon under Voice Channels. The Amazon Alexa Channel page is displayed.
    4. In a new browser tab, log in to your Amazon Alexa Skills Portal.
    5. You will be taken to the Alexa Skills Kit page. Click the Console button.
      Note: To enable the Alexa channel, you must have an Amazon Developer account or register for a new account.

    6. Alexa Skills page is displayed. You can access the existing skills or click the Create Skill button to create a new one.
    7. In the Create a new skill page, enter the required information in the respective fields.
    8. Custom model needs to be added to your skill as illustrated below.
    9. Select the Alexa-hosted(Node.js) method to be added to your skill as illustrated below.
    10. Click Create Skill and select the Start from Scratch template, then click Continue with Template.

    11. Enter the captcha and click Submit. An Amazon Alexa voice skill will be processed and created.
    12. On clicking Submit, the following message is displayed.
    13. Upon skill creation, the following page is displayed.
    14. From the  Interaction Model tab in the left navigation pane, you can add intents, annotations, check the Intent History and Utterance Conflicts.
    15. Go to JSON Editor under the Interaction Model.
    16. In the JSON Editor page, you can define the intents and entities to be associated with your newly created skill. For this, go to the bot builder and click Amazon Alexa under Configured Channels in the Channels page of your bot.
    17. Click the Download File button to download the JSON file containing intents and entities of all the supported dialogs in this bot.
    18. Click Confirm in the following pop-up window. The json file is downloaded in your local directory.
    19. Go back to the JSON Editor section of your alexa skill. Copy paste the content or drag and drop the JSON file.
    20. Review to ensure that there are no errors in your code and click Save Model. Once the skill is successfully saved without errors, click Build Model.

      Note:
      It takes 2-5 mins for the Model to build. Any changes implemented in the built model would be reflected only by rebuilding the model.
    21. To enable webhook integration, click the Endpoint in the left navigation, select HTTPS as the Service Endpoint Type. 

    22. Copy the Webhook URL provided in the Configurations tab of the Amazon Alexa in the Channels page of the bot builder and enter it in the Default Region field of the Endpoint page of Alexa Console.
    23. In the Select SSL certificate type drop-down, choose the option My development endpoint is a sub-domain of a domain that has a wildcard certificate from a certificate authority.

    24. Click Save Endpoints to save the changes.

    25. From the top menu bar you can go to the Test tab to test your skill.

    26. Before you can start testing your bot on Alexa, you must complete the channel setup. Go to the Configurations tab of the Amazon Alexa channel page, review the details and select Yes; click Save to enable Amazon Alexa Channel.
    27. You can use the Test tab of your Alexa Skill to test your utterances against the integration. In the Test tab, go to the Alexa Simulator section and provide any intent utterance and click Ask <skill-name> to test the utterance.

      If you get a successful response then the integration is considered a success.
    28. Go to the Distribution tab, provide all the required details for publishing your Alexa Skill on Alexa App and click Save and continue.
    29. You will be taken to the  Privacy & Compliance page, provide all the required details and click Save and Continue.

    30. You will be taken to the Availability page,  where the Beta Test option  is enabled and this allows you to invite your co-developers to test your app.
    31. Fill the required details and click Save and Continue.

    32. You will be taken to the Validation page under the Certification tab. Click Run to validate your skill.

    33. On successful validation and certification, your skill will be visible on Alexa Skills on Amazon App Store.

    Edit Amazon Alexa Channel

    To edit the Amazon Alexa channel, follow these steps:

    1. Hover over the channel to modify, and then click the Settings icon to display the command menu as shown in the following image.

      Select one of the following commands to modify the channel:
    • Disable/Enable – Click Disable to temporarily disable the use of the Amazon Alexa for your bot. To enable the use of the Amazon Alexa channel, Click Enable.
    • Delete – Click Delete. On the Delete Confirmation dialog box, click OK to permanently delete the bot channel configuration.

    Warning: This operation is permanent and cannot be undone.