The Skills feature helps set up organizational classifications to route calls or chats to an agent based on the agent’s specialization, department, vertical, customer segment, and other categories. Examples of agent skills may include:
- Languages – Agents can speak different languages like English, Hindi, Spanish, etc. Language is considered a default skill that every agent must have.
- Customer Interactions – Agents are trained for retention skills, up-selling/cross-selling, or other related skills.
Add a New Skill
To add skills to a skill group you’ve created, follow these steps:
1. Click the Skills menu option under ROUTING.
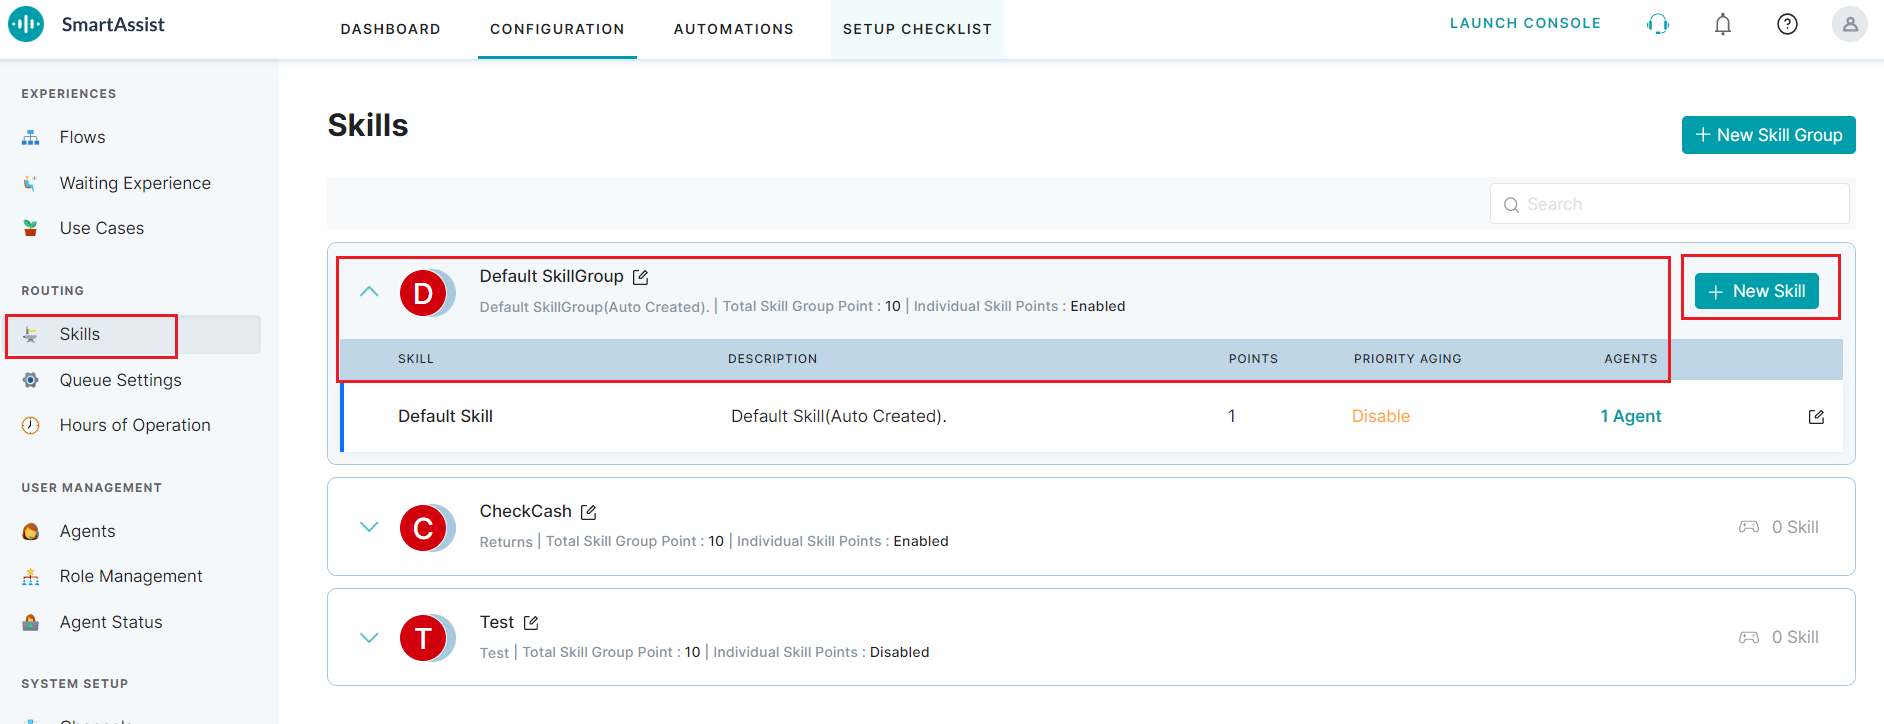
2. Click the respective skill group to get the drill-down view of the Skills.
3. Click the + New Skill button.
4. Enter the following details in the Add New Skill window:
- Skill Name – Enter the name to help you identify the skill. An example of a skill name is customer retention. This skill name can help identify and map the skill of an agent when a customer wants to cancel their subscription.
- Description – Enter a brief description of the purpose of the skill.
- Is Mandatory – Select Yes or No from the drop-down list. Selecting yes will assign only agents with this skill to an incoming call or chat conversation that needs this skill-based service.
- Priority Aging – If enabled, the system will move the contact waiting longer in the service queue to the top with the highest priority.
- Agent Assignments – Helps assign the selected skill along with the proficiency level (Novice, Average, Good, and Expert) to an agent to generate a positive customer experience.
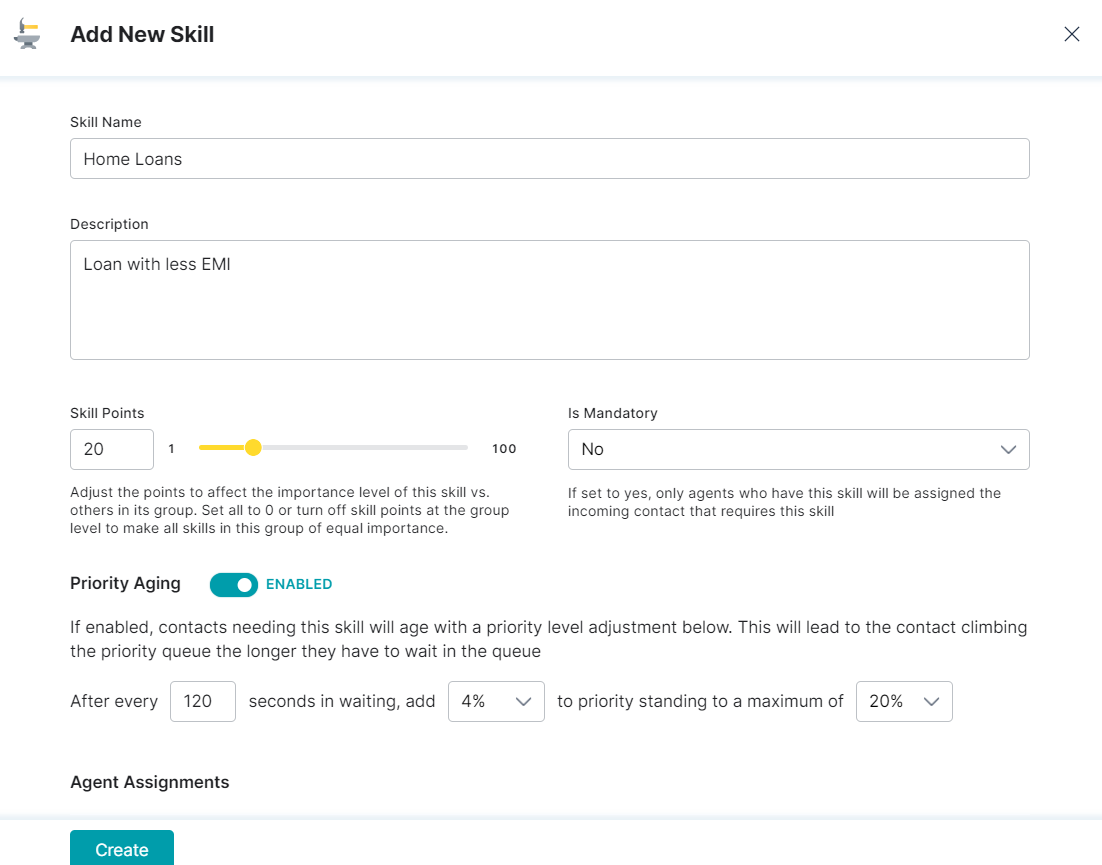
5. Click the Create button to complete the process.
6. A success confirmation message is displayed once the new skill is created and added to the list.

Edit a Skill
To edit the field values of an existing skill, follow these steps:
1. Click the desired skill group to get the drill-down view of the skills list.

2. Click the edit icon of skill you want to update.
3. In the Edit Skill window, modify the values you want to change.
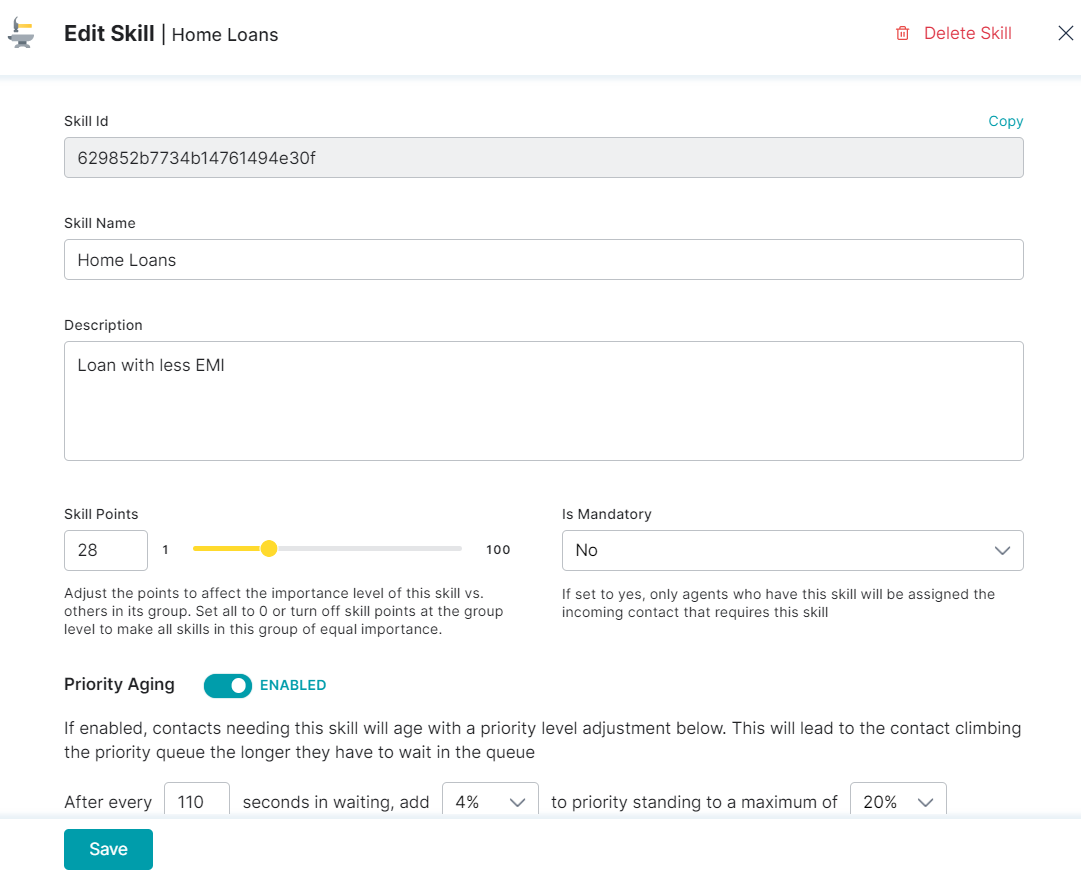
4. Click Save. A success confirmation message is displayed once the skill details are updated.
Delete a Skill
To delete a skill, follow these steps:
1. Click the desired skill group to get the drill-down view of the skills list.
2. Click the edit icon of skill you want to update.
Note: Ensure that you delete all the agents mapped to this skill before deleting the skill.
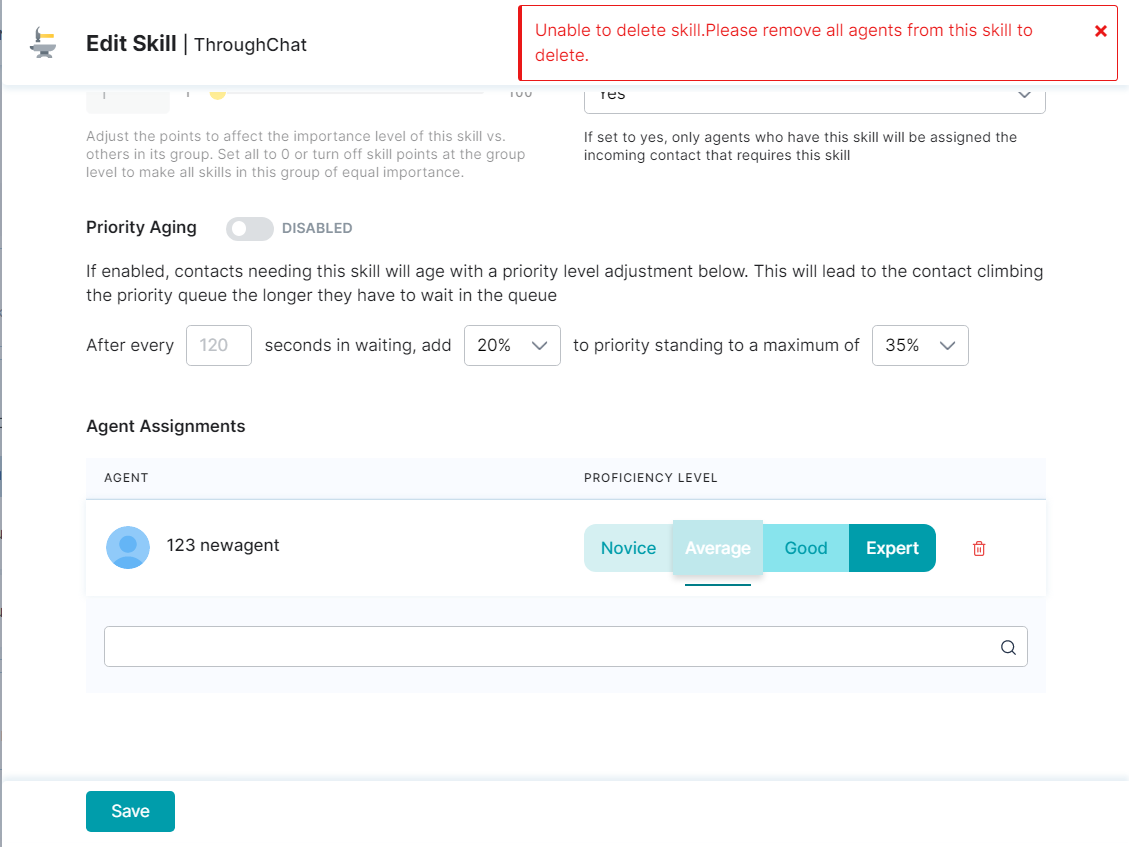
To delete an agent, follow these steps:
- In the Edit Skill window, scroll down to Agent Assignments.
- Click the delete icon for all the agents mapped to the skill.

- Click Delete button on the confirmation pop-up for each agent. Once all the agents are deleted under Agent Assignments, click Save.
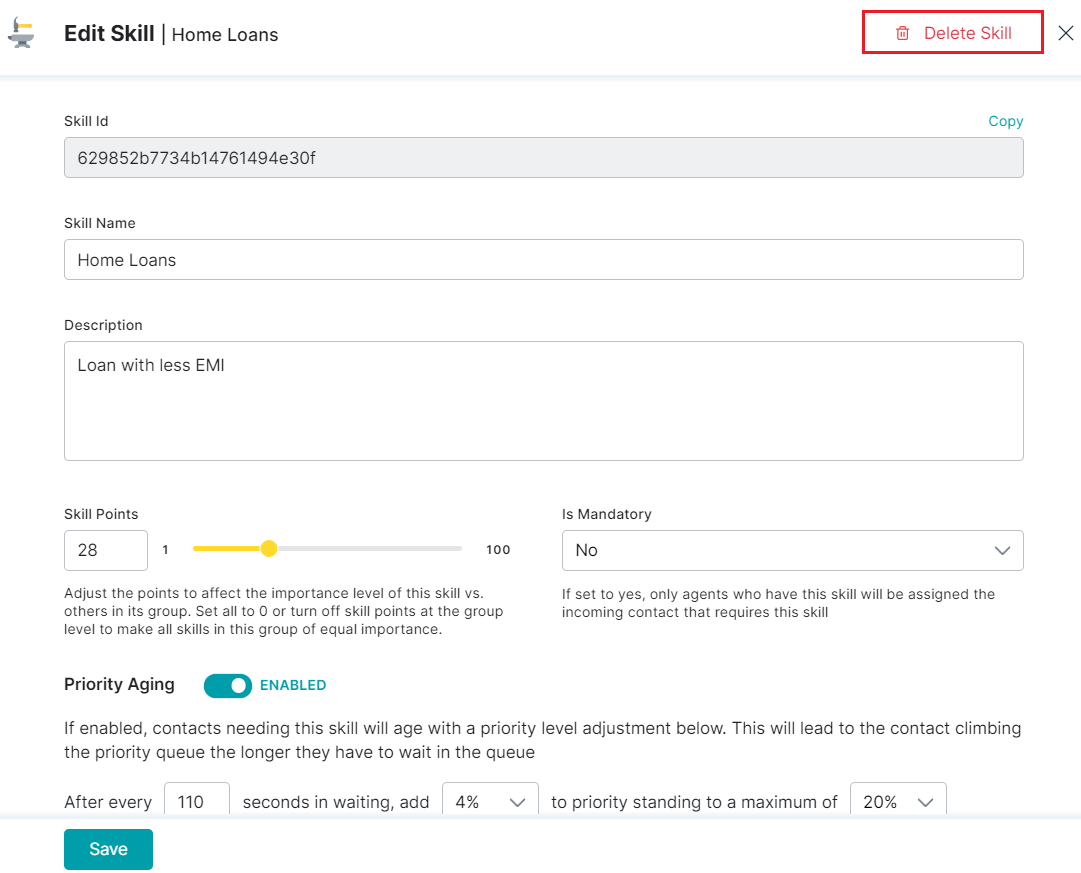
4. Click the Delete Skill icon.
5. Click Delete button on the confirmation pop-up. On successful deletion, a confirmation message is displayed.
Adding Skills Dynamically
As a part of your customer experience, you can choose to use customer attributes to dynamically add skills.
SmartAssist administrators can also add skills dynamically as a part of script nodes while building dialogs in the XO platform or while building an experience flow.
The following methods are available:
setSkills(skillsInfo) – This method can be used to append skills to the current conversation. skillsInfo is an array parameter.
getSkills() – Returns an array of skills in the current conversation.
getSkillById(skillId) – Returns a skill using the skill ID. Skills IDs are available under skills.
deleteSkillById(skillId) – Deletes a skill from the context of the current conversation.
deleteSkills(skillsToDelete) – Deletes an array of skills from the context of the current conversation.


